Introduction To Arduino
Everything “thinks” nowadays: Your car, your phone, your watch and, for the self-loathing, perhaps your toaster, too. But what is doing the thinking?
When most people imagine a computer, they might picture their trusty laptop or maybe a massive cluster of servers whirring and blinking away in a datacenter. The reality is that most of the hardware in the world isn’t being run with bulky CPUs in motherboards that have sticks of memory you can hold in your hand.
For the same reason we all don’t drive around in cargo trucks for our trip to the local market, people need lightweight systems that are efficient, cheap and fast (i.e. bicycles in this analogy) for everyday processing tasks. Enter microcontrollers.
Microcontrollers are an entire computer system on a chip! While they often appear as little black squares of plastic with a few metal bits poking out the side, don’t let their unassuming nature fool you. Microcontrollers are powerful tools for bringing electronics—from microwaves, washing machines and dishwashers to interactive toys—to life. Modern controllers have specs that would make a high-end personal computer from the ’80s blush, but you can do amazing things with 64 kilobytes of RAM and a 32 megahertz processor.
Ok, ok I get it. Microcontrollers are nifty. But what does this have to do with Arduino?
For a long time, working with microcontrollers has been fairly difficult or expensive for those who don’t want to pursue a career in computer engineering. Throughout the past 10 years or so, all of this has changed, in large part due to a few teachers in Italy who wanted to unlock microcontrollers for their artistic students. Luckily for us, the unintended consequences of this educational endeavor have made DIY programmable electronics accessible to individual makers and hobbyists for the first time ever.
Now harnessing the power of these wee devices has become accessible to anyone. In this introduction to Arduino, we’ll look at the who, what, where, why and, most importantly, how to start this electronic journey into embedded computing.
What Is Arduino?
So what does Arduino actually mean? And how the heck do you pronounce it?
Arduino is a combination of hardware and software that is open source and made to be easily accessible for those who may or may not have any experience with electronics. But Arduino is more than just electrical components; it is also a robust community of enthusiasts coming together through the projects they make. The founders named their platform after their local bar. What is Arduino? The name itself is just that, an Italian name with no translation.
Arduino History
In order to understand Arduino history, we need to go back to the early aughts. In 2001, Casey Reas and Ben Fry began their work on the Processing, which is a Java-based programming language that allows for quick, visually focused programs for more artistic projects realized in code. To this extent, the language refers to programs as sketches.
Not long after the creation of Processing and inspired by its simplicity, Hernando Barragán, a student at the Interaction Design Institute Ivrea in Italy, created a language called Wiring for his master’s thesis. Wiring was intended to simplify the process of creating interactive electronics for artists and designers.
A couple years later, Massimo Banzi, David Mellis and David Cuartielles forked Barragán’s work and created their own platform under the name Arduino. It would quickly evolve and cement itself as the de-facto development board for hobbyists, students and designers everywhere. This new board was relatively cheap and easy to program with its simple integrated development environment (IDE), which allowed people to quickly prototype concepts with electronics. Thus, it found widespread adoption.
Since it’s development, an entire industry has started—the maker movement—spurring maker fairs and maker-centric magazines, blogs, tutorials, videos and podcasts. Companies have grown around Arduino and the maker movement, such as adafruit and SparkFun, with the goal to make Arduino more accessible with plug-and-play breakout boards and high-quality tutorials. This not only lowers the bar of entry by eliminating a ton of electrical and programming work (thanks to the libraries release with the boards), but it also increases the scope of projects that beginners can make.
Arduino Basics
What can you physically do with an Arduino?
If you were to look at an average electronic product such as a microwave, you’d notice a few things: A keypad for entering time, a small screen for displaying information, a plate for spinning your food, a bell to let you know the status and the magnetron inside for actually motivating all of those lazy water molecules inside your week-old spaghetti. These components fall into two categories: Inputs and outputs.
If an Arduino were controlling your microwave, it could read the input of the buttons, process the information you’ve provided and then control the outputs by sending digital signals to the other electronics via its General Purpose Input/Output (GPIO) pins. Every microcontroller has a fixed number of GPIO, so it can only read from, or write to, so many external components at once. (The ways to expand connectivity is discussed later on).
The Arduino knows what to do with the inputs and outputs based on the program that you load onto the board. The program is a series of commands stored in the microcontroller’s ROM (Read-Only Memory). While the program is running, it needs to keep track of dynamic information (such as how many times you’ve pressed a button on the keypad), and it stores this kind of information in its RAM (Random Access Memory). When you power-cycle the board (i.e. turn it on and off), the program persists in the ROM, but any data stored in the RAM is lost (unlike your computer, which can store RAM after being turned off and on again).
While a microcontroller is powered, it’s also running at a fixed clock speed that determines how quickly it can read the instructions that the program dictates. While eight Megahertz sounds laughably slow for a modern computer, an Arduino is only running a single program and interacting with a handful of GPIO at any given moment. This allows it to process millions of instructions per second, which means you’ll often bump up against not having enough memory for your long program before how fast it’s running becomes an issue.
Prototyping With Arduino
One of the best reasons for using Arduino is how quickly you can take an idea and fully realize it as a working concept. Taking an Arduino prototype to mass production is easier for most people than developing around another platform for good reason. The community that has blossomed around this platform, and subsequently seeded the entire world, has already written hundreds of ready-to-use libraries and documented thousands upon thousands of projects that you can use as a template for your own ideas.
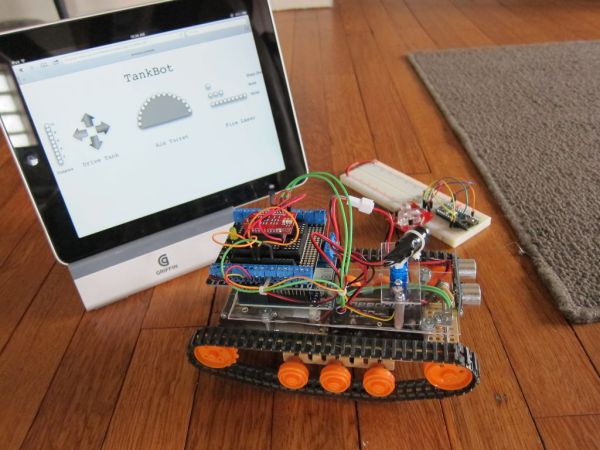
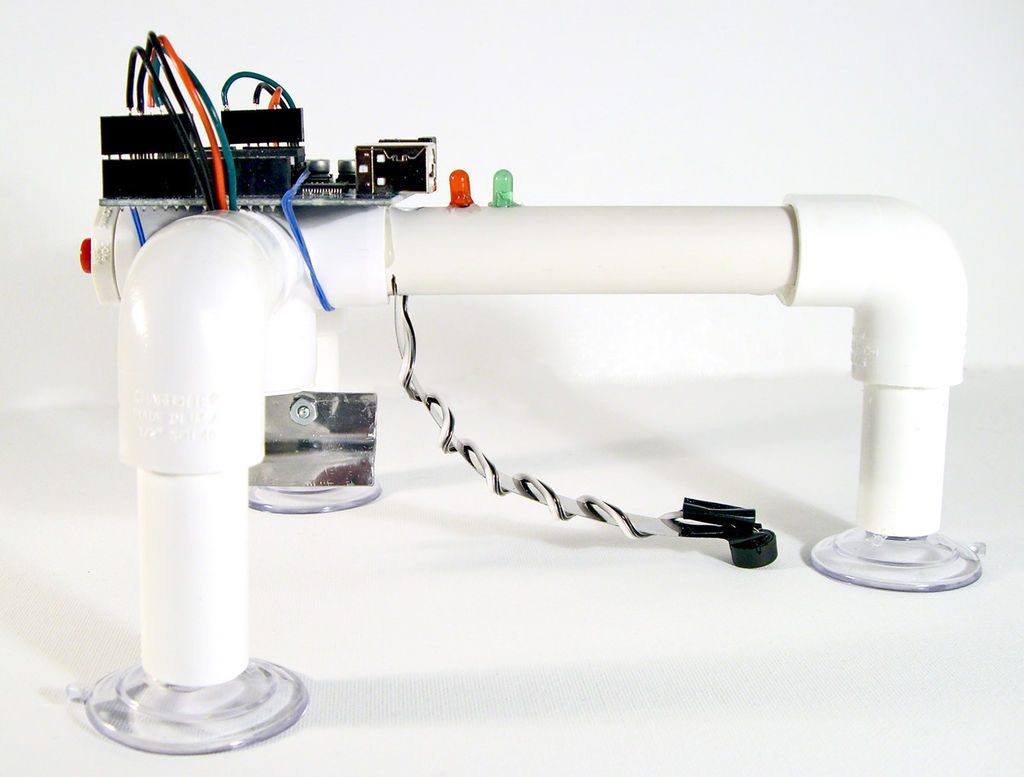
The beauty of the open source movement is the spirit of sharing the documentation and libraries so that makers don’t have to reinvent the wheel to build Arduino projects. That said, profiting from these resources is another thing. So if you’re planning on making a product to sell, such as this totally tubular Tankbot via duino4projects, make sure you’re following the open source distribution laws.
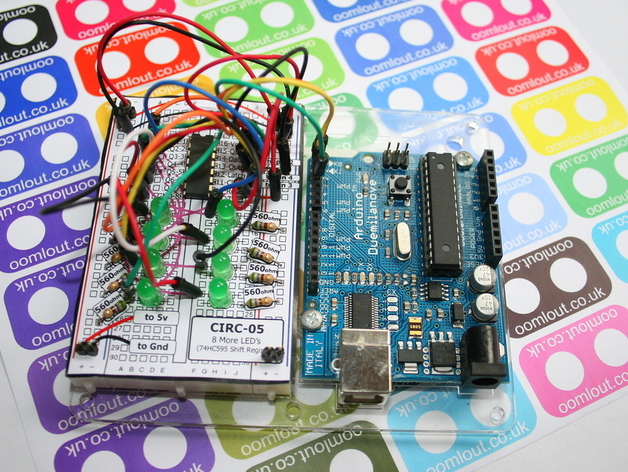
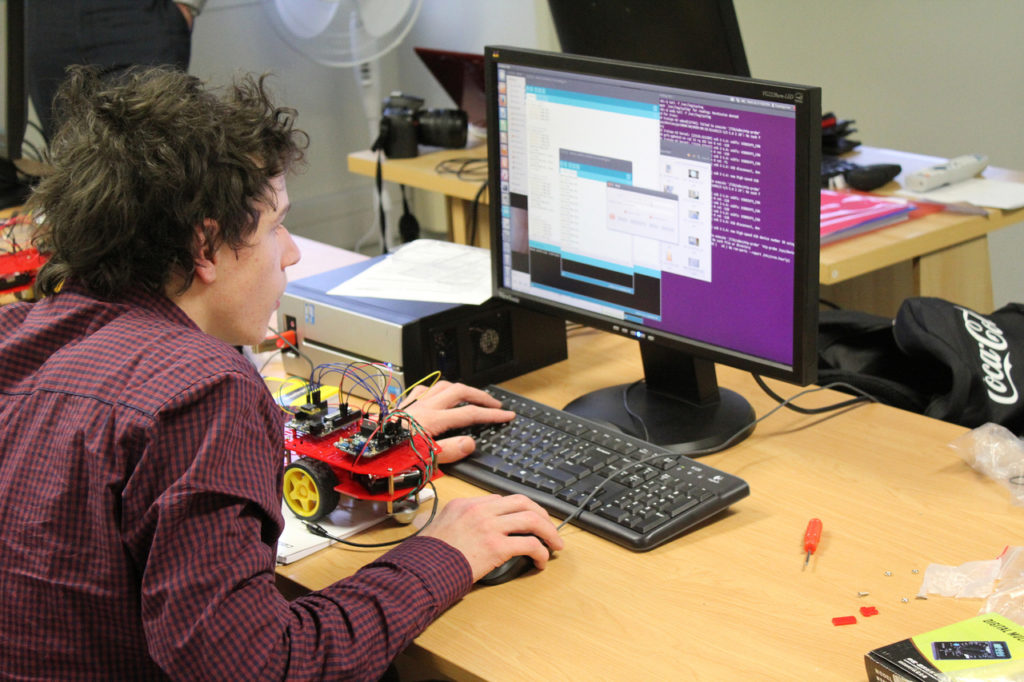
One of the key features of Arduino prototyping is the ability to make a project without the need to solder components together. Soldering is the process of forming an electrical connection between two metallic pieces by melting and applying a filler (the solder itself) between the joints.
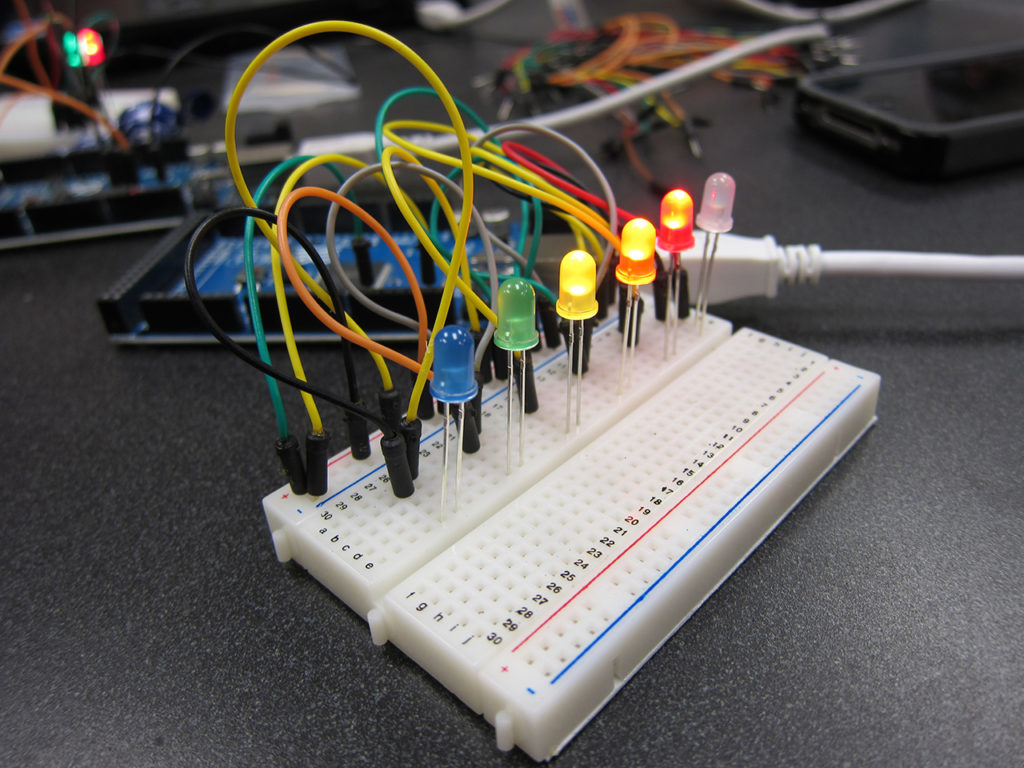
The main Arduino boards have rows of female headers that allow you to plug in jumper wires for lightning-fast connections. Often times you’ll see Arduinos sold with breadboards, which is another solderless electronics prototyping tool that has rows of sockets for easily connecting small components together. (Thanks Paul Sobczak for sharing this breadboard pic from your Arduino class.)
Learn more about how a breadboard works (and why it’s actually called a breadboard!) over on Sparkfun’s website.
Arduino Hardware / Peripherals
More than half a million results pop up when you google “Arduino Compatible,” so how do you choose the right board for your projects? Also, what does it mean for a piece of hardware to be “Arduino compatible” in the first place?
Arduino Boards
Uno: The Arduino Uno is the quintessential form factor and most popular variant among ‘duino boards. If you’re just starting out, buy this board. As is, about 90% of all accessories and libraries are built with this board in mind. So for compatibility sake, you’ll have the easiest time with an Uno on your desk.
The Uno is currently still made with an Atmega 328, which is an 8-bit processor that has 32K of ROM and 2K of RAM available for your next talking toaster. It runs at five volts and has a standard crystal oscillator for a 16 Megahertz clock speed. Nowadays, these specs seem a bit paltry, but this is a good ol’ platform that you can count on to be reliable.
One of the defining traits of the Uno (and what most manufacturers mean when they claim “Arduino compatibility”) is irregular spacing of the headers on the board. Most prototyping boards that are used for soldering and potentially stacking together use a 2.54mm (0.1”) spacing between holes.
The designers of the early boards intended to allow regular protoboards to mate on top of Arduinos. But due to a measurement flaw between the header spacing, you just can’t plug in regular prototyping boards. This quirk has metastasized throughout the Arduino ecosystem (including clones and competitor boards), so it is here to stay. It may seem like a trivial feature, but once you go deep into electronics and feel the frustration of this minor offset, you will have joined the collective screams of makers around the world. Welcome the family!
Mega: The bigger, badder, twice-the-price board, the Arduino Mega is a natural upgrade for most people who want a lot of I/O. Weighing in with 54 digital and 16 dedicated analog pins, the Mega is the go-to platform for more complex electronic prototypes.
While most accessories that are intended for the Uno will physically mate with the Mega, the pin assignments are different enough that you’ll need to spend some time reconfiguring your wee Uno project for this board. The Mega is very mechanically and electrically similar to its electrical sibling, but it has much more memory for those programs where you want a little (ok, a lot of) extra breathing room.
Specialty: If you want egregious amounts of memory and souped-up clock speed, then grab yourself an Arduino Due. If you crave more integrated components and want to skip to programming your own custom game controller, then check out the very hand-friendly Esplora. You want it all? Or juuuust the right combination of I/O, speed, size and memory for your next IoT back-scratcher? There are more official and unofficial Arduino boards than can be reasonably discussed in any article, so read more about them here.
H3 Arduino Connectivity And Modules (AKA Breakout Boards)
The main Arduino boards are rather compact, but what if you’ve finished a project and want to stuff it into a case you could wear on your wrist? Well, the Arduino folks have you covered.
If you want the punch of an Uno in a small package but want to hold on to that sweet sweet USB connectivity, grab yourself a Nano.
If you want a little more juice than a Nano or your project needs juice of its own, then use a MKRZero with its added micro SD card slot and built-in battery charging capability.
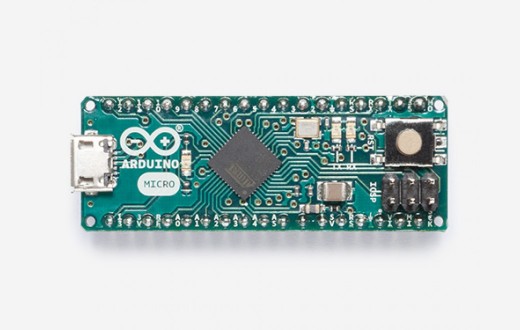
And for the daring, you can pack the ultra-slim Micro board or Pro Mini into a space not much larger than a postage stamp (you’ll need a USB-Serial cable to program these boards, however).
While the microcontroller platforms themselves are amazing, one of the best reasons to start your DIY electronics discovery is the availability of countless Arduino modules (a.k.a. breakout boards) that allow you to quickly connect sensors, switches and other goodies to your board. These add-ons take the fuss out of needing to source and assemble multiple tiny circuits by doing the work for you and putting just what you need on a PCB. In fact, many are plug-and-play. Plus, there’s tons of support documentation for these modules, lowering the barrier for entry for beginners and giving the opportunity to make even more robust projects.
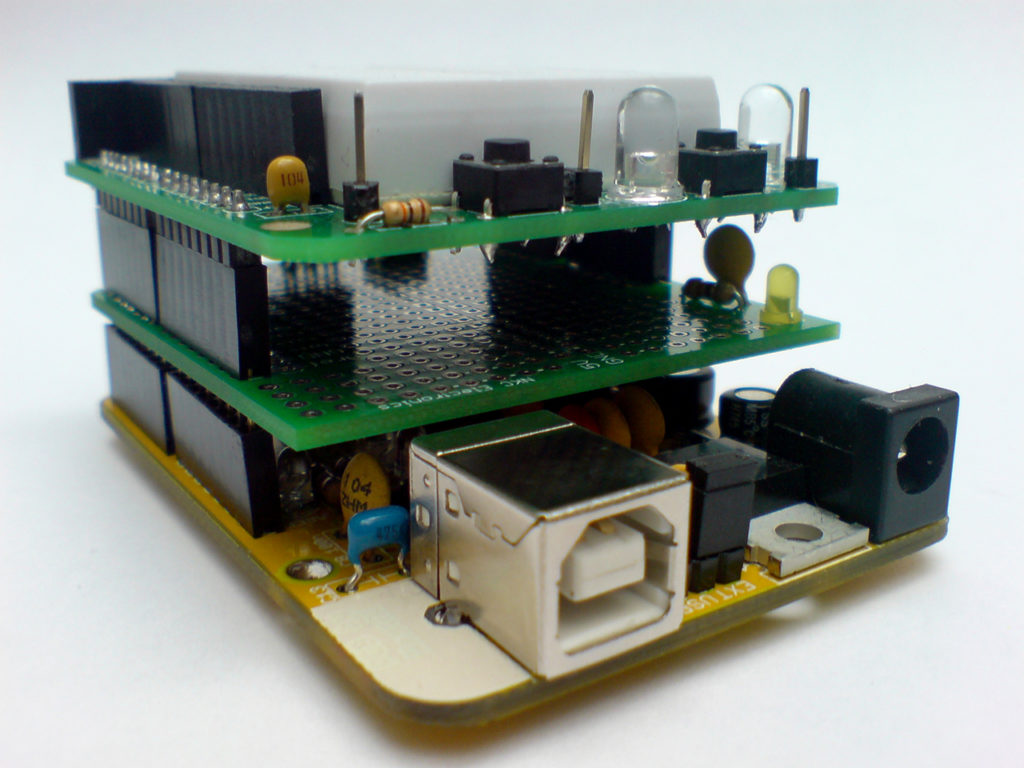
Arduino Shields
You can find specifically made add-ons for your Arduino in the form of “shields” (daughterboards in most other electronic nomenclature). Shields match the irregular spacing mentioned earlier and make prototyping complex concepts incredibly fast. Here are some popular kinds:
GRBL Shield: The gerbil shield provides a set of drivers for stepper motors and is the basis of many an open source 3D printer or CNC milling machine.
Display Shield – If you crave low-res alphanumeric LEDs in all their retro glory or would prefer millions of pixels to do your bidding, there are dozens of ready-to-go shields that incorporate LEDs, LCDs, OLEDS or VFDs for displaying whatever your heart desires.
Wireless Shield: Networking protocols are a heavy load for little microcontrollers, so thankfully there are millions of integrated radio transceivers that make speaking Bluetooth, Wi-Fi, Xbee or LoRa a cinch! Ok, it’s still pretty hard to do radio stuff, but these boards make it easier, and there are Arduino variants that include radio hardware for compact designs.
IMU Shield: The same advanced sensors you’ll find in flagship smartphones, inertial measurement units give your Arduino a sense of purpose and direction at several hundred times per seconds. You could attach one to your trash bin and finally detect when and how those pesky racoons manage to redecorate your lawn with garbage.
Shield Shield Etc.: Yo dawg, I’m not even joking about this one. There are, in fact, extra wide shields that allow you to place shields horizontally instead of increasing the vertical height of your projects. Chances are, if there’s an electronic component you want to use, type it into your search bar + the word “shield.” You’ll be surprised to find many people wanted the exact same solution, and it could save hours of prototyping if you do a little research now.
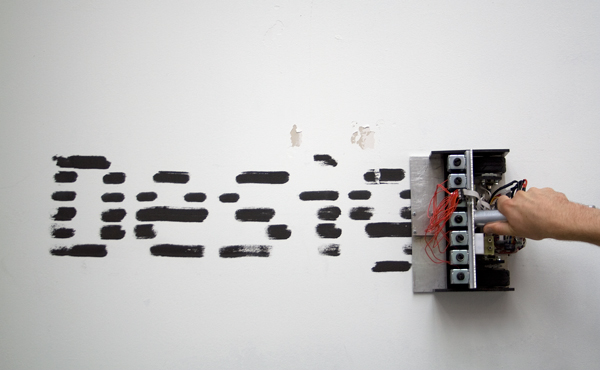
Motor Shield: The pins on an average Arduino can only supply a tiny amount of current. For high-power devices, there are a lot of control options that allow you to switch high-power loads such as DC motors with the lower voltage signals that an Arduino provides. You’ll definitely want an easy motor control system if you want to build your own gadget like this Arduino wall printer.
Weather Shield: What’s the weather like outside? Do you need sunblock, a rain jacket or a parka? With this weather shield, you have access to barometric pressure, relative humidity, luminosity and temperature. There are also connections on this shield to optional sensors such as wind speed, direction, rain gauge and GPS for location and super accurate timing.
MP3 Player Shield: Whether you’re lounging to Jose Gonzalez or rockin’ out to 30 Seconds To Mars, an MP3 player shield will add a musical element to your project. It has the capabilities of storing music files onto a run-of-the-mill microSD card, thus giving you the ability to add music or sound effects to any project. Additionally, you can pull MP3 files from an microSD card and play them using only one shield, effectively turning any Arduino into a fully functional stand-alone MP3 player.
WAV Shield: Another sound board, this shield can play up to 22KHz 12bit uncompressed audio files of any length. It has an onboard DAC, filter and op-amp for high quality output. Audio files are read off of an SD/MMC card, and volume can be controlled with the onboard thumbwheel potentiometer. And since these files can be layered, this shield is great in synth projects.
DIY Shield: Use this shield to design your own circuit, making it easy to pop on and off of an Arduino Uno. Now you have the capability to use the same Uno for several projects without worrying about re-configuring the circuit!
Guitar Shield: The TGA Pro from Blackaddr Audio is a combined two-channel audio and MIDI shield intended to make designing your own audio effects processing as easy as possible.
CNC Shield: If you want to make your own CNC mill, then this shield is for you.
Video Display Shield: Need visuals for your project? This Arduino Video Display Shield provides an analog composite video display with integrated frame buffer memory accessible through SPI.
Keypad Shield: Whether you’re giving your front door an electronic deadbolt, putting a combination lock on a puzzle box, building a novelty oversized calculator or adding a launch control panel to your rocketship, there are lots of uses for a keypad in Arduino projects. This shield gives you everything you need to easily attach a high-quality keypad to your Arduino with all the electronic, mechanical and software complexity made simple.
Arduino Cases
In order to keep your latest electronic widget alive, you’ll want to put it inside a solid project box, which also helps hide the inevitable rat’s nest of wires most early prototypes devolve into. Arduino cases come in all shapes and sizes: Tupperware, old coffee tins, cardboard shipping boxes, precision CNC-milled T6-6061 Aluminum with 5 micron tolerances. There are no limits when it comes to an Arduino enclosure.
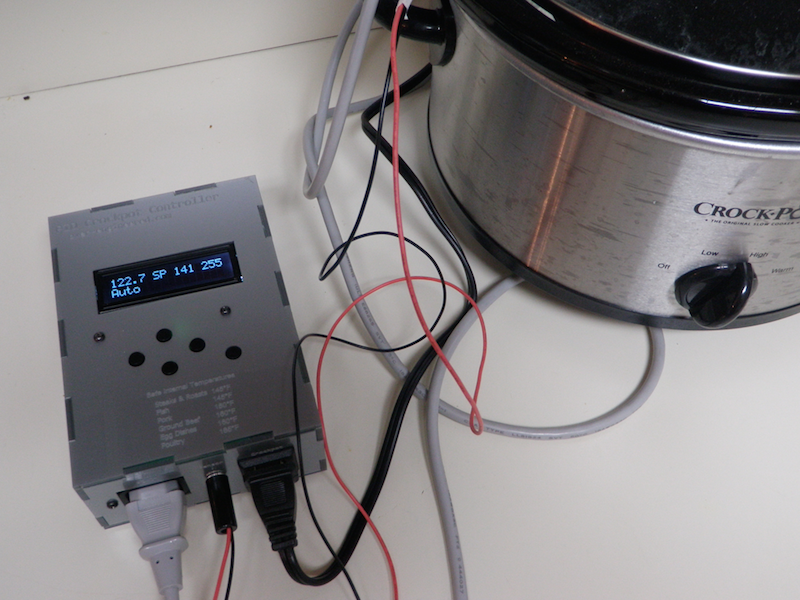
You could use a common mint tin (post mint consumption) or any variety of premade enclosure. Even better, you could just read this previous post on custom electronics enclosures to give you even more case-wise ideas. Just look at how polished this Arduino sous vide looks with that laser engraved case.
Is your Arduino going to be exposed to the elements? Then a weatherproof case will keep all your electronic goodness dirt free and dry. Laser cut from clear acrylic, this snug little box allows for easy access to cables and is mountable. Get the plans here.
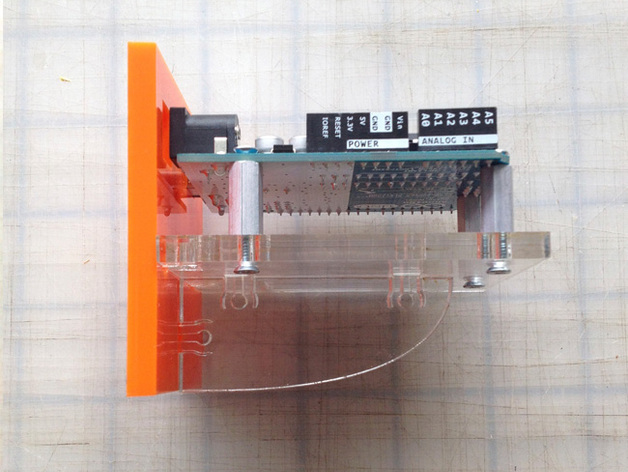
Sometimes you need your Arduino and breadboard to be side-by-side. This simple piece of laser cut acrylic has bolt holes to secure an Arduino and space to attach a 400 point breadboard beside it. While clear acrylic was used here, you can always brighten it up with colored acrylic. Fluoro blue would be cool. Get the schematics here.
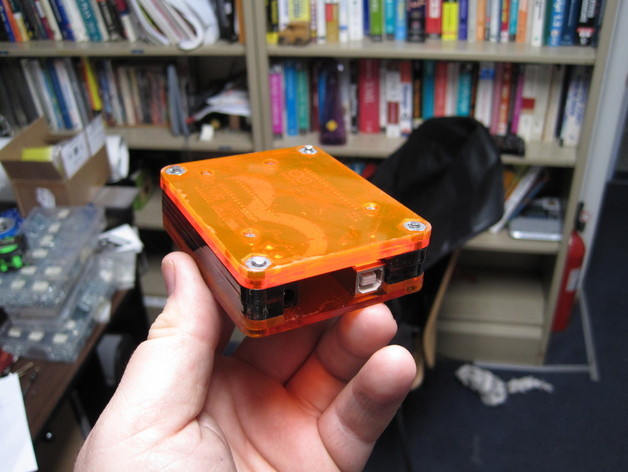
Protect your Arduino’s ports and headers from being knocked off in a bag or backpack with this sleek orange Arduino hardcase. Laser cut from acrylic, this case provides a standard bolt pattern for mounting the Arduino on another project. Additionally, holes cut in the top piece allow easy access to the headers and the reset button and, with slight modifications, shields could be added or enclosed.
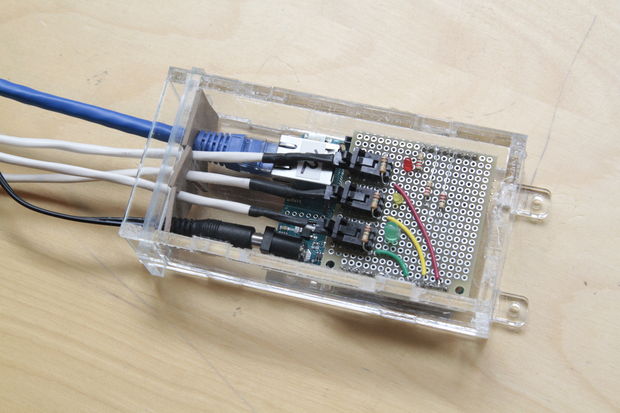
This simple laser cut snap together Arduino mount is perfect for use inside of project boxes. Because it has USB and DC power windows, you can be sure the USB connection and female barrel jack connector stay securely in place inside the enclosure for user accessibility. Get the instructions here.
Arduino Software And Programming
Hardware is only half of the equation when bringing your electronic project to life. In order to give your design structure, you’ll need to tell it exactly what to think with a few (or thousands) of lines of code. Just like Processing, Arduino programming is referred to as “sketching.”
Writing Your First Arduino Program
Let’s breakdown the program structure of an Arduino coding project.
Arduino IDE
When you actually download code onto your board, you aren’t sending nice, human-readable commands. The microcontroller can only interpret very low-level instructions, which are very difficult for humans to parse.
When it comes to a text editor on a computer, you have your pick. But most are for writing regular old words. In order convert your written software into those commands, you need a compiler.
Don’t you want nifty features like numbered lines and highlighted keywords? Maybe you want an easy way to include someone else’s library in your project, too. Well, you’re not alone. So the fine Ardu-folk have you covered by already integrating all of these features and more into a development environment: The Arduino IDE. While I recommend the original for beginners, there are Arduino IDE alternatives.
C / C++
Is there an Arduino programming language? In short, no.
What passes as valid code in the Arduino IDE language is, in fact, a mixture of C and C++. It’s beyond the scope of this article to teach you the whole language (you should learn it here anyway), but what I can do is break down a simple Arduino-style program.
Most standard Arduino boards have an LED built-in to GPIO 13, so here’s what it looks like to make that light blink:
1 int myPin = 13;
2
3 void setup(){
4 pinMode(myPin, OUTPUT);
5 }
6
7 void loop(){
8 digitalWrite(myPin, HIGH);
9 delay(500);
10 digitalWrite(myPin, LOW);
11 delay(500); // hmm, how could I make this faster?
12 }
Line 1: At the top of the program, I have declared my first and only variable. I named my variable myPin because I intend to use it to control one of my GPIO. So no matter where I write myPin in my program, I won’t be confused as to what kind of information it might contain.
Then using the equal sign, I assigned it a value of 13. MyPin is an int, which is a type of variable that, in the context of Arduino, means it can contain a value anywhere from -32,768 to 32,767.
At the end of my line, I placed a semicolon, which is necessary for C-based languages to let the compiler separate lines of code. Any numbers you see to the left of your program are just to help you keep track of things.
Line 3: Here is the first “Arduino” specific piece of code. Every Arduino program has two necessary routines that you must include in your program: A setup and a loop.
The setup runs the beginning of the program and is used for tasks that only need to occur once. The loop runs after the setup and repeats indefinitely. The curly braces mark the beginning and end of the setup routine and can encapsulate multiple lines of code. Note that the closing curly brace does not need to have a semicolon after it.
In my setup, I’m calling my first function: pinMode(). The pinMode function needs two parameters in order to work. The first indicates which pin I will be affecting, and the second notes the condition applied to said pin.
For my example, I’m saying “allow me to turn pin 13 on and off” in future code. Couldn’t I have just written pinMode(13, OUTPUT)? Yes, but it is good form to store unique constant numbers as variables with appropriate names so that your code is readable at any scale. This also allows me to change a single value at the top of my program to affect every instance of pin 13 in my code instead of rewriting it in each function.
Line 8: Here’s the first function in my main loop that I want to run continuously. DigitalWrite allows me to set a pin to a value of HIGH or LOW, which in practical terms means the Arduino will put five volts across pin 13 and allow current to flow for the LED.
Line 9: I want the LED to stay on long enough for me to see it, so I’m telling the program to wait here for half a second. The delay () function accepts arguments in milliseconds.
Line 10: To turn the LED off, I need to set pin 13 LOW with another digitalWrite(). Now it will be connected to zero volts, so the effective current is also zero and the light will turn off.
Line 11: There’s another quick delay here for a steady on/off cycle plus a note to myself. What’s the deal with airplane food and those two forward slashes? Jury’s out on the former, but the latter means I’ve just written a comment. Any text written after the “//” lets the compiler know to ignore what follows and focus on interpreting the rest of the code.
You can encapsulate multiple lines of comments with an opening “/*” followed by a closing“*/” if you feel like including snippets of your latest fanfiction mixed in with your program. Arduino projects with code but no comments are worth skipping. No matter the language, clear and consistent comments are the mark of a good programmer. They’re not only notes to yourself but also anyone who might read your code. So do your part. Make the world a brighter place. Leave a comment in your code, today.
Line 12: Thus ends the main loop. Now the program will cycle back to my digitalWrite on line 8 and the LED will blink until the sun burns out.
Programming On Windows PC
There are only a few considerations to keep in mind when using your Arduino with Microsoft Windows:
Drivers: Many simple micro controllers need special interface chips to translate the complex USB protocol into lower, slower signals that they can interpret. Windows needs the right driver to communicate with your board. You will need to install the right driver, which will come up during the installation of the .exe application.
Port Names: Arduinos and other like devices register as serial devices according to any OS. Microsoft calls the connections to this lower level port under the label COM. You need to select the proper COM port number in the Tools tab of the IDE in order to upload (or flash) your program to your board.
Troubleshooting: If you plug in your board and “nothing” happens, take a peek at your connectivity with the Hardware Manager utility and check the COMs and Ports tab to see if Windows acknowledges your board’s existence. From here you can click about and see if you have the right driver installed.
Programming On Mac
Drivers: None.Thanks, Mac OSX!
Port Names: These are a bit lengthier than on Windows. With your Apple Mac, you’ll find them under names that begin with /dev.tty/XXXX or /dev.cu/XXXX.
Programming On Linux
Yes.
Arduino Project Ideas
One of the biggest challenges new makers face is deciding what to build for their first Arduino projects. What can you do with Arduino?
The best advice: Build something you want. Add a feature to a gadget you already have (like turning that regular desk light into a Pixar lamp). Follow the footsteps of simple Arduino projects you like to completion. Find a simple task in your life that you could automate. Most importantly, don’t be afraid to get in too deep! You will make circuits that just don’t work, and that’s ok. You learn more from mistakes. Here are some Arduino project ideas to get you rolling:
Arduino Project Ideas For Beginners
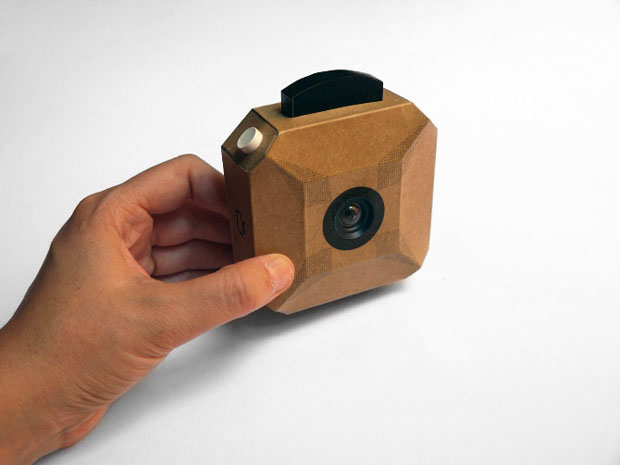
Lights, DIY digital camera, action! Using a handful of shields and a wee camera module, you’re only a few solder connections away from being able to snap shots with your Arduino.
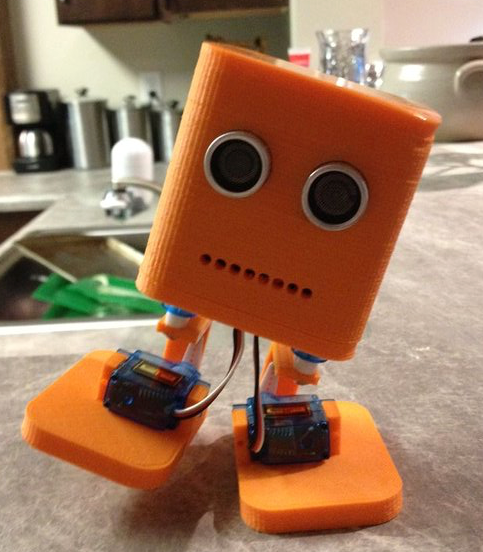
As far as Arduino projects for beginners are concerned, it’s hard to beat BoB the BiPed. This is an easy build for newcomers that want to learn more about servos and robotics in general.
Ready made kits are an excellent way to hone your soldering chops. This Nebulophone Arduino kit is no exception (plus it makes cool noises, too).
You have a lair, right? Of course you do. In order to protect the entrance from any wayward do-gooders, add a Secret Knock Detecting Door Lock to your definitely-just-a-regular-bookcase-and-not-a-hidden-portal mechanism. This is just one of those Arduino Uno projects that is sure to put a smile on anyone’s face.
Sync a beat using only your feet! Here’s an Arduino drum you could assemble in no time.

Most Popular Arduino Projects
I never cease to be amazed at what people can do with a few kilobytes of RAM and limited I/O, so maybe you’ll be inspired by these cool Arduino projects too:
Does it do anything? No. Does it do everything? Yes. This 8x8x8 LED cube build is one of the most popular and cool Arduino projects out there, and it’s sure to test even the most patient hands when it comes to soldering.

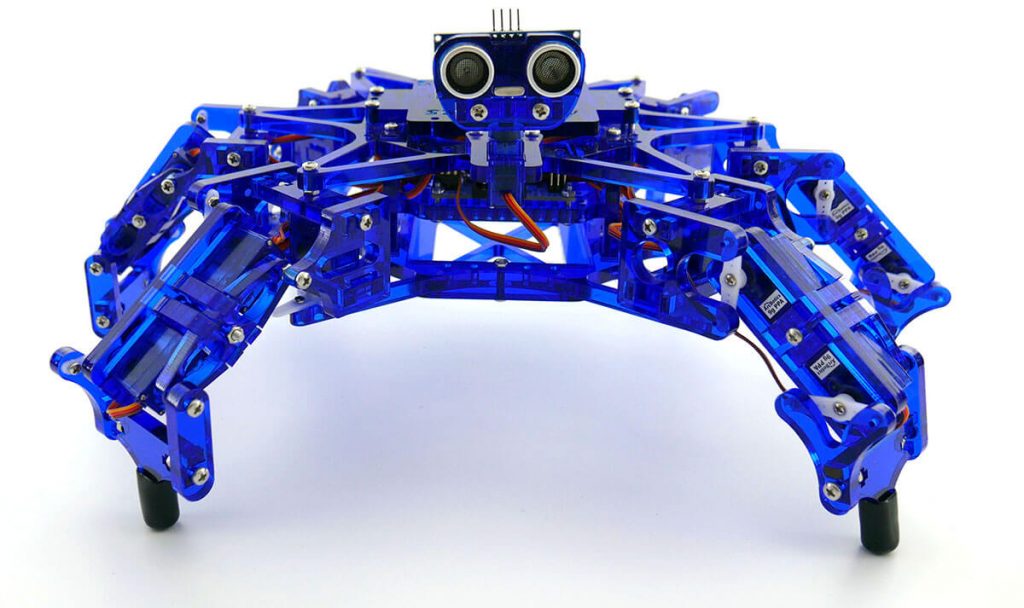
Making even average robots tends to run up the bill. And if you want an electronic creature that walks instead of rolls, well, you’ll often need to lay down serious cash to build one. For sheer ingenuity and accessibility, the Hexy robot as one of the best Arduino projects out there. All robot armies have to start somewhere, right?
Arduino Projects For Kids
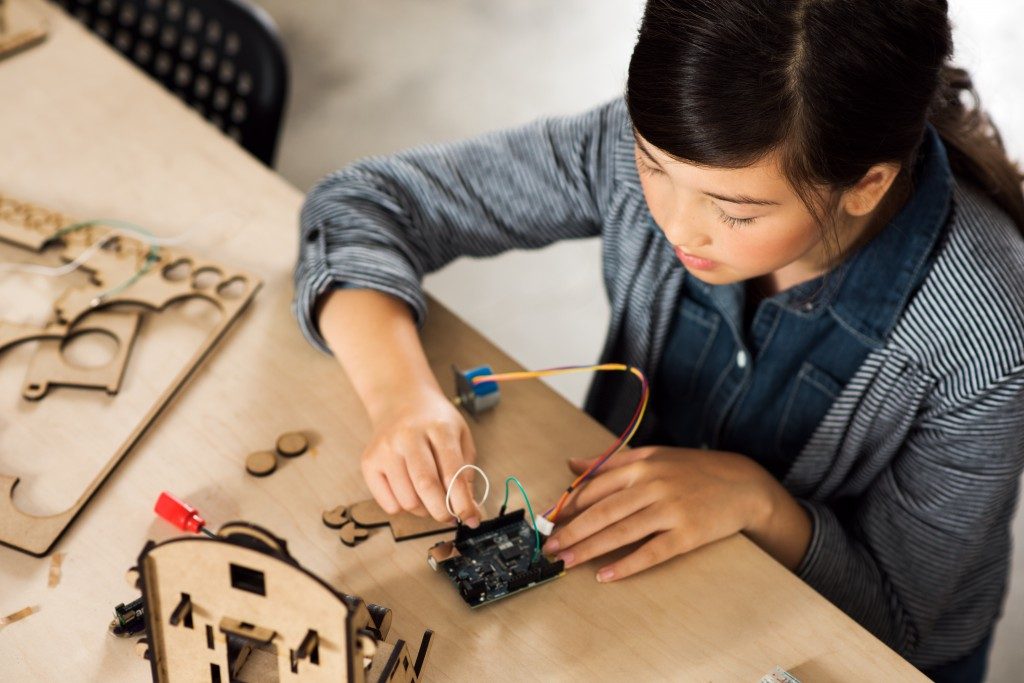
Looking for kid-friendly Arduino projects? You might be surprised, but any of these projects will do! I’ve personally taught kids as young as seven how to use a soldering iron (with keen supervision, of course) and build circuits on a breadboard with little help. Programming is often the largest bottleneck for the preteen maker crowd, so I’d recommend an introduction to Ardublockly or Minibloq platforms, which allow for a more visual, drag-and-drop interface for creating Arduino code.
Advanced Arduino Projects
You’ve blinked an LED or two, mastered motor control and slapped sensors onto every moving object in your house. (This is normal, right?) So now you’re ready for some more advanced Arduino projects to hack on:
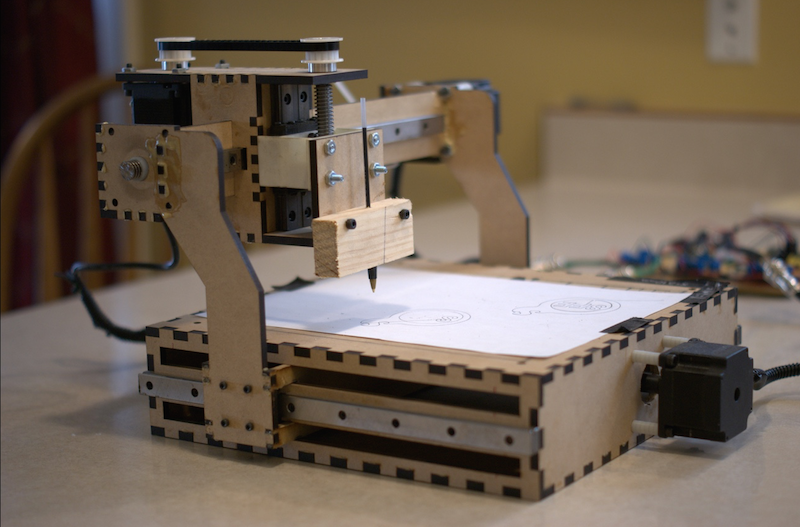
Learn the intricacies of G-Code and take a trip into computer numeric control with your own laser-cut Arduino 3 Axis CNC.
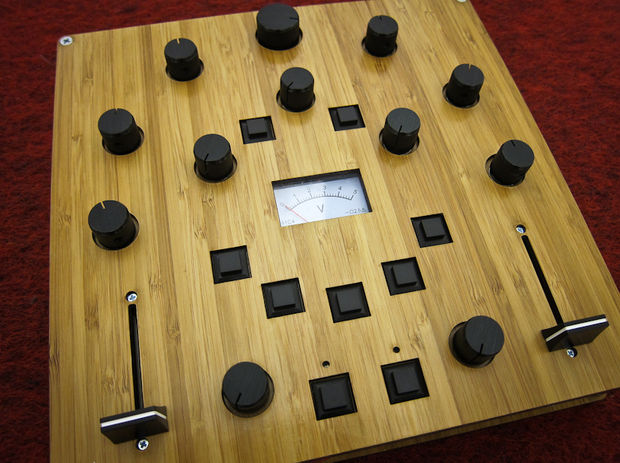
Why spend thousands on digital music equipment when you spend a fraction on a homemade Arduino midi controller?
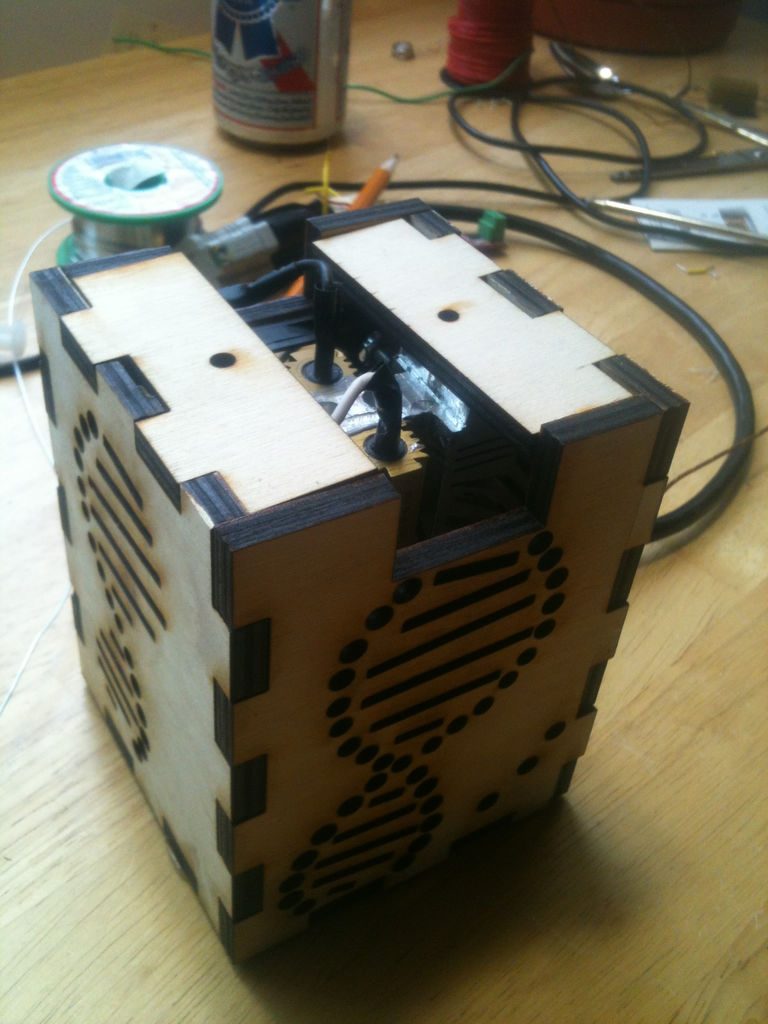
Would you consider yourself an aspiring young Frankenstein? Either way, this homemade DNA sequencer is sure to aid your dabbling in the genetic arts.
Wearable Arduino Projects
Are you ready for a gritty, cyberpunk future? Too late, it’s already happened! Here are some wearable Arduino projects that you can flaunt around the alleys of NeoTokyo:
Masterful mistress of wearable Arduino projects, Lara Grant (aka push_reset over on Instructables) has enhanced her music making abilities with a Second Skin Synthesizer, and now you can, too.
Work it, make it, do it, makes us…way cooler. The Ruiz brothers over on Adafruit have made a stellar DIY Daft Punk helmet full of glowy goodness that you can customize for your own noggin.

Wireless Arduino Projects
I think one of the most optimistic aspects of Star Trek is the world’s complete lack of cables. No ports, plugs, adapters or dongles to muck up your day in the future. Start building it today with these Arduino wireless projects:
- There’s hardly an easier template for great Arduino Wi-Fi projects than the Internet Button, which will allow you quickly connect to the great WWW.
- An internet oldie, but goodie, the reverse geocache box is a fun way to share your electronic hobby while roaming the great outdoors and learn more about GPS receivers.
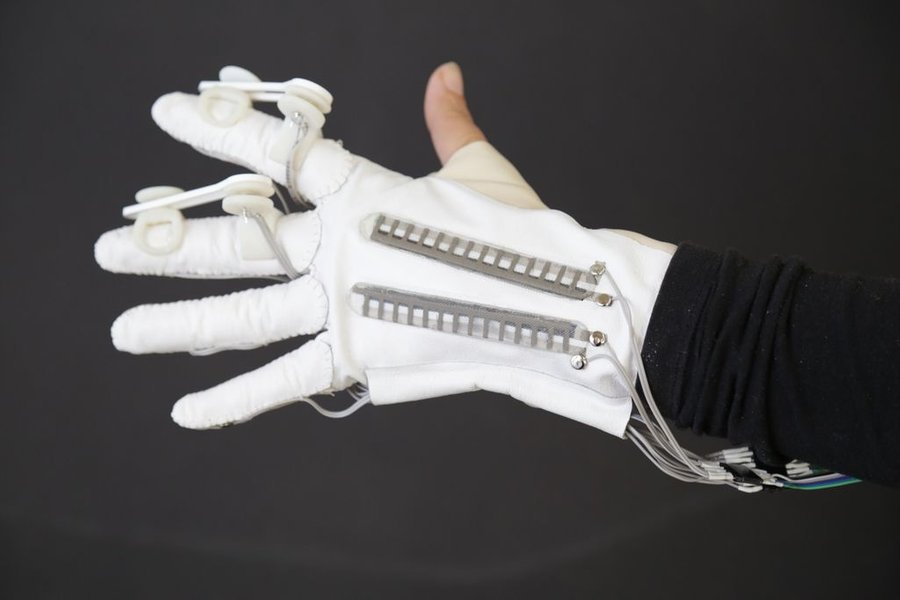
- You could change someone’s life with a decent 3D printer and a handful of electronics. Consider tackling a DIY prosthetic hand like this inspiring teen.

Arduino & Home Automation
Home life comes with a lot of nitty gritty “chores” that never seem to end. With these Arduino home automation projects, you can lighten your living load and maybe even save time in the process:
- Pets are great! Pet byproducts…not so much. Save some money, and keep your hands cleaner, by building the ultimate litter box.
- Give your upper extremities a well-deserved break when making meals and ask yourself, WWBHD (What would Ben Heck do?). He’d build an automatic pot stirrer, that’s what, and you can, too.
- Outdo your friends and let everyone on campus know where the party’s happening by making your own Ridiculously Automated Dorm.
Arduino Alternatives
Arduino has reached the Coca Cola status of name recognition in the development board world, but it’s far from the only game in town. There are faster (and substantially cheaper) alternatives that may fit the bill of your projects. Here are some great, compatible Arduino alternatives:
Teensy 3.X
Over on PJRC, Paul Stoffregen has done some excellent work on his series of Teensy 3.X microcontrollers that are affordable, full-featured and very well documented. He’s been a main contributor to many of the core Arduino libraries and is very active on the forum, so you can count on any information or hardware he provides to be reliable.
Particle
The Particle people have not only made great hardware that includes Wi-Fi, Cellular and Bluetooth development boards, but they have also created an ecosystem of software that is accessible for beginners and professionals alike. The main Photon and Electron board offerings allow you to connect, control and reprogram your projects anywhere and anytime with the power of “THE® CLOUD©™.”
Adafruit Feathers
Adafruit makes it all when it comes to DIY electronics, and the latest series of Feather boards is an excellent choice for people who want-it-all, too. The Feathers are a tiny package that not only includes built-in charging for lithium polymer batteries but also heaps of ready-to-play shields that have sensors, displays and drivers for nearly any electronic project.
Esp8266 And Esp32
Espressif had a sleeper of a hit when it came to the Esp 8266 a few years back. You could pick up a board that had built-in Wi-Fi and the specs to handle the hefty networking stacks required, all for less than $5! There were once quirks to getting started, but no longer. A huge community has sprung up around supporting and expanding the toolchain for the ultra-low-cost ESP boards.
Arduino vs Raspberry Pi
I hope you’ve learned a thing or two about the Arduino at this point. There’s certainly a lot you can do, and once you’ve mastered the basics, you might find your electronic projects growing quite large and unwieldy.
If you’ve heard of the mystical and powerful dev board from across the pond, you might wonder if that’s the route you should take in your electronic journey. When it comes to Raspberry Pi vs Arduino, who should you give the rose to?
To quickly illustrate their scale of abilities, you can use a Raspberry Pi to program an Arduino. Yes, they are both are small, relatively low power and have GPIO that you can fiddle with. But they are in separate, though similar, computing leagues (here’s an in-depth comparison).
Let me put it this way, A Raspberry Pi is like a restaurant and an Arduino is more like an individual chef. She can make a single delicious meal at her own pace, but you don’t want her running to buy the raw food, greet the guests and scrub the toilets all at once. The Raspberry Pi is a single-board computer that is meant for much heavier lifting, but it also comes with some trade-offs compared to a lean microcontroller.
Useful Arduino Tutorials, Books And Resources
The DIY world of Arduino is vast and full of intricate, informative and silly bits of information scattered around the internet and even some of those paper book things. Here are a few of the better ones:
- Limor “Lady Ada” Fried is really a champion of the open-source electronics world and has a set of beginner tutorials here that are sure to get anyone up to speed. She’s also the creator/CEO of Adafruit, which not only makes terrific hardware but also constantly releases high-quality tutorials for everything they make.
- Away in the snow environs of Boulder, Colorado, Sparkfun stands as a DIY beacon of all things electronic. They have some of the best Arduino tutorials available online and carry products for nearly any project.
- If you prefer a more relaxed way to learn, O’Reilly Media and the Make crew have put together more Arduino books than I have time to read. But I have enjoyed many of them, and you should, too.
Additional thanks to Lisa Horn for providing supplementary writing and content editing and Melissa Felderman for technical consultation.
6 Comments
Good write up – love to see briefs like this out on the web that can ease someone into getting their feet wet with embedded programming. Thanks
Hi Noah, thanks for your feedback! We always aim to be helpful and it’s great to know when we are getting it right.
Hi Shannon
Amazing article, first time i see something so detailed but at the same time easy to understand and follow about Arduino. But As far as Arduino projects for beginners are concerned,I think #OttoDIY already beat BoB the BiPed; is not about who is “best” but the family of biped robots is growing very fast because Otto DIY team created a design very easy to build, cheap with off the shelf components but good looking little robots.
What’s neat is that clearly the essence of Otto is of open remix and infinite possibilities. Kind of like a malleable canvas to get started in robotics, even for someone who has no idea about electronics and allowing to learn how to invent creative walking humanoids robots in short time.
The community of Otto builders is really active making remixes almost every week.
Regards
Hi Camilo, great to hear that our article is reading well! We’ll be making updates to this article over time, so we’ll definitely look into adding Otto to the post. Thanks so much for the suggestion. Best, Shannon
Great article. Lots of depth with good layout to find sections you’re interested in, and some pictures make great eye-candy.
Hi Steve, so glad you enjoyed this post! Are there any other projects or electronics type subjects you’d like us to write about? Thanks! Shannon
Comments are closed.