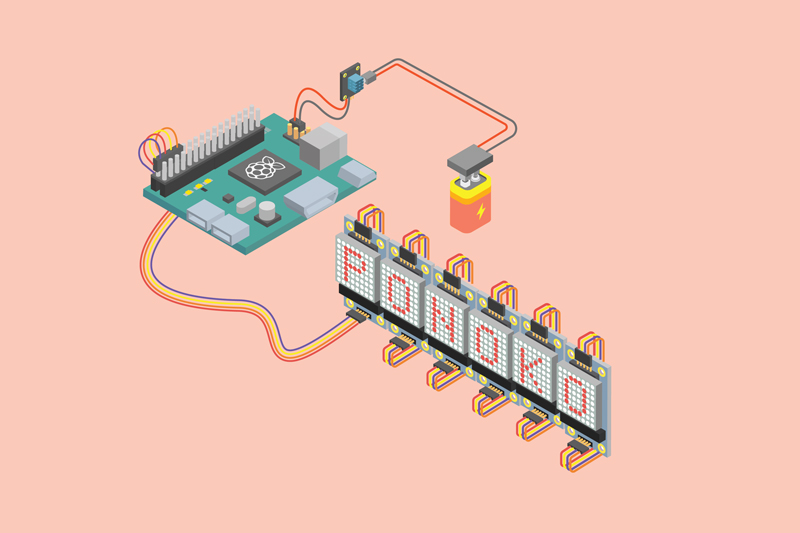
An Introduction To Raspberry Pi Models, Cases & Projects You Can Build
Have you tried Raspberry Pi? Not the dessert. That’s pie. (And it’s delicious, of course.) We’re talking the super popular single-board computer that can do anything from making lights blink to running sophisticated home media centers—all on a board that will literally fit in your pocket.
We’ve come a long way from the time of Alan Turing and the room-sized computing machines that the Allies used to help break the Enigma code. Computers are no longer the powerful tools that are only available to nations and multinational corporations. Now they’re accessible to everyone, and one of the easiest ways to start learning simple computing is with Raspberry Pi.
What Is The Raspberry Pi?
In early 2012, the Raspberry Pi Foundation, an educational charity working toward advancements of computer science education in both children and adults, released a $35 single-board computer and the internet went wild (ok, only a very small, mostly tech bloggy part). This Raspberry Pi 1, Model B was originally intended only for the educational market in the U.K., but it quickly became the must-have, DIY computing device around the world.
Not only could you this hook credit-card-sized computer up to a monitor, keyboard and mouse and use it as a regular desktop computer to browse the web, watch videos, make spreadsheets and play games, but you could also use it to build DIY interactive computational projects, such as plant monitors that alert you when they need water or a homemade weather station. The creative possibilities offered by this tiny and inexpensive device were (and still very much are!) endless.
Was it the first, tiny single-board computer? Far from it. Could you use it out of the box? Nope. For any of its shortcomings, the Raspberry Pi has thrived not only due to its affordability but also because of a global community of passionate teachers, tinkerers and professionals who’ve taken the time to support and share their knowledge—and love—for this little board.
In this introduction, we’ll cover Raspberry Pi basics—from the models available and cases you can make to projects you can build and more—a so you can start your own DIY computing journey. Let’ go!
Raspberry Pi Models—And Some Amazing Enclosures To Keep Them In
The embedded computing game was forever changed when the Raspberry Pi Foundation introduced its initial offering in 2012. What began as a single model has expanded into numerous Raspberry Pi boards, each with its own set of features and distinct characteristics. Depending on the peripherals desired (HDMI, audio, USB ports, etc.), there are Raspberry Pi versions at varying price points and board sizes for everyone.
Here’s a roundup of the latest Raspberry Pi models (as of June 2018) PLUS some very special Raspberry Pi enclosures in which to house them. Because let’s face it: Having a board simply sitting on your desk just doesn’t make sense. These project boxes will not only keep your Raspberry Pi project alive for years to come but also add context and personality to your product. Check these out:
Raspberry Pi Zero
The Raspberry Pi Zero is the newest offering in the Pi line-up. It’s ultra small (only 58mm x 32mm), ultra cheap (MSRP $5) and maintains most of the I/O found in its bigger brethren. The Pi Zero requires soldering if you want to use the GPIO, and it lacks hardline ethernet. Additionally, a USB-OTG adapter is required for plugging in any USB peripherals. But if size is your biggest concern, then this model is hard to beat.
For portable projects, many people prefer the Zero due to its low power consumption and they don’t mind its lower processing specs. The latest offering (model “W” revision 1.3) includes bluetooth, WiFi and adds the CSI (camera) connector. If this sounds interesting, you can have a powerful DIY device at a modest increase in cost at only $10.
Jumpstart a Raspberry Pi Zero project with this basic kit, a budget kit or a camera kit.
Raspberry Pi Zero Case
What’s appealing about this Raspberry Pi Zero case is its simplicity. The clear acrylic protects the board without obstructing the view of the circuits. But you could have some fun by using a translucent acrylic for a pop of color. Get started by downloading the files here.
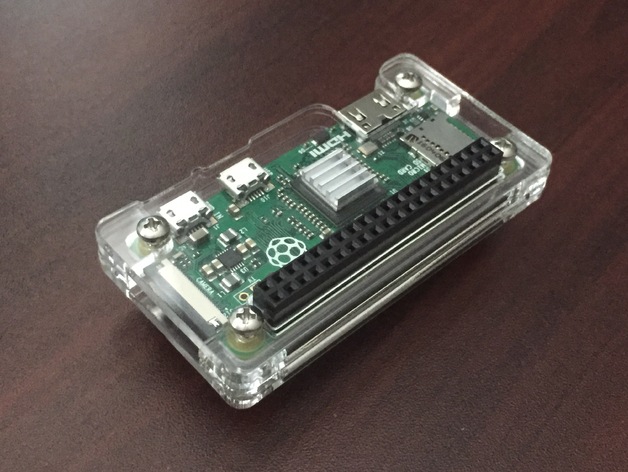
If you’d like to make a Raspberry Pi Zero case from scratch, put down those calipers and grab this 3D model so that you can use this virtual place holder and make it perfect from the word go.
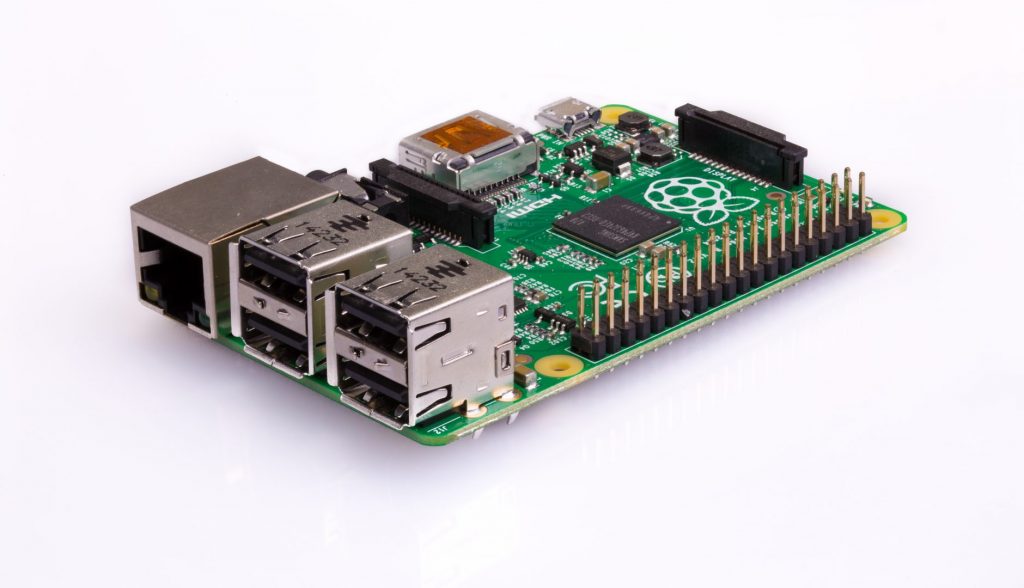
Raspberry Pi 3 B/B+
The Raspberry Pi 3 B is the mainline offering that boasts WiFi, Bluetooth, 1 GB of RAM, a multicore processor and an eight-speed manual transmission! Wow…ok, so maybe not that last part, but the RasPi 3 is a rock-solid embedded computer and, at roughly the size of a deck of playing cards, has a lot of features in a modest $40 package. You can dive into the full specifications on Wikipedia and find a starter kit here and here.
Compared to other models, the only possible downside is power consumption, but that is a minor gripe. If you’re getting started with the RasPi, buy this version first. It requires fewer adapters and needless dongles, and most projects now expect you’ll be using it.
If you dig the B model but want a bit more speed, the amped up B+ may be for you. Based on the same quad-core, 64-bit processor as the regular B, the Raspberry Pi 3 B+ has a faster CPU (1.4GHz up from 1.2 GHz) an increase of 16.7%. Get the starter kit here.
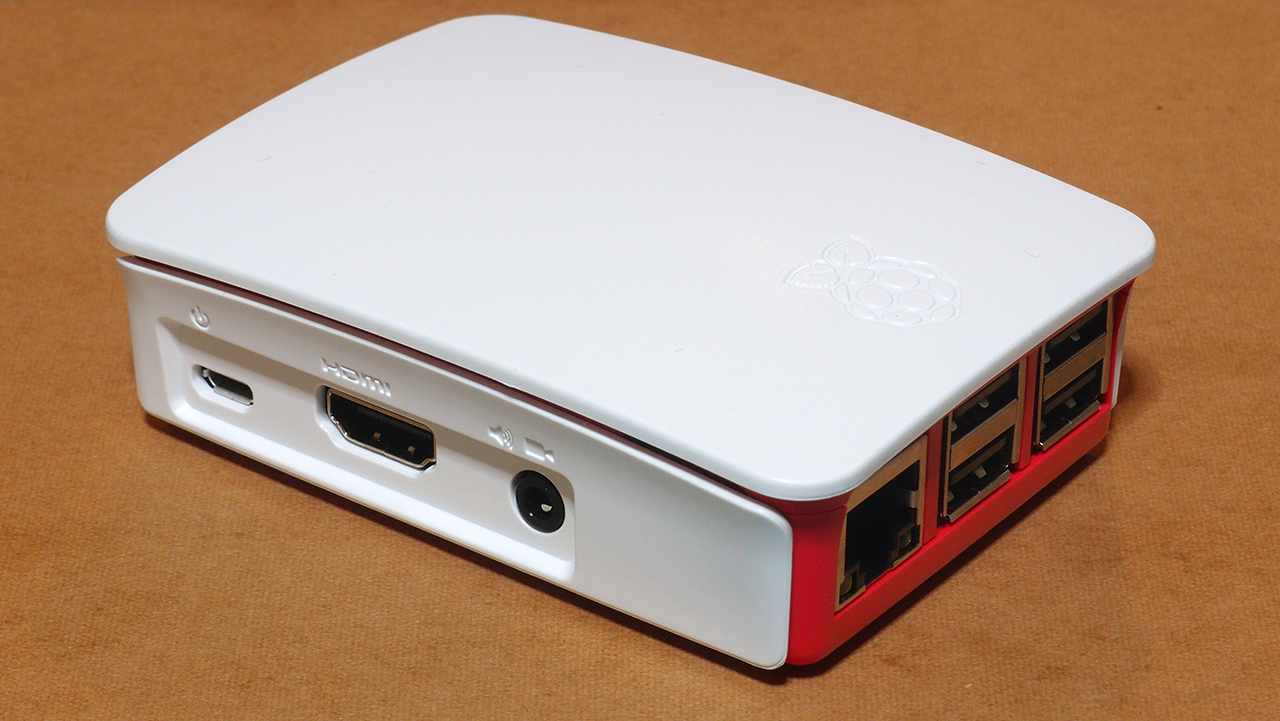
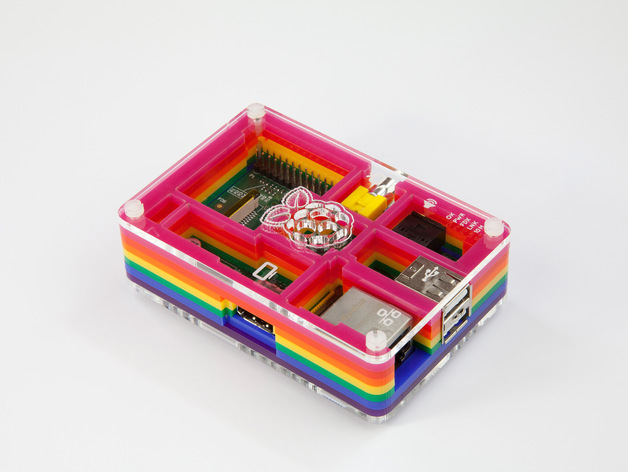
Raspberry Pi 3 B Case
In terms of a ready-to-go computer case, the official case is hard to beat.
If laser cutting is more your thing, the Pibow offers a colorful twist. Constructed of nine stacked 3mm layers of acrylic, this rainbow-colored case is an internet fave because of its innovative approach. Get the files here to laser cut your own in any color combo you choose.
If you’d rather build your own custom design, use this RasPi 3D model to perfect the fit.
Since 3D printers are becoming more and more accessible, that’s another option for creating a Raspberry Pi case. These models over on All3dp offer inspiration. And if you’re of the unconventional, renegade designer type, the folks at MakeUseOf have assembled a list of more ideas for custom Raspberry Pi cases using non-standard materials.
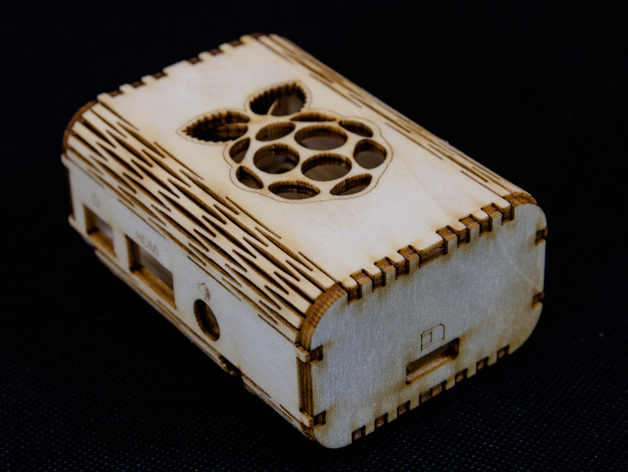
Raspberry Pi 3 B+ Case
With so many Raspberry Pi cases made from plastic, you may not have considered wood as an option. But ya should. This case is made from 3mm plywood and uses a living-hinge technique to create the curved wall edges. A pretty unique solution for a case!
Raspberry Pi 2 B
Now considered the “older model,” the Raspberry Pi 2 B is still a capable device. It lacks built-in wireless networking, which some might consider a security feature. This version introduced a standard, rectangular mounting hole pattern for easier case design and packs a quad-core processor for extra number crunching. Although superseded by the Pi 3 model, it’s still possible to find one on sale in a random corner of the internet, and it is still worth the buy.
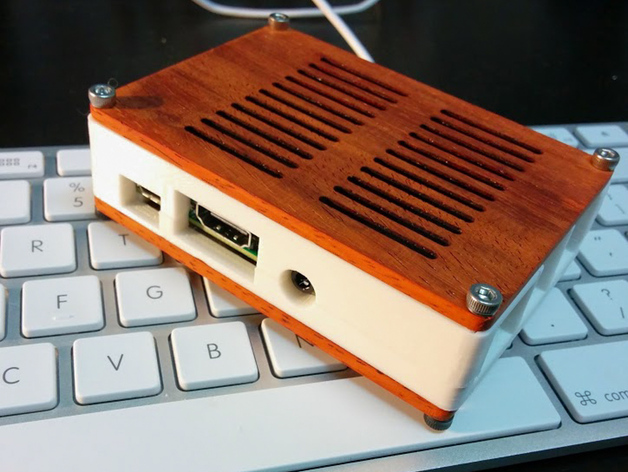
Raspberry Pi 2 B Case
Here’s an innovative idea for a custom Raspberry Pi case: Combine laser cutting with 3D printing for a one-of-a-kind piece. The laser cut wood top and bottom sandwiches a cream-colored 3D printed midsection, making this the aptly named “Ice Cream Sandwich” case. Get the files here to make your own delicious version.
If you’d like to explore more 3D printing ideas for the Pi 2, check out these cases over on Thingiverse for inspiration.
Raspberry Pi A & A+
The Raspberry Pi A models are the middle ground of Pi offerings. If you want easier peripheral access (full size HDMI and USB ports) than a Zero but want reduced power consumption and bulk compared to the model B, then the As are the way to go. The processor may be slower and there’s less RAM, but it’s still a great platform for tinkering for around $20.
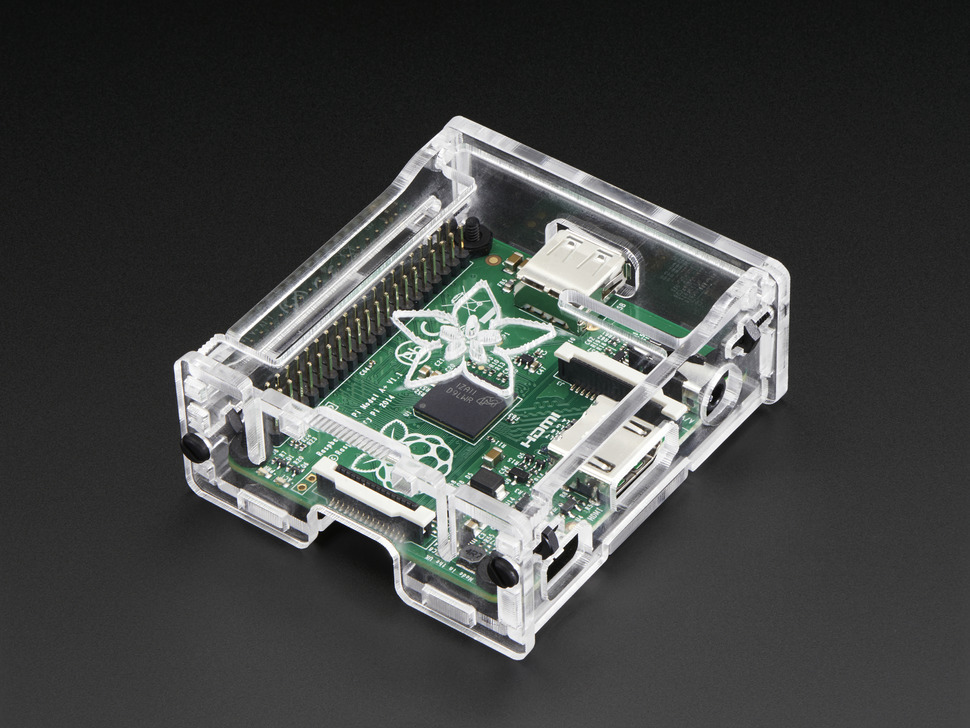
Raspberry Pi A+ Case
If you want to really show off the internal blinky goodness, consider making the of your Raspberry Pi enclosure entirely out of acrylic. This Raspberry Pi Model A+ case comes as six pieces that slide together and secure with four screws. Made of crystal-clear acrylic, this case keeps the Pi secure, has a hinged top for connector access, and even has little feet cut into the sides so that it stands up above your desk. Get it here.
If you want to make a Raspberry Pi A+ Model of your own, this 3D model program makes the design process a cinch. It’s A+ work. And this sampling of Raspberry Pi laser cut cases gives some inspiration.
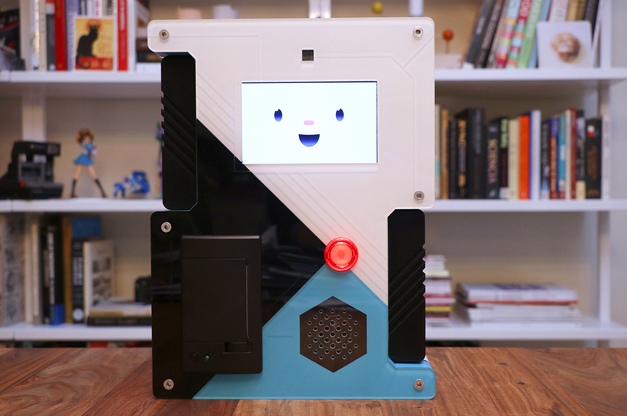
Raspberry Pi Display Cases
This display is one of the best official offerings from the Foundation, making it highly recommended for your first Raspberry Pi screen. Be sure to enhance your projects using this accessory by 3D printing a Raspberry Pi display case for it, too.
And if you want the case for your Pi, look no further than the PiTop, which combines a screen, keyboard, power system and more to turn your board into a decent laptop.
As you can see, finding or building a Raspberry Pi enclosure isn’t hard. For even more case-building goodness, check out this article about making custom electronics enclosures.
Raspberry Pi Projects
What can you do with Raspberry Pi? Whether you’re looking to make a robot, build an arcade or just blink a handful of LEDs, there are Raspberry Pi tutorials of nearly every design flavor. Raspberry Pi projects abound in every tech corner of the internet, so here are a few to wet your whistle:
Raspberry Pi Projects For Beginners
The Foundation is keen on making this a solid platform for learning. To that end, it’s designed and documented more projects to help you get started than can be discussed, but do go check them out! There are also dozens of separate tutorials on the most popular software, workflows and peripherals over on the Raspberry Pi website.
If you really want to get started building projects with Raspberry Pi and could happily allow someone else do all that design work, then there’s no better way to start than by building a few kits. Adafruit has invested a lot of time in creating great products that are also thoroughly documented and highly recommended. You’ll find they’ve got Raspberry Pi Projects for beginners and pros alike.
Media Center
So you’ve legally gathered dozens of your favorite movies, definitely purchased hundreds of TV shows, appropriately paid the big music labels for each and every song in your collection. Now you want to stream it/share it/bing it in every room of your house. How?
You could walk down the beaten path and just buy a box to do it for you, but that’s not why you’re reading this article, is it? Be bold! Make your own Raspberry Pi media center and say NO to off-the-shelf solutions:
XMBC: A.K.A. Kodi, XMBC is one of the most popular ways you can handle all of the media bits and bytes on the hard drive connected to your Pi. Here’s how to get set up over on MakeUseOf.
OSMC: Like Kodi, the Open Source Media Center does what it says and is another equally valid means for watching the remastered version of Waterworld on your big screen and streaming Katy Perry in every corner of your home.
Raspberry Pi Projects For Kids
Even taking a cursory glance at the Foundation’s website, and you’d be surprised if it wasn’t geared towards children. The Pi is meant to be a learning tool, and we’d wager most kids, especially if they can already type, are more than capable of tackling any of the beginner Pi projects they find interesting.
Even better, many great RasPi projects don’t require the use of the all-powerful, yet burning-hot, soldering iron, so they’re quite safe to build. Either way, there’s no better way to find Raspberry Pi projects for kids than by reading about these Raspberry Pi projects by kids over on Tech Radar.
Advanced Raspberry Pi Projects
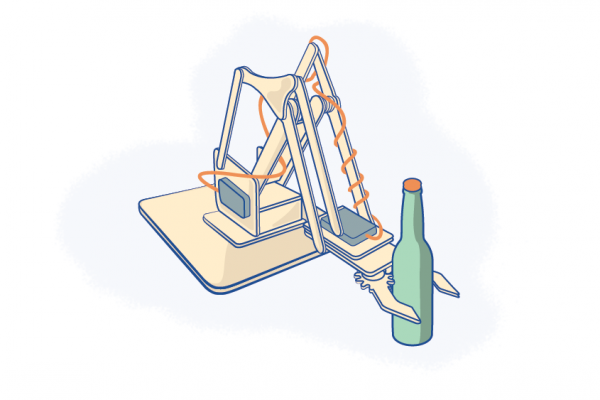
For those who live in snowy climates, you probably know the sheer joy of moving that white stuff around so you can leave your house. Kris Kortright shares your pain, so perhaps you’d like to recreate this remote control snow blower to aid in your wintery chores.
If your selfies suck as bad as ours (arms just aren’t long enough!), this SelfieBot will have you looking picture perfect every time without needing a full-size photo booth. The Raspberry Pi-powered selfie camera has an HDMI screen and thermal printer to print out the pic, Polaroid style. Now that’s how to make memories even more memorable.
Home Automation
Wouldn’t it be better if your house could just adapt to your needs without the requirement for you to flip switches, or dare we say, press a few buttons? Give your living quarters a bit more intelligence with these Raspberry Pi home automation projects:
J.A.R.V.I.S.: Jeremy’s Astute Residential Virtual Intelligent System is one of the most wildly advanced Raspberry Pi projects, and it incorporates more features than you can shake a stick at. Seriously, just go check out this demo video for inspiration to build your own Iron Man-ish tech into your life.
Amazon Alexa: Your friendly synthetic assistant, from everybody’s favorite megacorp Amazon, doesn’t just come in commercial packaging like the Echo and Dot. Using the Pi (the 3 B is recommended), you can run the Alexa Voice Service in your own custom project. This definitely skews toward the software side, but having such a powerful speech recognition system for your DIY design is very attractive.
Raspberry Pi 3 Projects
Having difficulty finding out how to feed your cats when you’re away? Would you like to browse the internet with a greater sense of privacy? Are you fed up with having to steep your tea bags by hand, like some kind of animal? Find out how to solve all of these problems and more by reading about these Raspberry Pi 3 projects on the IT Pro website.
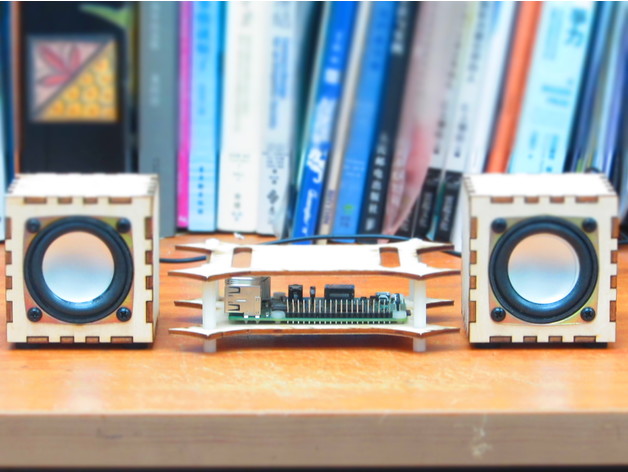
Spotify sounding a little soft on your iPhone? Pump up the volume by building your own mini HiFi system. All you need is a Raspberry Pi, PC speakers and these plans from Thingiverse. The laser cut plywood looks great on its own, but you could stain it for a richer tone or use the wood as a canvas for a custom, hand-painted masterpiece.
Raspberry Pi Zero Projects
Palmtop computers, handheld game consoles and even a tiny, functional arcade cabinet are among the Raspberry Pi Zero projects you can find over on Zdnet.
If the links above aren’t nearly enough to sate your endless need for DIY documentation, then head over to Hackaday.io where users have uploaded 900+ projects with the Pi.
Raspberry Pi Programming
Is there a Raspberry Pi programming language? Nope! While the RasPi may be lower-spec, it is a fully fledged computer. This means you can run code from nearly any modern language.
If you’ve only previously programmed microcontrollers or are new to coding in general, you may initially be wary. But not to worry. Programming with the Pi is a dream. Since there are so many great examples of well-written code out there, it’s no wonder this is the platform of choice for embedded computers.
Programming For The Raspberry Pi
While you can use nearly any language on the Pi, the de facto tongue of choice is Python. The best way to get started programming on the Pi is with IDLE 3, which is the official development environment for Python.
As an example, here’s a simple Python program for blinking an LED.
0 from gpiozero import LED
1 from time import sleep
2
3 led = LED(17)
4
5 while True:
6 led.on()
7 sleep(1)
8 led.off()
9 sleep(1)
0 – Here, we’re saying, let’s use just the LED portion of the gpiozero module. Modules in Python are more code that contains useful information such as variables and functions that can be used over and over within a program. The gpiozero module has specific functions that simplify reading and writing to the pins on the Pi. Because it is more efficient to load only the code needed, we’re just using the LED parts of this module.
1 – In order to have human scale delays in our program, we need the ability to sleep, so let’s grab that from the time module.
3 – We need to create our own LED function, which we call “led,” and it will control pin 17.
5 – This is a while loop. Because it is evaluating a “True” expression, it will run the code contained within the while statement forever.
6 – The LED function, among other things, allows us to turn the led on or off. This practically means that we’re sending a voltage across pin 17 of the Pi (which runs at 3.3 volt logic), which allows current to flow through the pin and the led will light up.
7 – Wait with the sleep function so that we can actually see the LED is on. We’re passing a value of one to the sleep function, so it will wait one actual second.
8+ – Here we’ll turn the led off and wait one more second. You may notice the program just stops here, but how does the interpreter know what to do with the code? Python separates blocks of code based on indentation, so the indented led and sleep functions calls are all part of the while loop.
Now we could call our program blink.py and run it by simpling typing “python blink.py” in the command line; it’s as simple as that! For a deeper tutorial to get you familiar with coding on the Pi, take a look at these Python tutorials via Open Source For U and SparkFun.
To get even closer to the metal, jump into the official Raspberry Pi repositories on GitHub and SparkFun where you can find all of the low-level sources and gain access to the hardware in ways that mama Python just won’t let you.
Raspberry Pi Prototyping
There are many reasons tinkerers and teachers begin Raspberry Pi prototyping, not the least of which is the availability of great products that make it fast and easy.
Raspberry Pi Prototyping Kit
For years, PCBs that fit or plugged into another larger board were simply called daughterboards. For whatever reason, the Arduino team called its add-ons “shields,” and the Pi Foundation found it fit to further rename its prototyping plates to “hats.” You can buy these Raspberry Pi prototyping boards that have plenty of space for additional components and allow you to build projects in no time at all.
The ever-helpful team at Adafruit has made a wonderful plate that plugs into any modern model B, allowing you to quickly screw in wires and solder (very small) circuits in a compact package. They’ve also developed dozens of other Pi-centric products so you can start projects asap with minimal fuss.
Compute Module – After making the next bartending robot sensation with your Pi, you may want to commercialize it. While it’s possible to stuff the product with a full board, there is (literally) a better fit. The barest of bare bones Raspberry Pi boards, the Compute Module is meant integrate directly into a product (it matches the PCB of DDR2 SODIMM RAM for mounting). However, since prototyping with the RPi Compute requires an expensive breakout board or your own custom PCB layout, it’s only recommended for engineering purposes. The other boards are far better for first-time tinkerers.
Raspberry Pi Alternatives
The Pi was neither the first, nor will be the last, single board computer for makers; it is simply the most popular. When it comes to the Raspberry Pi vs the world, well the world has some offerings that may better fit the bill for your idea:
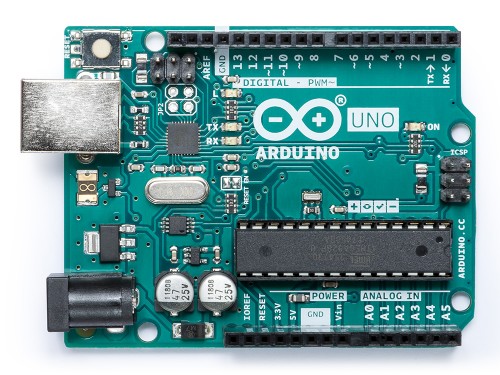
Raspberry Pi vs Arduino
If you’re dabbling in the DIY electronic arts, then you’ve likely heard about the Arduino platform, too. Are you wondering which board is the right one for you?
Raspberry Pi vs Arduino is a false comparison, as they are both the right choice for electronics projects. Let’s put it this way: An Arduino is like a bicycle and a Raspberry Pi is like the average sedan. They’re both a means of transporting your stuff from A to B, but in very different scales.
Bike manufactures won’t ever add heated seats (but you could) and using a car to drive 10 kilometers is always going to be more expensive than a comparable bike ride. You should compare bikes to bikes and cars to cars.
Want your project to have an HD display? Use a Pi. Need it to start the second you turn on the power switch? Grab an Arduino. Want to program using nearly any language? Pi. Is battery life a big concern? Arduino.
Simply put, use the Raspberry Pi as you would a full size computer that can talk to low-level peripherals, and use the Arduino as a tiny gadget that can tackle a single high-level task.
Beaglebone Black vs Raspberry Pi 3
On its surface, the BeagleBone Black seems comparable to the Pi in many ways: HDMI output, USB connectivity, ethernet, yada yada yada.
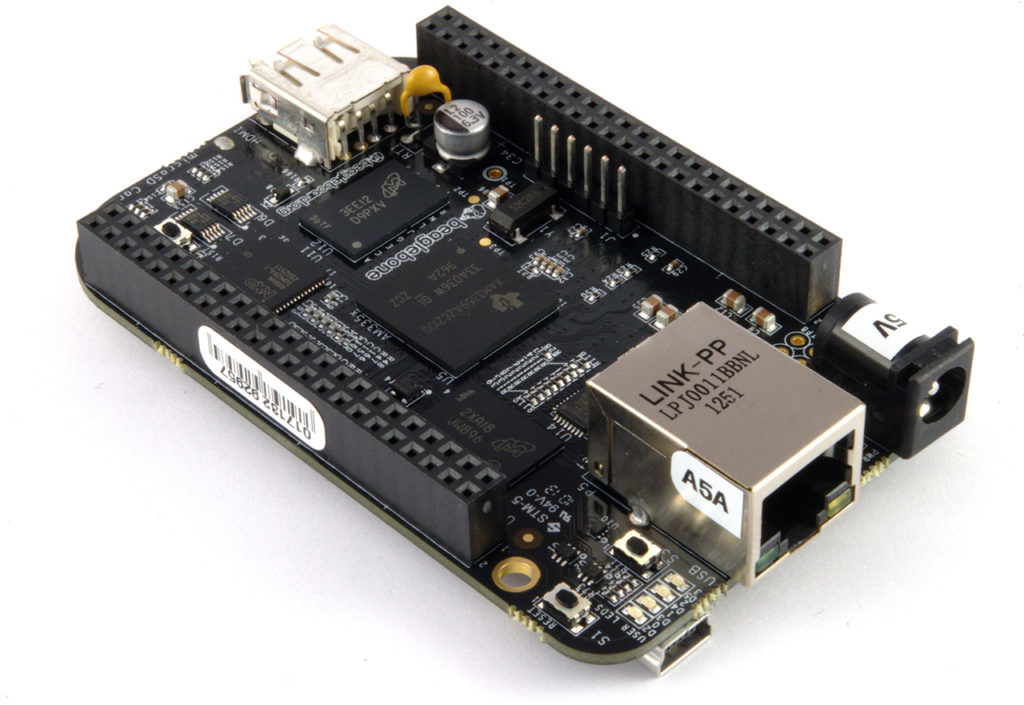
When it comes down to the BeagleBone Black vs the Raspberry Pi 3, it’s a close race. But the Pi reigns supreme.
The BBB earns points for having built-in eMMC for your OS (an SD is mandatory for a Pi to work), and it has oodles more GPIO. But the Pi 3 B is simply cheaper, faster and easier to use thanks to a massive global community and the ongoing support of the Foundation. Beagleboard.org is good people, but when it comes to SBCs, the choice is clear.
Asus Tinker Board vs Raspberry Pi
Asus recently launched its Tinker Board, a microcontroller similar to the Raspberry Pi. While the Tinker Board features a similar layout to the Raspberry Pi Model B, it boasts more power due to a faster processor and 2GB of RAM.
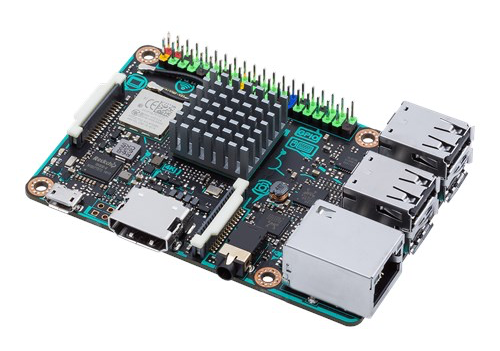
This improvement is reflected in the cost of the boards, as the Tinker Board is close to double the cost of the Raspberry Pi Model B.
Beyond the faster processor and increased RAM, both boards feature a USB power connection, Wifi and Bluetooth connectivity, an audio jack, microSD storage, and 40 GPIO pins. All of that is to say, unless you need to increase the speed or processing power of your project, the Raspberry Pi is probably the best bang for your buck.
micro:bit vs Raspberry Pi Zero
If you are looking for a smaller microcontroller, it’s natural to gravitate toward the Raspberry Pi Zero. After all, it’s half the size of a Model A+, with twice the utility. This tiny Raspberry Pi is super affordable and aptly capable.
However, for those who are new to the wonderful world of physical computing, and especially to programming, check out the micro:bit as an alternative.
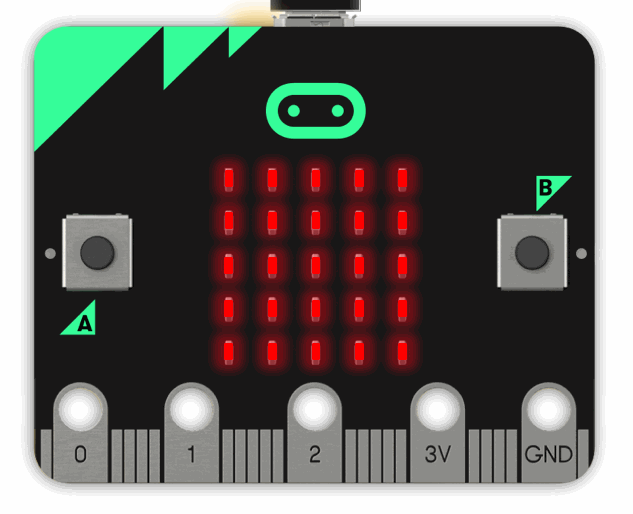
This board, developed by the BBC for educational applications, uses makecode, a visual block-based programming language and environment. Since Makecode is exceptionally easy to learn, it’s great for absolute beginners. The micro:bit is pricier than the Pi Zero, but it comes with a lot of components included on the board and significantly lowers the barrier of entry to making physical computing projects.
ODROID vs Raspberry Pi
Hailing from South Korea, the ODROID boards are generally more powerful than comparable Pi products and not much more pricy. They’re almost dimensionally identical and a great choice when you want a little more processing punch in a small package.
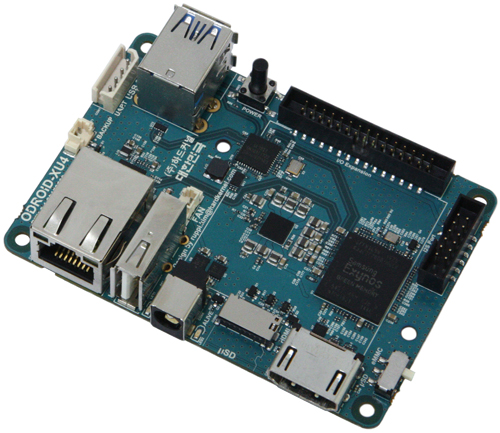
To get a sense of the kinds of projects you can make with ODROID, check out this list via ODROID Magazine and this compilation via Hackaday.
For more info on how the Pi stacks up against the competing horde of SBCs, take a look at this Raspberry Pi 3 benchmark to know once and for all.
The Future Of Raspberry Pi
Since its debut in 2012, Raspberry Pi has sold 19 million+ units (and counting!) within five product lines. With new models regularly introduced in the past, it’s no wonder there have been Raspberry Pi 4 rumors. But don’t expect word of a Raspberry Pi 4 release date to grace your inbox anytime soon.
Founder Eben Upton told Wired: “Raspberry Pi One lasted for three years. Then we had Raspberry Pi Two that lasted for a year; I think Raspberry Pi Three is more like a three-year product. We may tweak some peripheral bits of it at some point but probably not even that.”
Instead, the Raspberry Pi Foundation has been focusing on developing the software available for all Pi devices. They’ve introduced the PIXEL operating system and have even dove into AI through Google’s Colaboratory.
For some educated guesses at what might come next, check out this article from Techworld. And of course, stay tuned to the blog on the Raspberry Pi website for all the latest news.
Additional thanks to Melissa Felderman for providing supplementary content and Lisa Horn for writing and content editing.
2 Comments
One significant advantage the BBB has over any RasPi is that it has analog inputs that the RasPi lacks.
Another advantage of the BBB (that fewer care about) is the PRU’s (Programmable Realtime Units.) These are generally only useful to those doing CNC or robot control.
Hi Jonathan, thanks for the helpful addition!
Comments are closed.