
Why You Should Always Prototype Your Product
So you’re on your way to creating a product. You have a brilliant idea for a new invention or promotional swag, and you are working your way through the industrial design process. You have done market research, identified the user and market, developed ideas through brainstorming and checked out your competition. You believe you know what the user wants and what this product needs to be successful. This means it’s time to start prototyping.
Sure, we’ve all heard of prototyping before, and it’s loosely understood that it is the process of making a pre-production proof of concept model. But what does it really mean to prototype? When should prototyping start in the design process? What are the best ways to manufacture a prototype for your idea? And why should you, as a maker, practice rapid prototyping? This article will answer all these questions—and more.
What Is A Product Prototype Anyway?
As we jump into the wonderful world of product prototyping, it’s important to understand how “prototyping” and “a prototype” relate to each other. Prototyping refers to the process of developing and iterating prototypes. It is a design methodology, practice and/or process.
On the other hand, a prototype refers to the actual physical or digital objects generated during the prototyping process. “A prototype is a rudimentary working sample, model, mock-up or just a simulation of the actual product based on which the other forms are developed,” writes Aashish Pahwa in the Feedough article “What Is A Prototype? Prototype Examples, Types & Qualities.” “Sometimes, creating a prototype is called materialization as it is the first step of transforming the virtual or conceptualized design into the real physical form.”
While Pahwa notes the main motive behind prototyping is to validate the design of the actual product, there’s actually more to the product development process. “A prototype isn’t just a part of the product design,” he says. “It is one of the most integral parts without which future steps of the startup process are nothing but useless.”
Beyond determining desirability, prototyping also helps determine feasibility and viability. “Your product or solution should not only satisfy the needs of a user but be easy to implement and have a commercial model as well,” say Rikke Dam and Teo Siang in the Interaction Design Foundation article “From Prototype To Product: Ensuring Your Solution Is Feasible And Viable.” “You are also concerned with testing your ideas and validating your hypotheses about your users. Towards the end of your project, bring the focus to feasibility and viability as well so that your solution can be sustainable.”
While it may seem that Dam and Siang are talking about complex products or those with big budgets from well-known brands, that’s actually not the case. Even the simplest of products—anything from board game pieces to branded coasters—should be prototyped with low-volume manufacturing before committing to full-scale production runs.
Prototyping Methodology
So, what does the “how to make a prototype” process look like? Think of the prototyping steps like a feedback loop:
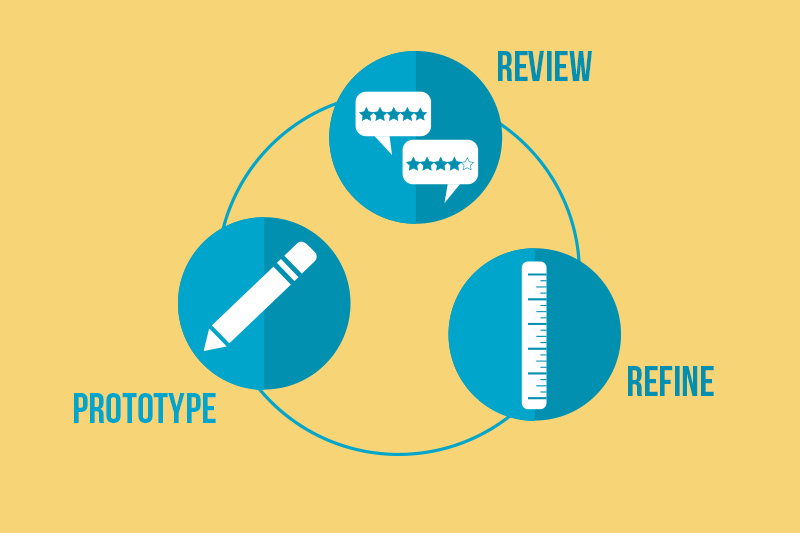
1. Make a prototype
2. Test your product and get reviews from users
3. Refine the design by applying feedback
4. Repeat!
“Soliciting feedback on your ideas and prototypes is a core element of the Ideation Phase, and it helps keep the people you’re designing for at the center of your project,” according to this Design Kit tutorial from IDEO. “It’s also a direct path to designing something that those same people will adopt. If the point of a prototype is to test an idea, then collecting feedback from potential users is what pushes things forward.”
Here’s the sad truth: What is usually found through the prototyping process is that the first idea isn’t all that great. Oftentimes, it down-right sucks. An #epicfail. It’s said that Thomas Edison went through 1,000 prototypes before he finally created the first commercially practical incandescent light bulb. He just kept failing his way to success.
It’s the same for designers & engineers, regardless of product and whether this product will be sold for a profit or used to promote a brand. Based on feedback received from product testing, designs and ideas should continue to be iterated until the end result—something the user both wants and needs—is achieved. And this is where the true value of prototyping is found.
Prototyping Tools
So you’re convinced of the merits of prototyping. Now what? Where do you start?
Before getting down to the actual business of prototyping, it’s important to understand the available tools. The recent and continued development of accessible digital fabrication tools such as the laser cutter, CNC machine and 3D printer have opened up the floodgates for designers and engineers like yourself to get cracking on the prototyping process.
Before converting your idea to a digital design file, it’s crucial to decide which prototyping tools to use. Thinking about 3D printing or CNC machining? This article from Core77 can help you decide.
For those planning to 3D print your prototypes, there are tons of software options. A great free, easy-to-learn online tool is TinkerCad. Those looking for a more robust set of 3D modeling tools might prefer SketchUp or Fusion 360.
Or perhaps you’re drawn more toward laser cutting. If so, programs such as Adobe Illustrator (AI) or Inkscape are a must when generating design files. Both of these programs produce vector based files, meaning the design is created mathematically using points in space and drawing lines between them. This is critical because vector files allow the design to be scaled up or down to any size without losing any definition or detail.
Not sure how to create the perfect files for laser cutting? We’ve got ya covered. Don’t miss Adobe Illustrator Tools For Makers and Design Made Easy With Inkscape Vector Tutorials for step-by-step instructions.
Because laser cutting works with flat material sheets, you may think 2D products are it. Not true! With ingenuity—and slick design with slots or joints—you can create some pretty awesome laser cut 3D products. And, thankfully, there’s software to help.
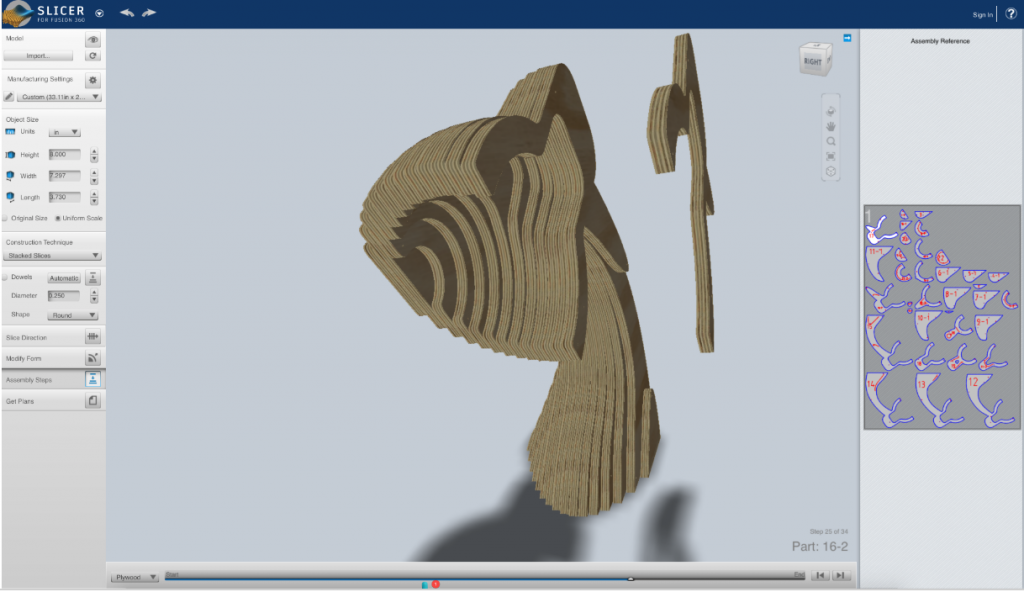
For example, AutoDesk’s Fusion 360 Slicer will convert a 3D model into a array of layers in your chosen material’s thickness, allowing you to laser cut each layer of the greater whole and easily create a 3D object as seen in the image below.
Or perhaps you want make a simple box. Online box generators such as MakerCase allow you to plug in design requirements to generate design files that are laser cutter ready. Check this out:

Once the correct files are ready, it’s time to get to the fun part…Making!
How To Make A Product Prototype
When starting out, early prototypes should be “low fidelity” and gradually become “high fidelity” as you iterate. Fidelity speaks to how true the prototype represents final product. The lowest-fidelity prototype might be a paper drawing or rough paper model, which can then turn into something like a cardboard prototype.
The key here is that the materials and manufacturing of the early, low-fidelity prototype are inexpensive and quick, keeping the cost down, such as these paper prototypes of a handheld stud finder created by Patrick Dugan.
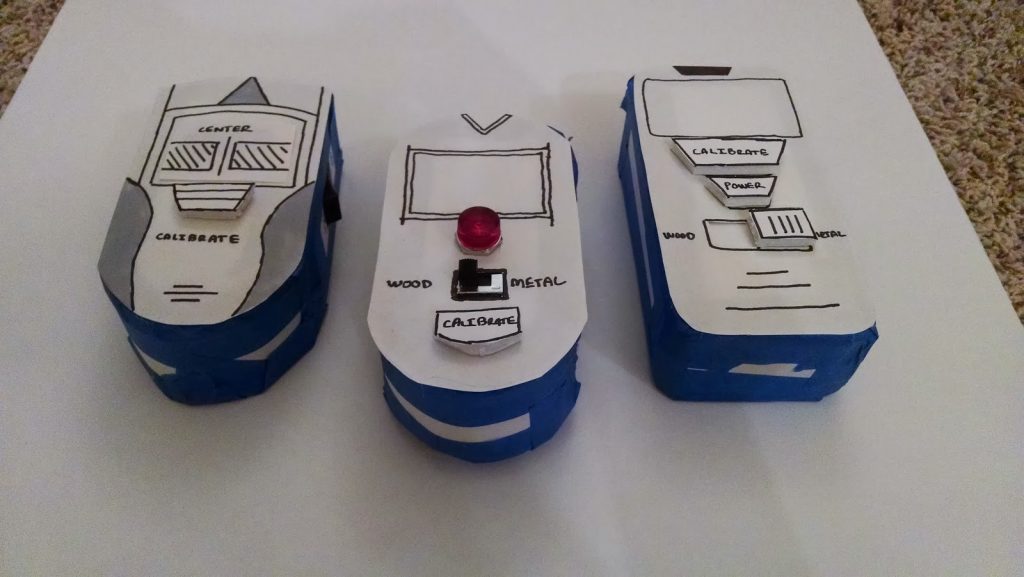
Paper, cardboard, foam and wood are good material choices for low-fidelity prototypes because they are inexpensive and forgiving, meaning there is room for minor design errors. If a joint is too tight or too loose, it’s easy to bend or push the material to suit the prototypes needs.
Once the low-fidelity model is accurate from a design standpoint and you’ve incorporated feedback from each iteration, then you can move to higher-quality materials with confidence in your design files.
High-fidelity prototypes more accurately represent the final look and feel of the product, which is critical so users can really experience what the product will feel like. The upside: You’ll get more value in terms of feedback from testing. The downside: Upgraded materials and functionality have higher costs. (More on prototype costs momentarily…)
The good news is that users can test just about anything from a cardboard prototype, such as the Nintendo Miniverse prototype featured in Smashing Magazine’s “The Skeptic’s Guide To Low-Fidelity Prototyping.”
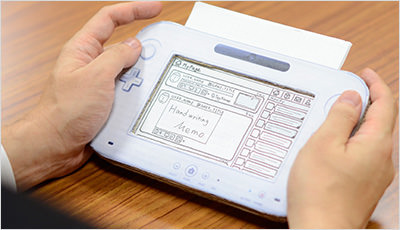
As this example illustrates, you can still employ laser cutting in the prototyping process even if the final product will be manufactured differently.
To get started prototyping using laser cutting, first check the available material sheet sizes and make sure you have read the material information carefully so that you understand all the characteristics of the material and if any special accommodations must be made in your design.
Next, open a laser design template in your chosen software. Using the template makes it much easier to get a good result.
Then start with digital prototyping. What’s amazing with this kind of zero-cost prototyping is that you can upload designs for instant quotes—with no commitment to buying. When determining how to make products, this step is super important because you can upload numerous variations of your product designs to easily and immediately see what design choices will decrease costs.
Once the digital prototype looks a-okay, print it out on paper. This is the first way to get a sense of what your product will look like at 100% scale. It’s easy—and it’s free. You’d be surprised how easy it is to misjudge scale on screen.
After confirming size and scale with a paper proof, next it’s time to get an actual product in hand. Cardboard and cardstock are good choices because they are inexpensive and cut really quickly (time = money when laser cutting).
When you get these initial samples in hand, take a really good look at the design. Is it what you envisioned? Do any slotted parts fit together perfectly? If not, now is the time to adjust so they better align with what you had intended. The result of this revised design will naturally be a new prototype, followed by another round of assessment. Continue revising the design until you’re confident in the quality of your product.
Next, make a small batch in the final material of choice. Here, you can evaluate if the material you chose will work as expected and be strong enough for its intended use. Once again, you’ll want to get some sample product in hand so users can test it out and provide feedback before you commit to a large order.
Finally, once you’ve gotten to a point where users are giving rave reviews of the product, you can make a larger order in accordance with market demand.
For more on the process, including a complete tutorial (beginning with prototyping all the way through making to promotion, each stage with real laser-cut product examples), How To Make A Product That Sells is a must read.
When To Start Prototyping
A common adage for prototyping is “prototype early, prototype often.” This is where the “rapid” in “rapid prototyping” comes from. Most literature on product prototyping advises to prototype your invention as early as possible.
This concept is deeply inline with the current industry standard of Human Centered Design. The idea here is to avoid being in a vacuum during the design process by incorporating the needs of the user into the overall design right from the start.
Cost Of Prototyping
At the end of the day, you want to sell a product that makes a profit, and making prototypes can prevent you from wasting time and money on the wrong thing. “By realizing additional requirements and constraints early, as well as receiving user feedback early, you can make better complexity and time estimates. And this results in better cost and time estimates,” explains Rishal Hurban in the article “To Prototype Or Not To Prototype: That Is The Question.”
So what does it cost to get a prototype made? Don’t be surprised by the answer…It depends.
As described above, digital prototyping allows you to generate zero-cost prototypes for the first few iterations of prototype development. Free is good!
The simple back and forth of making a digital designs tested through renderings costs you nothing more than time. And these Top 10 Tips To Reduce Laser Cutting Costs will help you optimize costs not only for laser cut prototypes but also for finished products if laser cutting is your manufacturing method of choice. Once you understand how much different design ideas will cost both as prototypes and in a full scale production run, you can move on to the physical prototypes.
A great way to keep cost down on physical prototype manufacturing is to start with low-fidelity prototypes as described above. The goal is to really nail down the design with more affordable and more forgiving materials such as paper and cardboard before moving onto higher quality, less forgiving materials such as plastics. This is a major money saver because you mitigate the risk of producing an expensive but sub-optimally designed product, and it’s better for the environment by keeping failed products out of the trash!
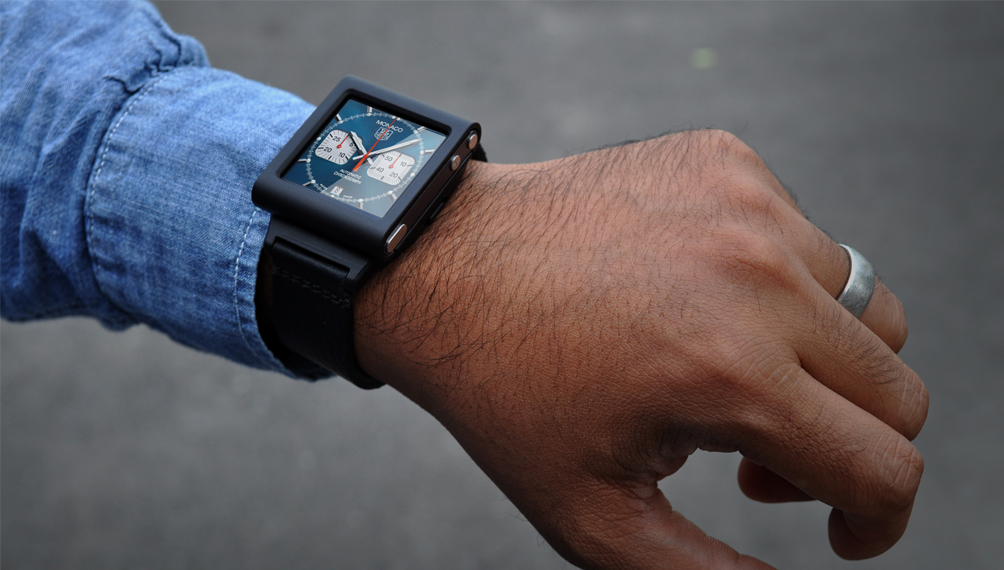
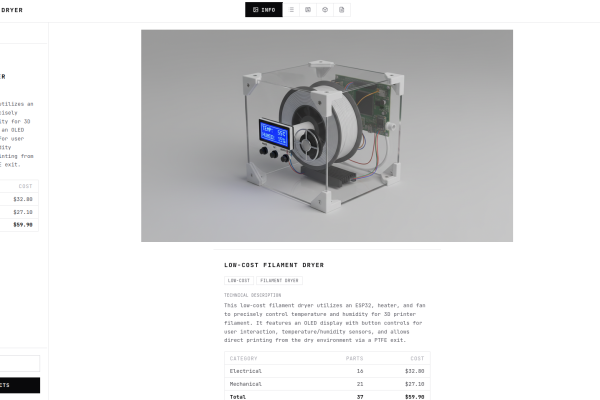
As you iterate through low-fidelity prototypes, you’ll eventually get to a stage where higher-fidelity products are warranted. And here’s where costs can really vary. Depending on the custom parts and electronics required, this fully functioning watch prototype could cost thousands of dollars.
In fact, prototype costs can range from a $100 to upwards of $30,000 (hello!) for high-fidelity connected devices, according to the article “How Much Do Prototypes Cost” via Design 1st.
“One end of the scale is a fully functional production-ready prototype with custom embedded electronics and software to run it,” they write. “This prototype can cost $10,000+, a lot more than a cardboard model prototype with a sketch of the user interface and 3D virtual rendering.”
The article goes on to discuss the four stages of the product development process as well as review the types of prototypes and risk identification at each stage so that you can better determine what your prototype costs may be.
Best Practices For Making A Product Prototype
What you prototype and what you need to look for during testing will depend on what you are developing and what you hope to learn. As Dano Qualls describes in “What Not To Prototype:”
“Rather than approaching prototyping like a designer soliciting feedback, approach it like a scientist testing a hypothesis,” he says. “Before you put pen to paper and design a prototype, write down exactly what you want to test.”
For example, someone making robots or electronic enclosures will need to test the interface as well as the mechanisms. On the other hand, someone making signs will be more concerned with legibility of text and graphics. In any case, prototyping is an essential step in making sure your product works.
To get the most out of prototyping, adhere to the following principles:
1. Make it disposable.
When iterating prototypes, you will execute many variations on a single design theme. As such, you want to make something disposable—both physically and emotionally. Prototypes should be low investment, i.e. inexpensive in materials and low in personal attachment.
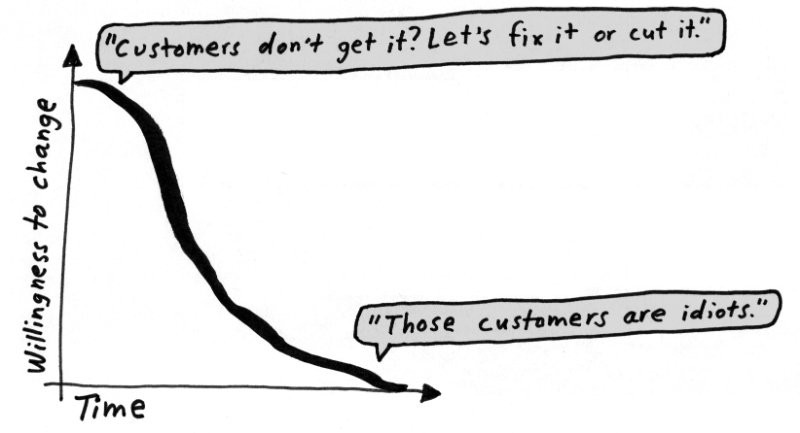
If you are too attached to a prototype because you love the idea or because you spent a lot of money on it, you may not only be less willing to hear the honest feedback from users but also make the necessary changes, as cleverly depicted by the graph below.
2. Make it a representation.
A good prototype is a representation of what the product will be, not an actual example of the product itself. “Sure, you could take a longer time to build a more perfect prototype?—?but doing so would only slow down the learning process,” explains Eric Ries in “The Prototype Mindset.”
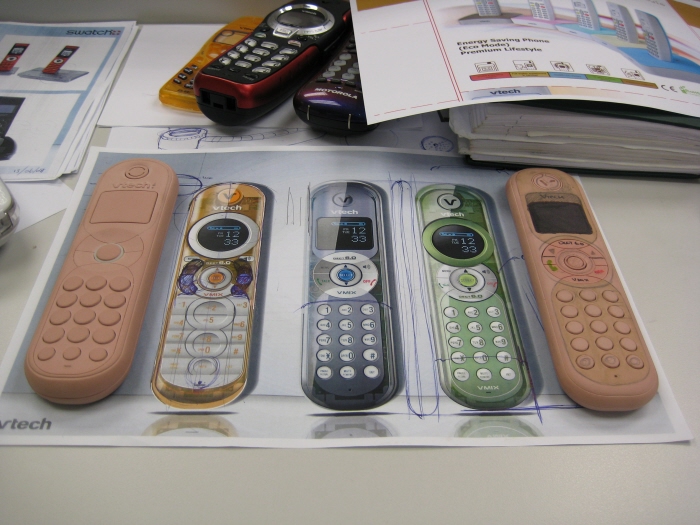
In this light, you want to make your prototypes just robust enough to convey the idea to the user, but rudimentary enough to maintain low investment, such as these remote control prototypes via LeManoosh.
Additionally, prototypes should go just as far as projecting the illusion of the real product so that users can interact with them genuinely and offer valuable feedback.
3. Make it precise.
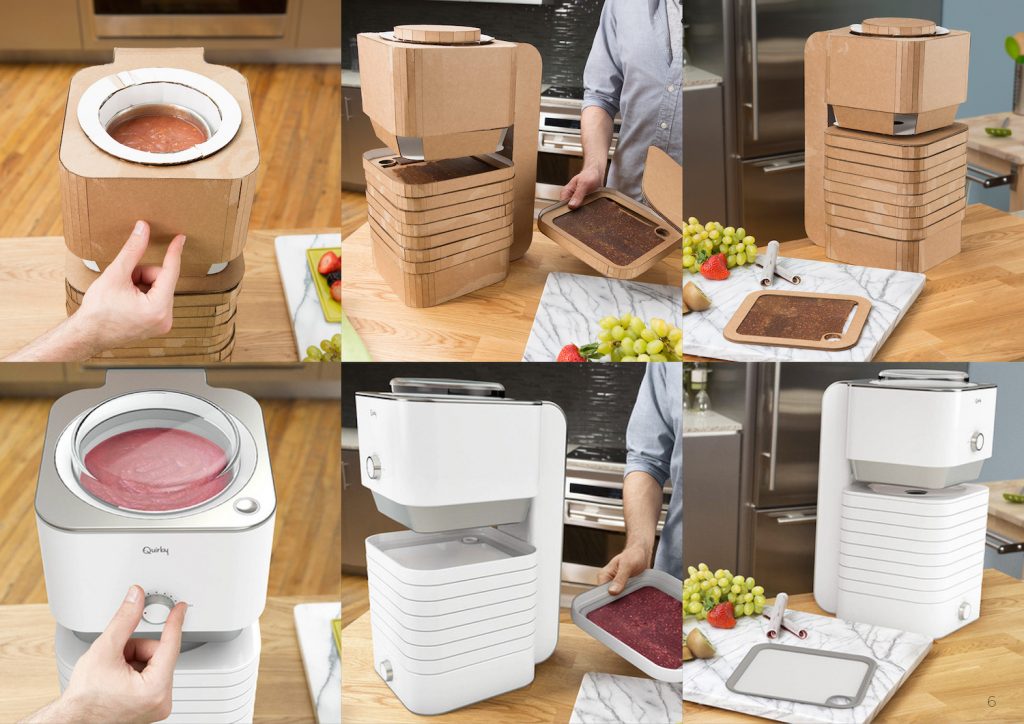
Ok, so this sounds like it’s in direct opposition to the previous principle of simply making a representation. What this best practice actually means is that your representation should be as precise of a representation of the product idea as possible in order to sell the illusion to the test group. Attention to detail in your prototype helps users truly experience what you plan to build, and thus they can offer more valuable feedback, as David Bull exemplifies with his kitchen device.
4. Make it iterable.
The whole point of prototyping is to iterate the design over and over again until you have a successful, user-friendly product. Prototyping is nothing without iteration, so make sure you can not only easily iterate and adjust your prototype based on the feedback but also quickly produce the next prototype to continue the process, as OXO has done with its easy grip fruit and vegetable peeler.

The Many Benefits Of Rapid Prototyping
There are many clear cut benefits of rapid prototyping. One of the most important? It frees your mind. Having the ability to try out a myriad of different solutions, materials and tools, you are allowed to explore without pressure or commitment.
When you set out to make a masterpiece, a major mental barrier exists. This pressure to make something great usually results in a creative block and builds up fear and anxiety, ultimately making it much more difficult to be bold with designs. The truth is, most masterpieces are the result of iteration. So your best bet in making something awesome is to get busy prototyping!
Additionally, rapid prototyping also mitigates risk by allowing you to see the product from multiple perspectives. It helps build a product that is agreeable to you and your audience. User feedback informs whether or not this product will be successful in the real world by testing the viability of your idea over and over again, so you can confidently bring your idea to market.
Rapid prototyping also allows engineers to use computer-aided design (CAD) to generate 2D and 3D models of parts or assemblies, and thus hit the production floor running. “These models can be analyzed and tested through 3D visualization and simulation, and once cleared the prototypes can be made by 3D printers and CNC machines using the original files for fast production,” says Kagan Pittman in “How Rapid Prototyping Maximizes Savings In Time And Cost” over on engineering.com.
Ultimately, prototyping takes out all guess work from the design process. It minimizes cost and increases profit. While it may seem like extra hours and money upfront, prototyping will save you big time in the long run by not only avoiding large production runs with the wrong design but also by ensuring the viability of your product to the user.
The bottom line: Prototyping sets you up for success. And isn’t that what any maker, regardless of product size or budget, really wants?
Additional thanks to Lisa Horn for supplementary writing and content editing.
2 Comments
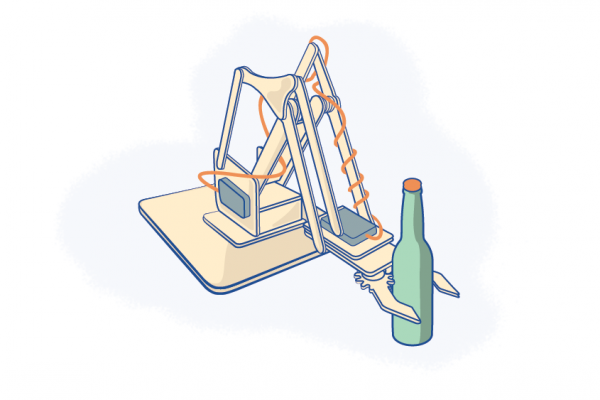
estoy creando un prototipo de una impresora 3d de 4 camas, esto con la idea de mejorar la eficiencia de la impresión 3d. La misma podrá dejar impresiones en cola cuando se termine una la cama girara y comenzara la otra hasta hacer las 4 impresiones sin intervención del usuario. Solo necesito financiamiento para hacerla realidad.
Hi Christian, sounds cool! You might like to look at this build platform from MakerBot https://www.makerbot.com/media-center/2010/09/13/makerbot-automated-build-platform
Comments are closed.