Mark Wilson Explores Making Electronic Clocks With Custom Laser Cut Enclosures
Have you ever wished you could save time in a bottle? Or do you feel like you have too much time on your hands? Time is funny, in a peculiar, fluid way. It flies by as kids grow up but stands still in office staff meetings. Vacations seem too short, workdays too long.
However time ticks by, thankfully there are horologists like Mark Wilson that are serious about telling time. A software engineer by day, Mark often finds himself making clocks in his time off, “playing around with software (Arduino, Inkscape) and experimenting with methods of time display and aesthetics of project enclosures.”
While Mark’s electronics project boxes just happen to enclose clocks, the same principles apply for laser cutting any kind of enclosure for electronics. When form meets function and there’s some artistry sprinkled in, the magic happens.
Building Unique Word Clocks
While some people spend their free time hiking, biking or baking, Mark likes to dedicate his hours to actually chronicling time through making clocks. Time well spent, we’d say.
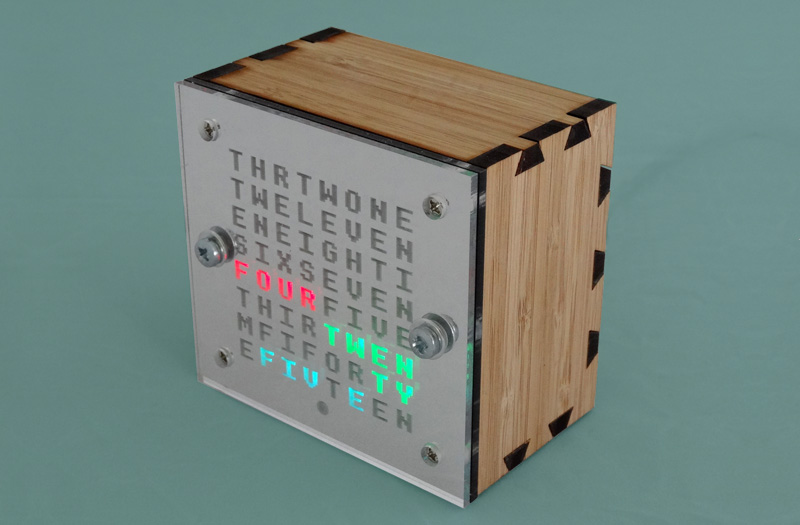
But Mark isn’t making just any ol’ clock. He’s taking an unconventional design route, skipping the numerals and using the alphabet to tell time in this unique word clock.
It all starts with building a digital file for the enclosure so the parts can be laser cut.
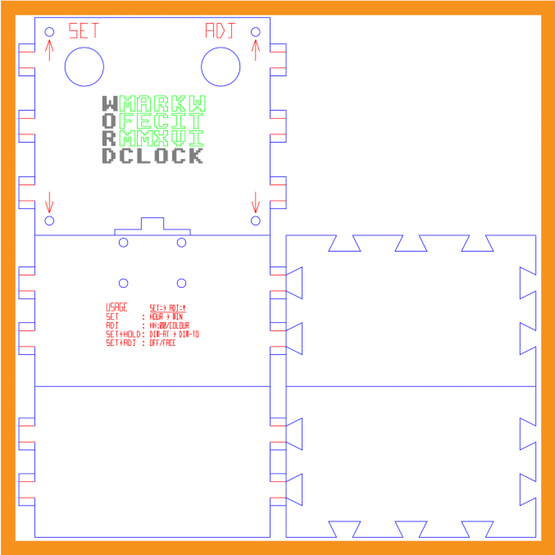
Mark chose to use bamboo and acrylic because they’re non-conductive materials that are safe for electronics enclosures, look amazing and are reasonably priced.
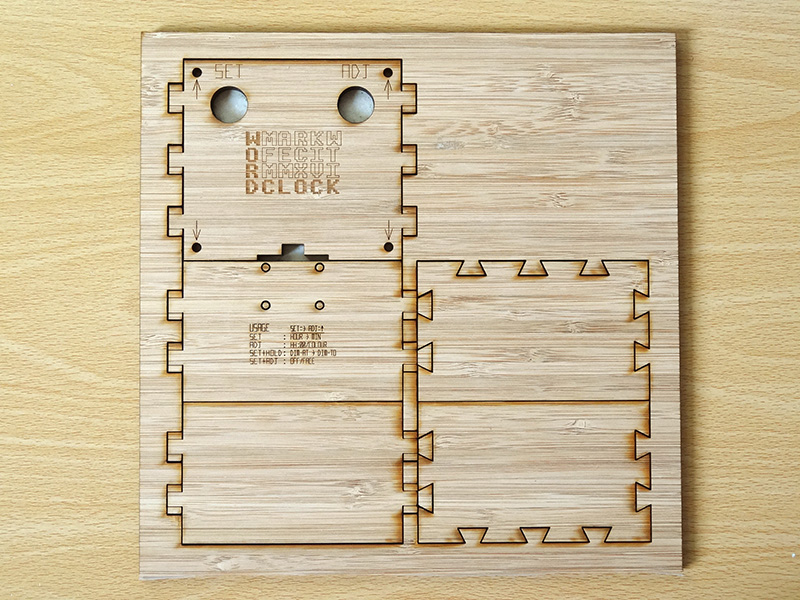
Here’s what the box parts look like when laser cut in bamboo.
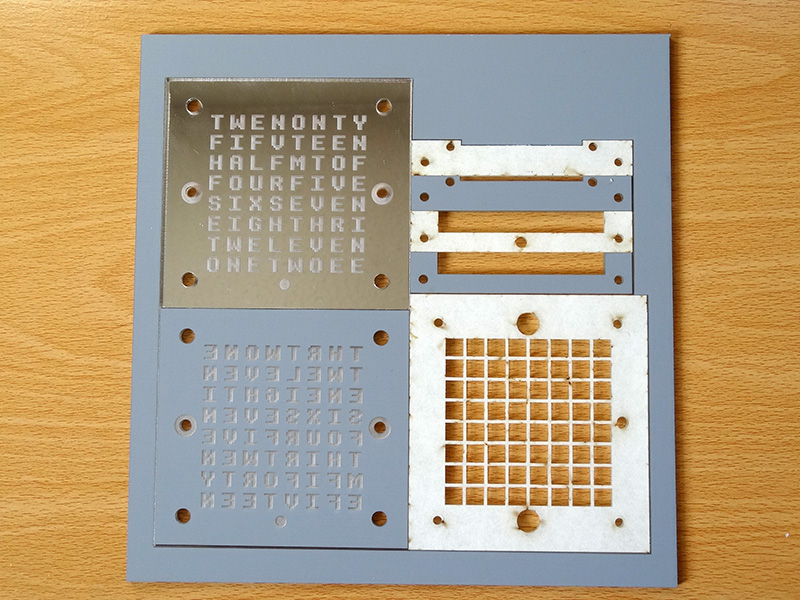
When designing the face plate, Mark had to determine how to make good-looking letter-shaped windows in something practical and attractive—and have the LEDs shine through them without too much spill-over to adjacent letters.
“I considered using a stencil font to cut through an opaque material,” he says. “I wondered about etching normal letters onto a transparent material, somehow carefully peeling off the etched-through protective backing leaving letter-shaped islands, spraying the exposed material with an opaque paint, then peeling off the remaining backing. Nothing seemed very appealing or practical. Then I noticed that a mirror acrylic was available. This was the answer I was looking for! It is opaque, but the laser can ablate the mirror coating off the back, leaving a translucent window. No need for a stencil font.”
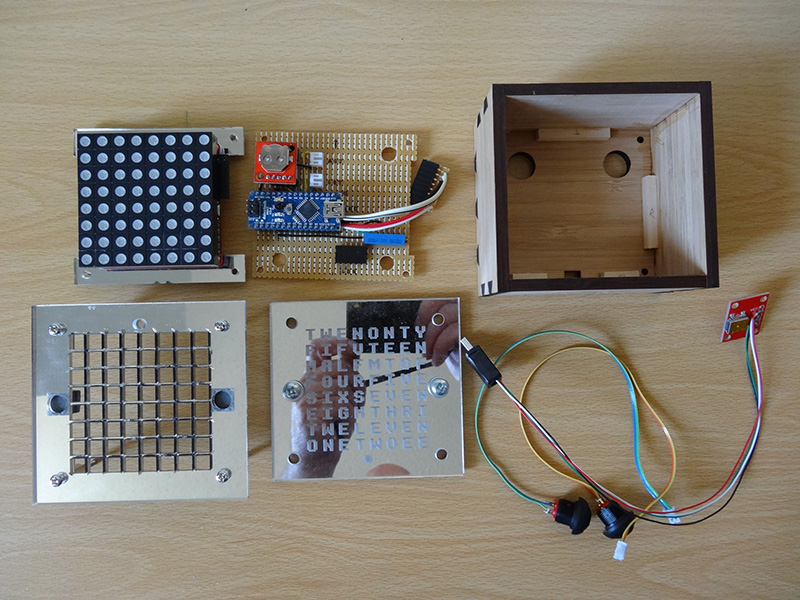
To construct the box, Mark says the whole thing sandwiches together with bolts running from the front and the back, with standoffs between.
To get the word configurations just right, Mark spent a lot of time playing around with the arrangement of the letters on an 8” x 8” grid. “It was an interesting and enjoyable challenge, a little like a reverse crossword puzzle,” he says.
The result was two designs. Both tell the time to the nearest five minutes with no AM/PM indicator. The first face shows the time as “minutes to hour” or “minutes of hour.” For example, 9:45 will read FIFTEEN TO TEN and 10:15 will read FIFTEEN OF TEN.
The second face simply shows the time as “hour minutes,” where 10:15 reads TEN FIFTEEN. “Rather than show the top of the hour as a bare TEN, there are options to show it as NONE OF TEN and TEN EVEN, respectively,” Mark explains. “Also TEN FIVE looks odd, so I threw in an ‘O’ for TEN O FIVE.”
The latter was a last minute thing, he notes.

Because the words are sometimes adjacent, Marks says the design works best with colored LEDs to distinguish them.
“I am happy with the two faces because they are complete (all the hours, all the five-minute intervals), they fill the grid (there’s one unused location in both grids, occupied by an ‘M’) and they’re quirky (TWEN TY etc.),” he says.
Since he couldn’t decide which face plate he liked better, he toyed with the idea of making two clocks. “In the end, I decided to make the face interchangeable,” he explains. “The face plates snap onto the front of the enclosure and are held in place by magnets. A chorded button-press toggles the display mode.”
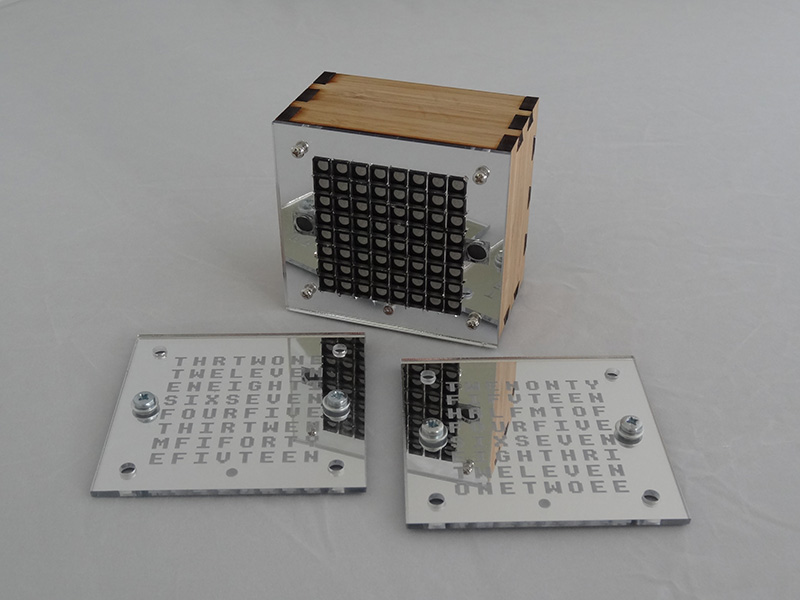
You may have noticed that the clock enclosure has dovetail joints. Keep in mind that dovetail joints can’t be achieved straight off the laser because the laser make straight perpendicular cuts and dovetail joints are angled. Thus, this design required some hand-work to get the desired finish.
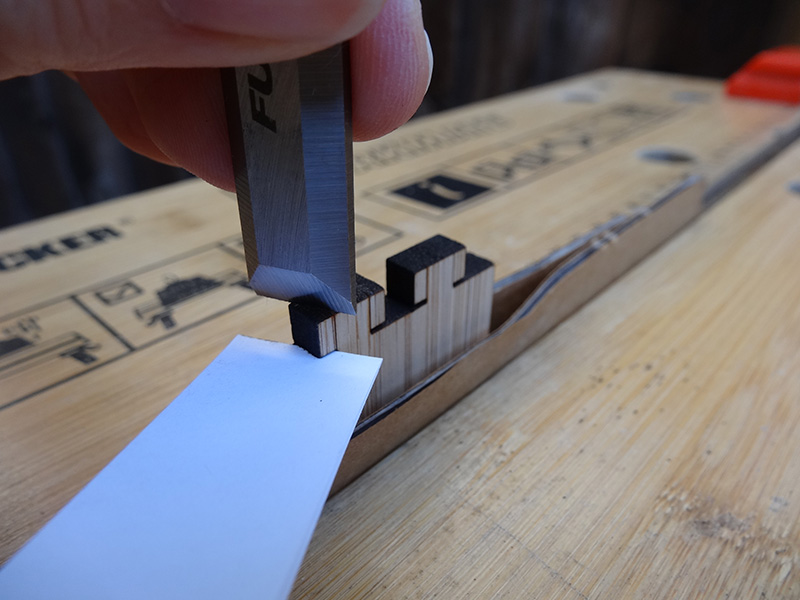
Mark designed the laser cut tail and notched pin, then he used a chisel/blade to slice a triangular piece off the pin along the grain in order to create the proper dovetail shape.
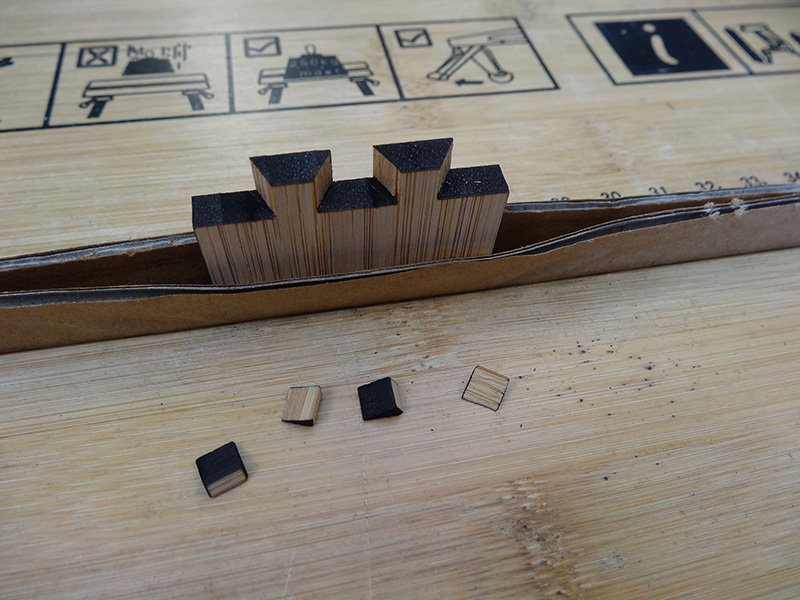
Since Mark is only building his clocks in low quantities, spending the extra time to hand-finish dovetail joints is worth the effort. If making a larger quantity to sell, however, this kind of hand finishing could be too time consuming (and thus eat away all the profits) or it could make the price more than the market will bear (if the extra time is built into the overall costs).
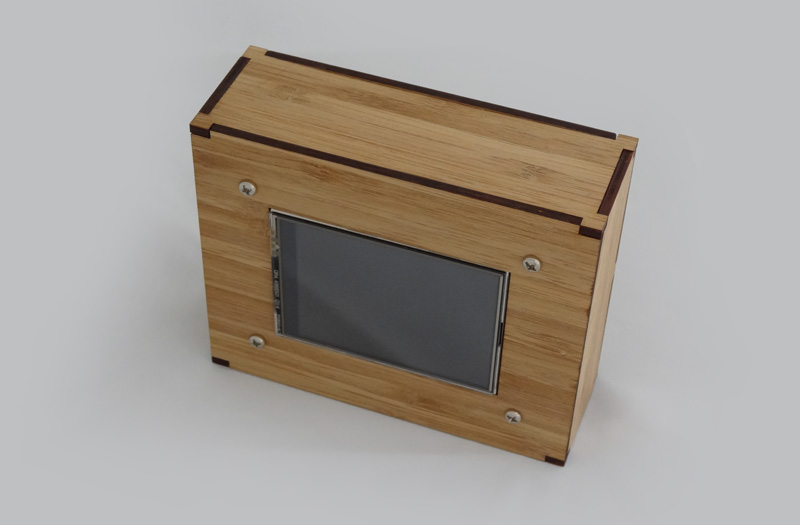
An alternative? Traditional tab joints like the ones shown below. They may not have the aesthetic appeal of dovetail joints, but they are just as functional and much less expensive (in terms of time = money), which is an important consideration if you’re making a product to sell.
Creating Curved Electronics Cases
One of Mark’s latest projects is a clock that tells the time in Roman numerals. While the electronic display itself was a challenge (we’ll get to that in a minute), the enclosure design was of significant importance to the project. “I wanted to break with the common square look of laser-cut enclosures and create a curved one by layering,” he says.
Rather than using solid flat pieces to create each side, he designed a set of seven layered pieces that fit together kind of like a puzzle box. It’s a smart design, especially because each of the pieces is properly nested to take full advantage of shared cut lines and utilize the complete material sheet.
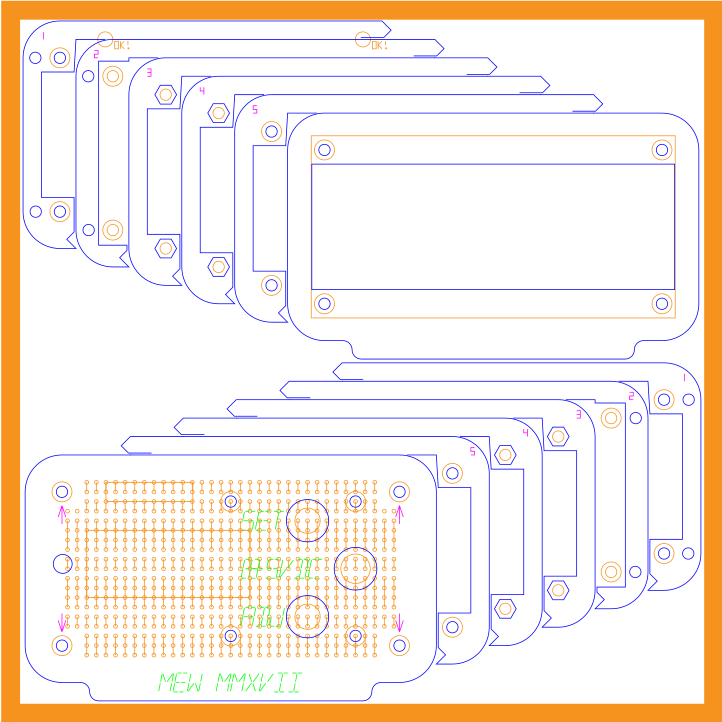
“In the course of packing parts into the template, I shared some common cuts to save space and cost,” he says. “I found some parts were marred at T-intersections where the vertical cut would encroach slightly into the adjacent part. I solved this by not quite completing some cuts, leaving a tiny gap to break off.”
Using 6mm black acrylic, Mark was able to not only maximize the interior space in the enclosure but also match the front face of the LED module. Here’s what the individual pieces look like once laser cut.
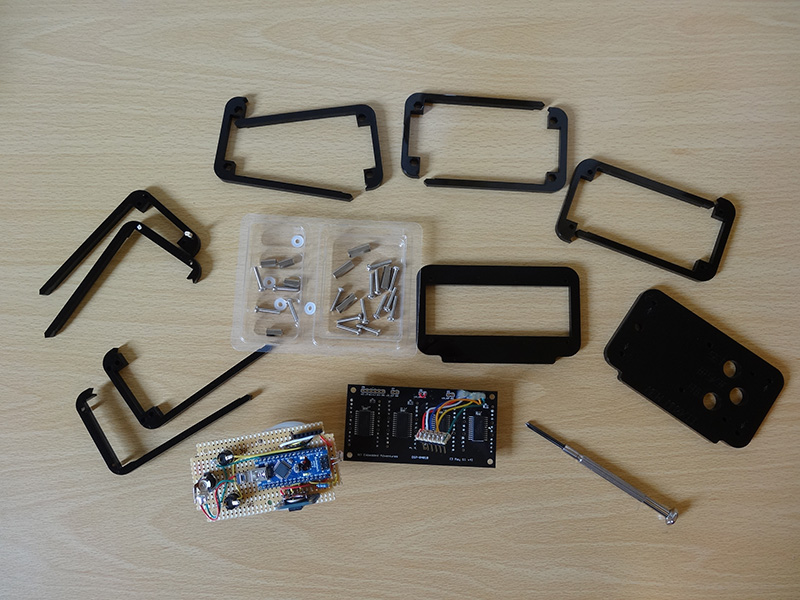
Keep in mind that once assembled, there is an obvious part line with this construction configuration. This is neither good nor bad, just something to be aware of when prioritizing cost/material/finish.
Other than the enclosure design, the primary challenge with the project was how to show the time, which Mark decided to base around a four-digit 16-segment display. “I gave myself three of the four digits for the hour,” he says, “with numerals such as VIII shown by squeezing two I’s into a single 16-segment character.”
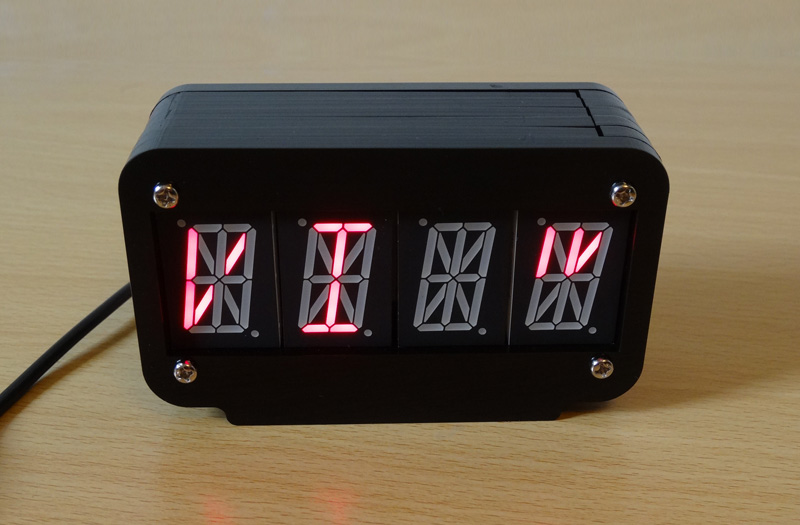
Mark admits the minutes were a bit trickier. “I toyed with a number of schemes,” he says, “but in the end settled on a half-height Roman numeral indication of the ‘tens’ of minutes with the additional trick of placing minutes in the lower part of the character during the ‘bottom’ of the ten-minute period and in the upper part of the character during the ‘top’ of the ten minutes. Thus the time is shown to the nearest five minutes.”
Making Time For What You Love
Since time waits for no one, it’s important to make time to do what you love. Why does Mark use laser cutting as his creative outlet? “I just love the precision of laser cut design,” he says. “It would be impossible for me to create the quality of the final product myself.”
Whether you’re making analog or digital clocks, or if you found inspiration in the post for how to incorporate a unique enclosure into your next engineering build, spend your time wisely—but also have some laughs. Sure, we take making serious but it should also be seriously fun.
Just think of Flavor Flav and how he began wearing a clock as a necklace. It all started as a joke, but it eventually became an important part of his brand image, differentiated him from his musical competition and served a more serious purpose.
“The reason why I wear this clock is because it represents time being the most important element in our life,” he said in this interview. “Time can’t afford to be wasted, but not only that, God only gave us one life. Each minute we live, we got to live each second to our best value. Time brought us up in here, and time can also take us out.”
The clock is ticking. What are you going to
make today?
To keep up with Mark’s projects, check him out on Flickr. Get the complete details on the word clock build here.
For more behind the scenes in the world of clock making, don’t miss these spotlights on the Lixie clock, bike chain clock, Nixie Tube clock and Magiclock. Then checkout this clock making tutorial to get started.
And for more inspiration on electronics enclosures, check out these 50 laser cut engineering projects to build a business on.
