How To Use Inkscape Like A Pro
Want to design products but don’t have the budget for expensive software? Or do you simply like the ethos and flexibility of open source software? Inkscape, a professional vector graphics editor for Windows, Mac OS X and Linux, is a great tool you can use to design products for any number of applications, including laser cutting. And the best part? It’s open source—and FREE.
When designing products, vector graphics are critical because they maintain quality when saved and scaled. Additionally, software that creates vector paths can export both visual artwork and files to be machined. This kind of multitasking is awesome!
While Inkscape is a good alternative to paid programs such as Adobe Illustrator, it may require a bit more time to learn than its counterpart. To help you feel comfortable understanding Inkscape basics, we’ve created this guide to walk you through how to use Inkscape for design projects.
To get started, download Inkscape here so you can click along throughout all the vector tutorials. Let’s get started—and have some fun!
Raster (Bitmap) Images Vs Vector Graphics
To approach projects most efficiently, it’s important to understand the types of files that different softwares make. Raster (bitmap) images are comprised of many dots called pixels that are unable to scale because they distort when made larger. On the other hand, vector graphics are a calculation of points with lines connecting the points. This gives vector images the ability to scale to any size without losing clarity (resolution). And the lines can be followed by machines, such as laser cutters, that need coordinates to operate.

Vector files should be the base files for any image you create. And if you need raster images later (usually for web purposes), you can always export one from the master vector file.
However, it’s not possible to save a vector design from a raster image. Why? If a JPEG is resaved as an SVG, it will not have any vector information embedded in the design.
But what if the only artwork you have is JPEG and you need vector art? Don’t worry. There are ways to make and convert images to vector paths. Keep reading!
Converting JPG To Vector Images (Tracing Bitmaps)
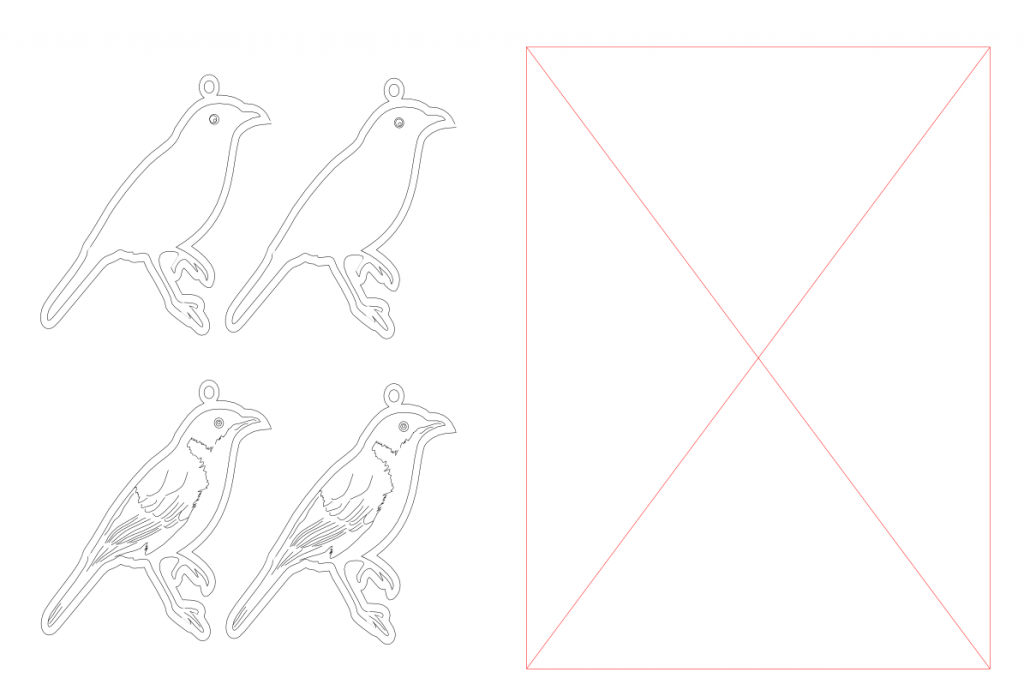
Need to vectorize an image? You will if laser cutting your designs. Drawing these designs using graphics software tools will get the cleanest results. For brands or businesses including graphics or logos in designs, these files should be created in a vector form (i.e. the master design file).
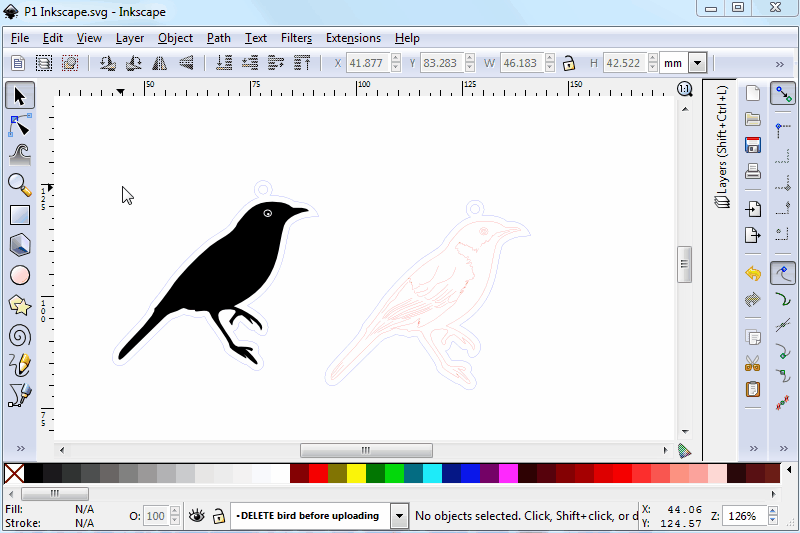
To see what vector paths are present in an Inscape file, view the design in outline mode. You’ll see all the vector paths in black outlines and any bitmaps (JPGS) as blank squares.
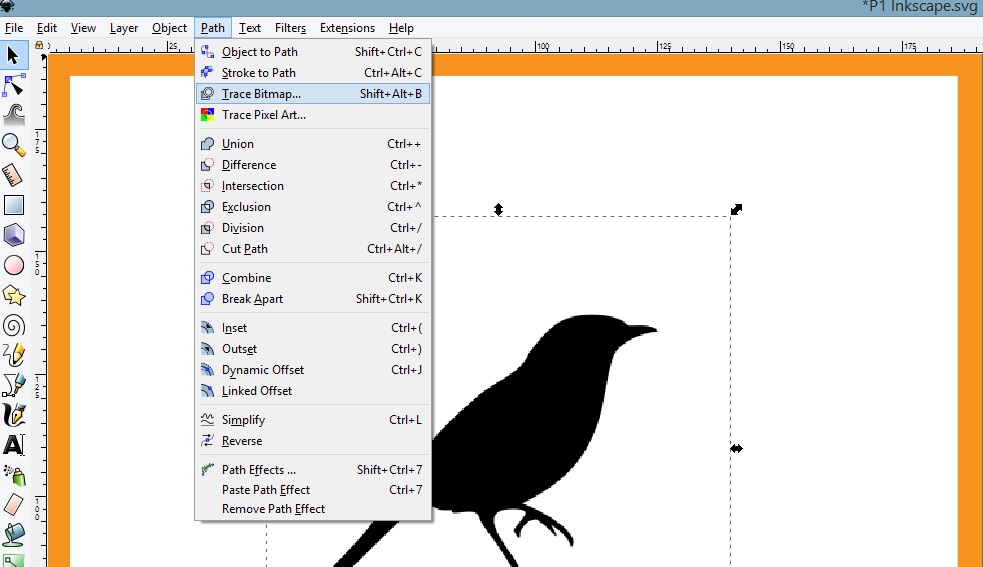
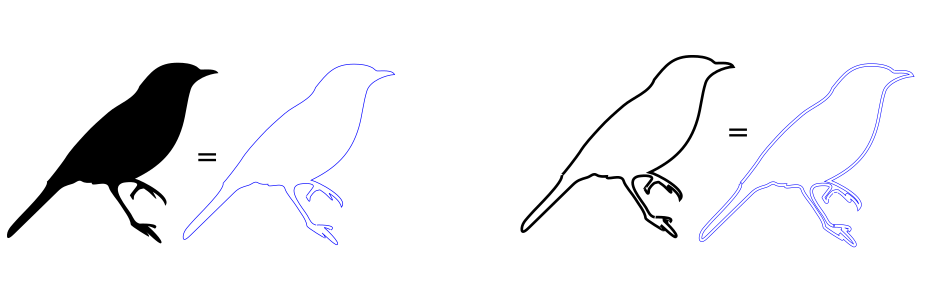
If you have a raster/bitmap image, such as a JPEG, Inkscape has a helpful “Trace Bitmap” tool that automatically converts it to vectors. Start by selecting the inserted image and using the “Path > Trace Bitmap” window. There are several tracing options, so try out a few until you find the one you want.
You can also see how to use this tracing tool (works best for simple forms) on the Inkscape website. Keep in mind that larger images produce better results, as there is more information available to convert. Learn how to use it with this video (trace is about 5mins in):
Eliminating Double Lines
If you have traced an image that is made of lines instead of being a solid shape (think line drawing vs silhouette), the result is a second set of lines in your file. These must be removed. Why? Extra lines for laser cutting means more burning and higher making costs, and who wants to pay more? (We don’t!). To split up those two sets of lines use ‘Path > Break Apart’ then you can click on one of them to delete it.
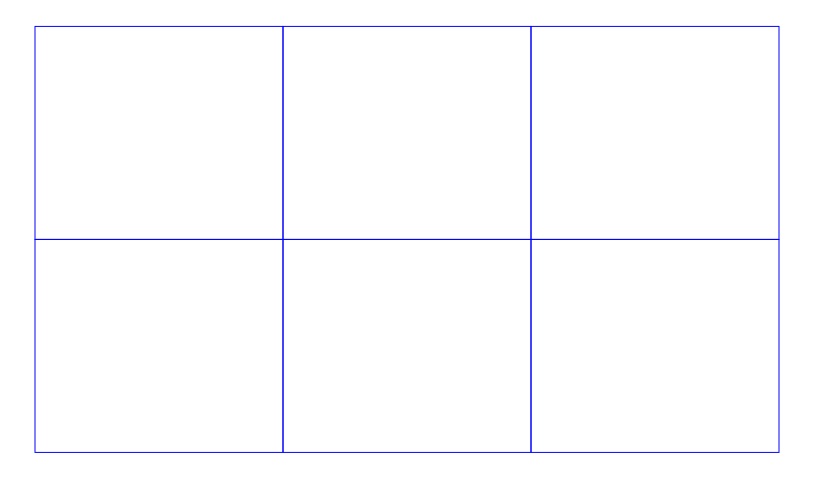
Double lines will also result if you place parts hard up against one another when laying out the design files. In this simplified example, the double lines of the rectangles are directly on top of one another. You’ll see these tend to look a little darker on screen. While sharing cutting lines is a good way to reduce laser cutting costs, you must remember to actually delete the extra lines to get the savings.
For a step-by-step instruction on how to remove extra lines from parts sharing lines, check out this additional Inkscape vector tutorials article.
Using Layers
To help you organize all the individual parts of your design, Inkscape uses layers. Objects are placed on a layer, then you can select and edit these objects according to the layer they are on.
This becomes especially useful when designs get more detailed, as you’ll find it increasingly difficult to select individual objects without accidentally clicking on something else.
You can make as many layers as you want and name them accordingly to help facilitate workflow. Or have some fun and entertain yourself with clever labels. This video tutorial shows how it works:
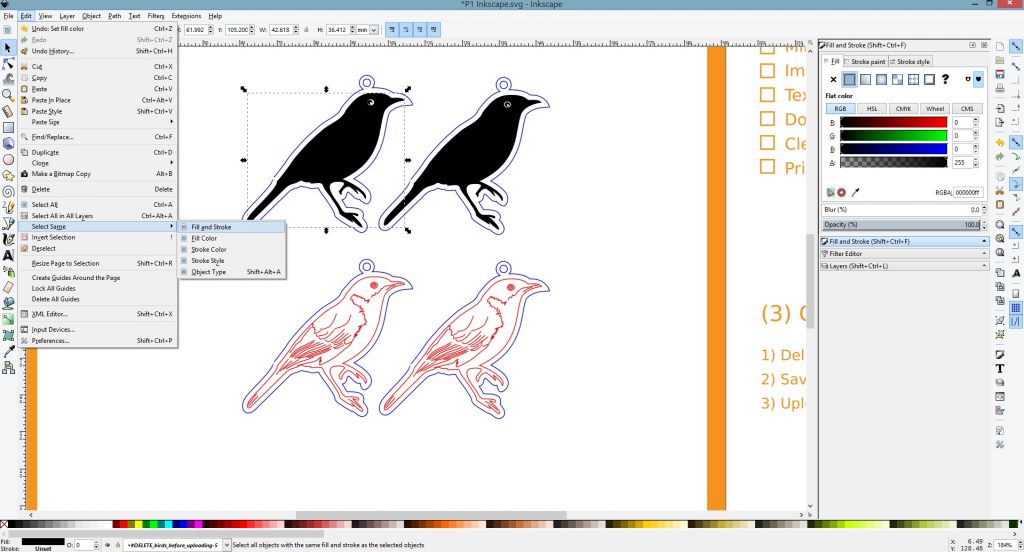
Selection Tool: Select Same
Ever need to select and edit multiple like objects within a design? Rather than using the arrow to individually click and select the parts, you can use a tool that will select all the similar parts to one clicked upon. This handy tool means you can select similar objects all at once, even if they are intertwined with other parts. What a time saver! Here’s how: “Edit > Select Same > Stroke/Fill/Etc.” You’ll need one of the more recent versions of Inkscape to do this, so you may need to upgrade if you can’t see it.
Drawing Tools
When designing in Inkscape, you’ll most certainly use the basic drawing and editing tools. To have all the handy features available immediately on screen, activate them by clicking “View > Show/Hide.”
Drawing tools include functions such as selection tools, line and shape drawing options, and type/text tools. You can find Inkscape vector tutorials for all the basic tools here.
Using Inkscape Text Effects
Text can be manipulated and shaped in many ways to create graphic effect. Rather than trying to click and tweak all the paths by hand (which can be time consuming and inaccurate), use text effects to precisely adjust the lettering.
Drawing Text On Path
Want to curve text? Draw a shape to guide the form of the curve. Quite often a simple circle is all you’ll need, but you can also draw lines if the desired outcome is something more squiggly or asymmetric.
Once the shape is made, simply select the text and shape by clicking “Text > Put On Path” to get some interesting shapes. Check out these fun spirals on the Inkscape vector tutorials on Tav’s website.
Converting Fonts For Laser Cutting
To make sure your files are properly configured for laser cutting, any text used in the design file must be converted to paths. This allows the laser cutter to follow your design correctly, regardless of whether or not the font is installed.
It may sound hard, but it’s really easy. Just select the text and then choose “Path > Object to Path” from the top menu. Tip: You won’t be able to edit the text once you’ve done this step. So do it last, after spell check.
Ungrouping And Converting Paths For Laser Cutting
If designing for laser cutting, make sure all design paths are pure vectors without any Inkscape specific formatting or hidden colors. Some formatting will either impact the laser’s ability to recognize shapes to cut or the pieces might be arranged different than expected. Here is how to prevent funny things like this from happening.
Groups
Groups can mask settings, so don’t apply settings (such as colors) to groups. (Rather, settings should be applied to individual paths in order to actually change them.) The most straightforward way to ensure parts are all the right colors is to ungroup everything prior to applying setting such as colors: “Object > Ungroup.”
Combined Parts
Some times parts have been ‘combined’ rather than grouped meaning several paths are present, but you can’t select them separately to edit them. Use ‘Object > Break’ apart to split these up so you can get to editing them.
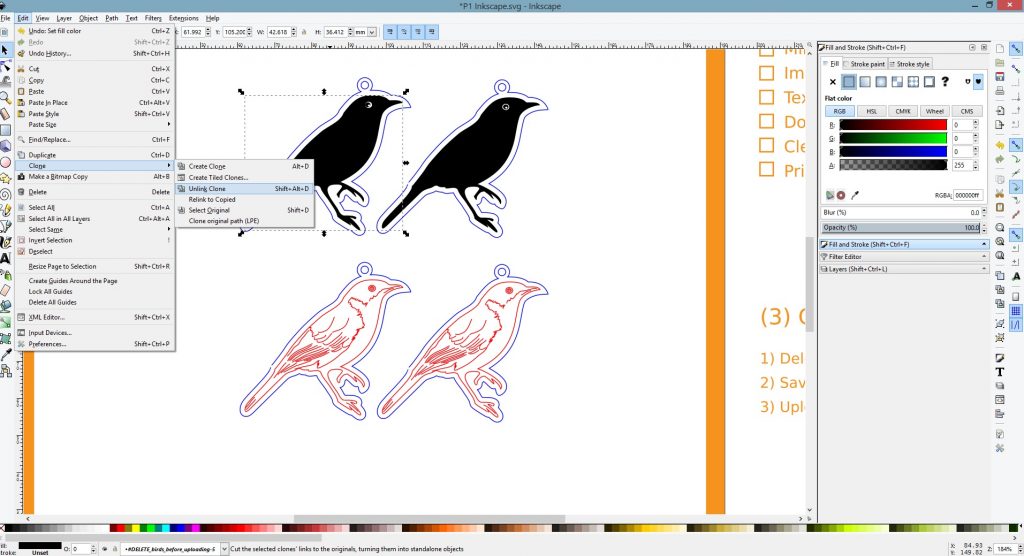
Clones
Once ungrouping/break up is done, different colors and strokes on paths might appear, or you may see “clone” in the parts description at the bottom of the screen. While clones are parts that have been duplicated, they don’t export well because they tend to disappear or loose orientation.
To make sure all parts are able to be properly exported, first ungroup and then click “Edit > Clone > Unlink Clone.” It may take several rounds of ungrouping and unlinking to catch them all.
General Conversion
The object-to-path tool is a good base tool to clear Inkscape-specific formatting that may impact proper exporting to other softwares. When creating laser cutting files, use this upon completing the design process to ensure accurate manufacturing.
Resizing And Cropping In Inkscape
When adjusting the size of objects in Inkscape, you have options. If your design will be laser cut, make sure to actually edit the vector paths and not just hide parts on screen. Additionally, for designs that must be a certain size when produced in real life, you can be quite specific by inputting numeric values rather than just clicking and eyeballing it. Here are some tips to get you started.
Resizing
The most frequently used Inkscape tool is the “Selector.” Click the topmost button (with the arrow) on the toolbar. Now you can select and resize objects by clicking on them. You can also use the numeric entry fields in the “Controls” bar (above the canvas) to set exact values for coordinates (X and Y) and size (W and H) of the selection.
Cropping
When cropping parts for laser cutting, use tools that actually remove the vectors rather than only mask them on screen. Masking happens with a clipping group, which looks nice on screen but doesn’t play well with lasers because the vectors are only covered rather than edited.
To double check what vector paths are actually present, view the design in outline mode: “View > Display Mode > Outline.”

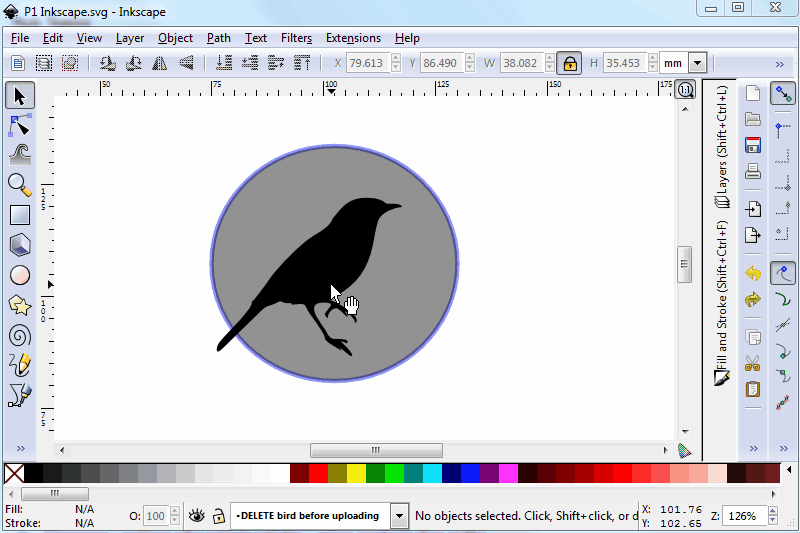
The best tool to crop objects is the “Path > Intersection” tool. This tools takes the overlapping sections of two paths and removes the rest, which is really handy if the object must fit perfectly into a box.
Inkscape Vector Tutorials For Joining Curves
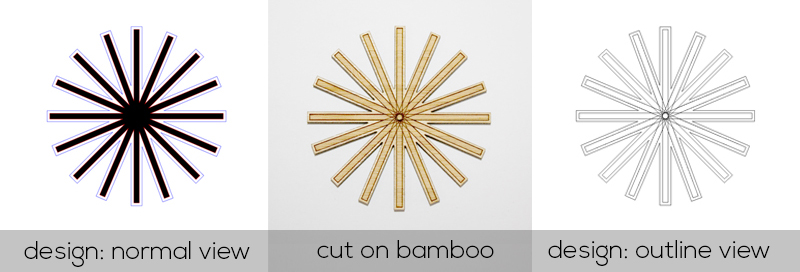
When joining paths and combining shapes, use the “Path” tools. When laser cutting, it’s important to actually combine curves rather than overlap them. Why? Even if you can’t see them on screen, any cutting or engraving lines that are hidden underneath other objects will still be cut.
To check what paths are present, view the design in outline mode. To see what this looks like, check out this example of some engraving lines that are hidden by black fills in normal view but still gets engraved when sent to the laser.
For more instructions on how to join parts to avoid this kind of issue, check out this video:
Making A Logo In Inkscape
One of the most common uses for software such as Inkscape is making vector logos. Why? Because logos should always be created in software that can produce vector paths, which allows the image to be scaled without losing resolution and looking all fuzzy. Vector logos can be used in any number of branding applications–including being used on laser cut products!
Usually the most memorable and effective logos are simple forms rather than being overly complicated. Constructing vector paths helps keep these forms simple and intentional. (For some vector logo inspiration, check out this post on 30 brilliant vector logo designs deconstructed.)
For a logo creation project, use the “Drawing” and “Path” tools examined above. For a really great guide for creating vector logos, check out in this video tutorial from designer Nick Saporito. (Don’t miss all the other Inkscape vector tutorials on his channel. Lots of good stuff there.)
Designing Made Easy
So what do you think? Is designing with Inkscape easier now that you’ve been through these vector tutorials? Hopefully you’re feeling more comfortable and confident using it to bring your awesome designs to life.
And one of the best parts? This software exists totally for free. Pretty darn cool. A big thumbs up to the community that has made and is always working on improving the software.
If you have any tips for how to use Inkscape like a pro, leave a comment below. Good luck on your Inkscape journey!
5 Comments
Hi
Can it be used for 3D printing ?
Does it’s output can be G-code or STL ??
Hi Orpak, this software is a 2D design program. For designing 3D models, you might like to try a free software called Sketchup. Hope that helps.
I’m hoping to get familiar with this software, but I’m not a fast learner so it will take me some time.
Don
Hi Don, sounds good! It can be time consuming to learn new software, but once you get the hang of it you can make awesome stuff. Looking forward to seeing your designs!
I will be working to learn this software.
Don
Comments are closed.