How To Save Material—And Money—By Formatting Your Designs With Nesting Optimization
Do you know about nesting? We’re not talking about those intricate avian structures birds call home (although it is surprisingly fascinating to watch a nest being built). Nor are we referring to “nesting” done by newlyweds or expectant parents (while this could be equally fascinating from the psychological perspective).
Our kind of nesting is all about creating a neat and tidy home for your laser cut designs so you can eliminate material waste—and save money.
What Is Nesting?
From a manufacturing perspective, nesting is about laying out cutting patterns to minimize raw material waste.
Top 10 Tips To Reduce Laser Cutting Costs
Everything you need to know to reduce your laser cutting costs.
Nesting for laser cutting builds on the concept so that the parts to be cut are not only positioned close together but also configured where there can be shared cutting lines on parts that have parallel lines.
Why Does Nesting Matter For Your Laser Cutting Project?
No matter what kind of maker you are, you can use nesting as a tool to be able to make more things, save more money and generate more profit.
Perhaps you are a designer who wants to reduce making costs and waste less material. Or maybe you sell your laser cut designs on Etsy or are launching a product via Kickstarter. Being able to lower the per-unit cost increases your profit.
What about for businesses that laser cut custom promotional products? Nesting allows you to maximize your swag budget and have higher ROI per giveaway.
Even casual makers can benefit from nesting. Not only can you get more for your money and out of your materials, but with the saved space you could also add another product. We often see designs come through where customers add a personalized card in the extra space made available when the pieces are properly nested.
Because nesting optimization maximizes overall material usage, there’s less waste. Nobody likes to be wasteful! And every little bit of material that isn’t wasted is better for the environment.
How Can Nesting Save You Money?
When laser cutting, the price you pay is mainly determined by two things:
1. Material Costs
Whether you cut one piece or one hundred, you buy the entire sheet of material. If you configure the design to get more parts on the sheet, then cost per piece is reduced. Because nesting parts fits more pieces into a more compact space, you may also be able to use a smaller materials sheet—saving you money on the materials cost. Overall, part nesting allows you to maximize the output per sheet and get more for your money.
2. Machine Costs
Machine Time = Making Costs. The more time it takes to cut a design, the higher the price. Keeping pieces together reduces the travel time between parts, making the cutting process quicker. If the design includes straight parallel lines that can be shared, then this line only has to be cut once and not twice. Nesting allows you to be more efficient with how the machine laser cuts the design. More Efficient = More Savings.
How To Use Nesting Like A Pro
Laying out the pieces for your laser cut designs is a bit art and a bit science. It’s kind of like building a house. There are many different configurations that will work. But which is the most optimal and cost effective?
You can nest manually or you can employ automated nesting software tools (either free or paid) to assist with the task. Let’s take a look at the options so you can decide what’s right for your next project.
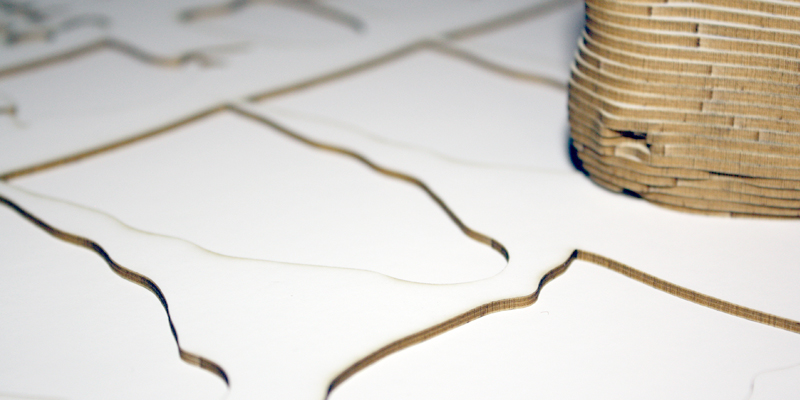
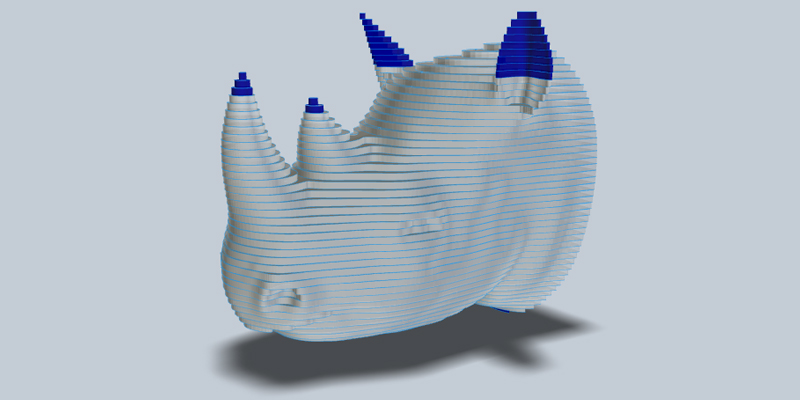
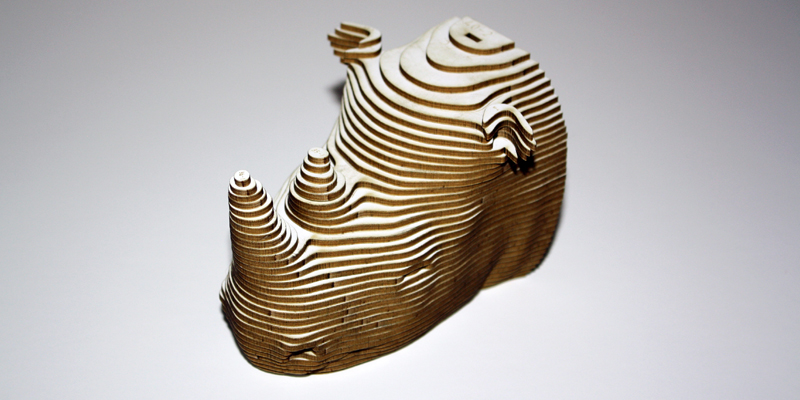
To make it fun, let’s use this super sweet rhino design made from laser cut stacked slices of newly introduced white mat board as an example throughout.
MANUAL NESTING
As the name suggests, manual nesting means that you edit the design by moving parts around by hand until you get the pieces to fit in the least amount of space. It’s a bit of trial and error, manually shifting the pieces until they look just right.
By incorporating a nesting strategy from the very beginning of the design process, you can be very intentional in your placement to maximize opportunities for shared lines, etc.
Manual nesting is most appropriate for simple designs with straight lines as well as when you are cutting multiples of the same shape that can be turned into a grid.
For example, look at how much more efficient the configuration can be with these hexagons:
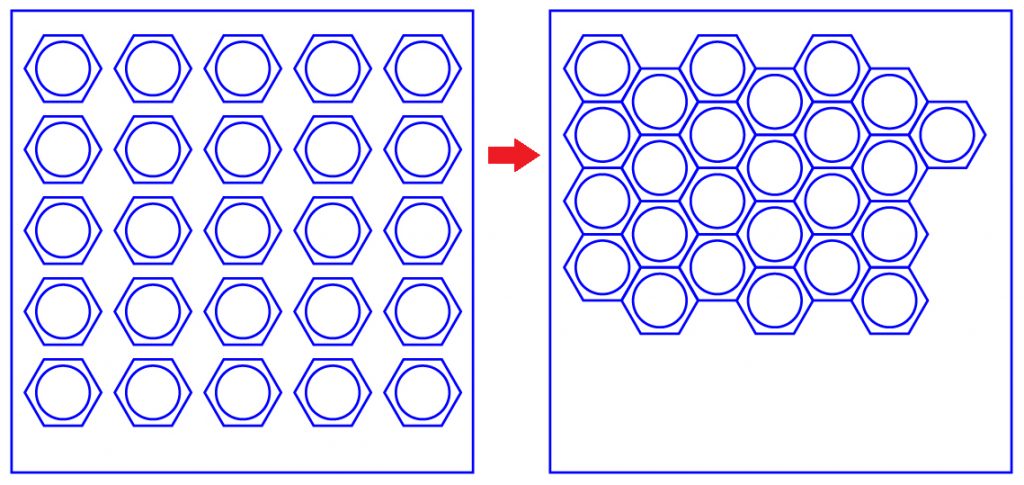
By grouping them together and sharing cut lines, you can get more shapes per sheet, increasing your output and reducing your unit cost.
Patterns such as these hexagons are visually intuitive and rather simple, so an automated nesting tool isn’t necessary. You can just as efficiently place them manually to achieve the same results.
But what about our rhino example? There are many more pieces of varying sizes and shapes. Here’s one way to manually configure pieces that looks pretty efficient:
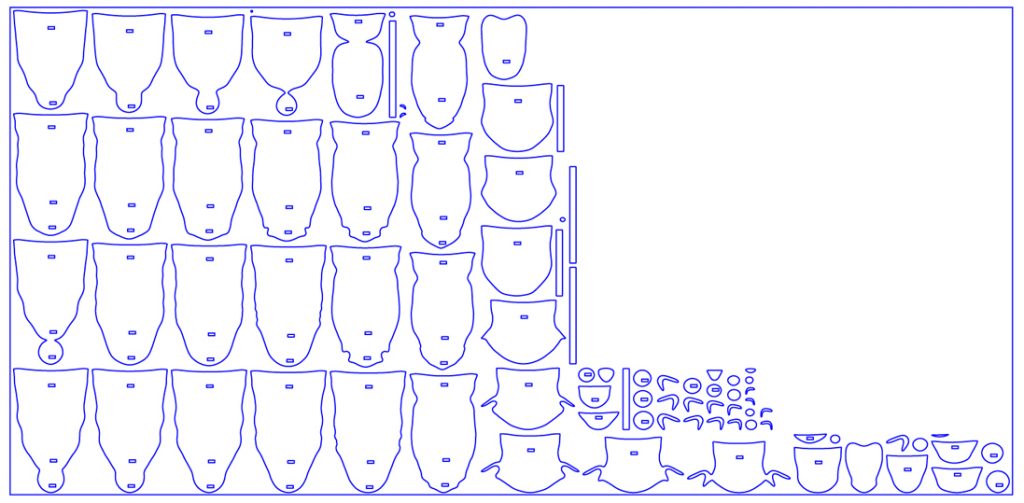
We’ll find out how good our manual nesting design is once we try the automated tools next…
Manual Nesting Pros:
* Free
* Ideal for simple designs and shared lines
Manual Nesting Cons:
* Can be time consuming
* The more complicated the design and/or the more pieces, the more complex the nesting becomes
* Depending on how you build the design, you may need to manually delete any doubled lines, another time consideration
* The computer is most likely better than you at Tetris
AUTOMATED NESTING
Automated nesting tools are generally much faster than manual nesting, and the computer algorithms are typically better at configuring the pieces in the most efficient way. They can rotate the pieces getting them to fit together with the minimum amount of material waste, which saves you the most money when laser cutting.
These online nesting tools also offer more features for managing designs. This makes it easy to upload a design file and have the computer quickly arrange the pieces onto a chosen material sheet size. Depending on how robust the nesting software is, many offer additional services for managing files and combining parts from multiple files together. For example software’s such as Sigmanest are specifically designed to deal with multiple types of machines for industrial users.
While it is fast and easy to make multiple layouts with automated nesting tools, keep in mind that laser cutters don’t necessarily cut sequentially where logically it seems they should. Sometimes the lasers will travel to the other side of the material for the next line despite other linework in closer proximity.
Due to the slight unpredictability of the cutting order, it can be helpful to upload several slightly differently nested files. Sometimes how the parts are placed next to one another might save cutting time and money. The good news is that creating different versions of these nested designs is as easy as a click of a button with automated tools.
SVGnest – Free Nesting Software
SVGnest is a vector-based, online nesting tool to optimize laser cut layouts. The geometry-driven, genetic algorithm works by grouping all of the elements within a defined area, then it finds the best fit by first setting the largest shapes and subsequently placing the smaller objects around them.
As one reviewer notes in this previous post, “It gets really interesting when there are many design elements and also when the objects to be sorted are all of a similar size.”
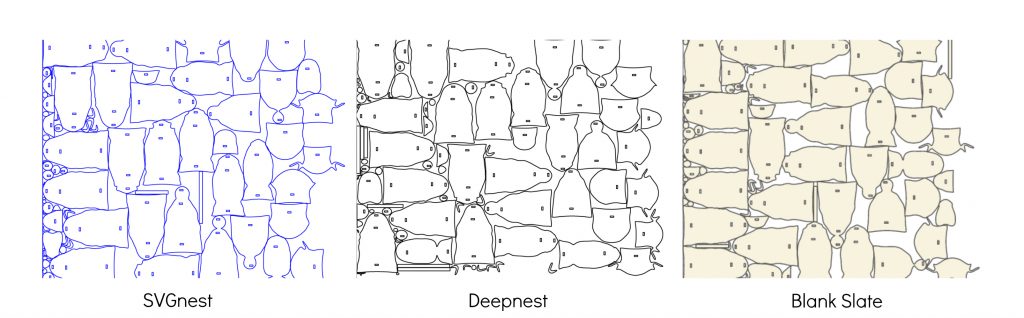
So how does our manual layout of rhino pieces above compare to the configuration SVGnest computes?
The layout is much different—and more efficient—than our original manually nested file. You can see how the larger pieces were arranged left to right, then the smaller piece added in where they fit best. The resulting layout definitely has less material waste than the manually nested configuration.
The drawback with this tool is that you have less options when it comes to adding parts from files together and you have to upload individual files with an object the same size as your chosen material each time.
SVGnet Pros
* Free
* No account necessary to use tool
* Simple to use
SVGnet Cons
* Only imports and exports SVG files
* No options
* No ability to add multiple parts from different files
* File must contain separate box the size of your intended materials sheet
Deepnest – Paid Nesting Software
Deepnest employs a part-layout engine with part-in-part placement to build nested files specifically for laser cutting. It utilizes an online interface combined with software downloaded to your desktop. Because most of the work occurs in the desktop nesting software, there is no waiting for the next page to load as with pure online tools. Thus, it’s feels a bit smoother to use.
And since it is based on a credit system of payment, it is affordable to use whether you need occasional nesting as a hobbyist or maker, have light use in a workshop or makerspace environment, or need unlimited nesting for production shops and enterprise customers.
To get started, download the software (Windows, Mac or Linux) using this special offer for Ponoko makers.
Next, import your file. You’ll see all the parts and their respective dimensions on the left. Select them and add any multiples of each part to be nested.
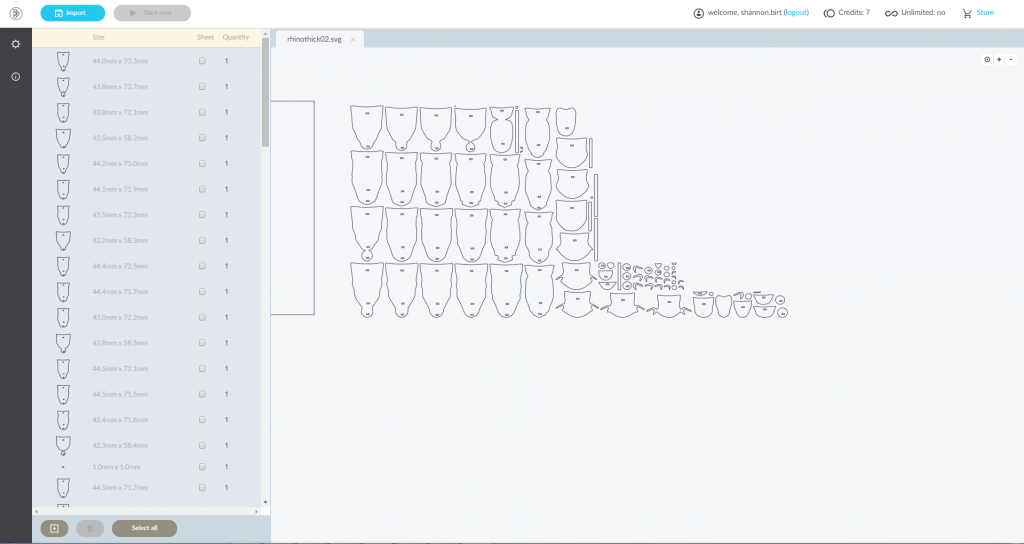
You’ll also want to create a part in your file that is the size of the material sheet. Having an object the size of the template ensures the scale is correct after export. While it is possible to create the sheet size in the software, including it in the file upload allows the scale to easily be fixed if necessary.
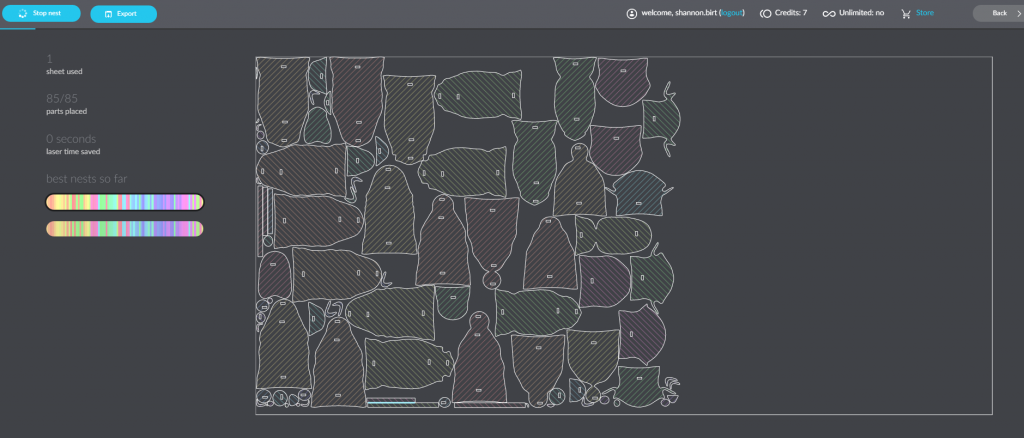
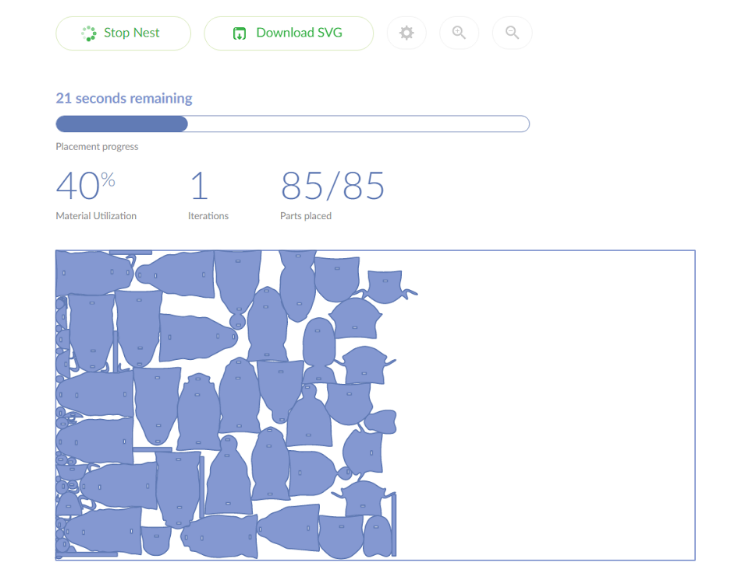
Mark this largest part as your sheet, then hit start. Deepnest will continue to search for better solutions until you hit stop.
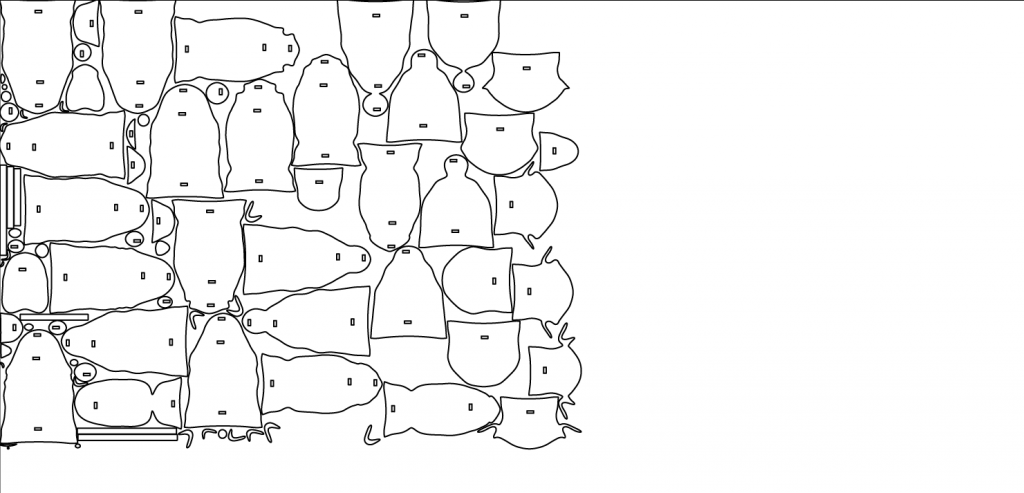
How does our rhino file look nested with Deepnest? Check it out:
Of the three automated tools tested, this one had the most enjoyable user interface. Some may feel like downloading nesting software to the desktop is a drawback, but not having to wait for pages to load like with an online-based nesting tool made the entire process much smoother.
The drawback was difficulty keeping the scale accurate, which was corrected once a piece this size of the material sheet was added. But this took some additional time to figure out. The tool does delete most of the double lines, but the system isn’t perfect. So some additional time was required to address this as well.
Deepnest Pros
* Designed for laser cutters
* User-friendly interface
* Ability to select individual objects and place them multiple times in the nested file
* Easy-to-use options for changing space tolerances between pieces
* Accepts SVG, DXF and CDR files
* Exports to both SVG and DXF
Deepnest Cons
* While software runs on the desktop (a pro for us), user must be logged in online to nest
* Requires additional post processing to get files Ponoko ready
* Can be difficult to keep the scale correct (troubleshoot this by creating a piece that is the size of the material sheet as described above)
* Doesn’t perfectly merge common lines so the laser doesn’t cut the same path twice
Deepnest Special Offer
Want to give Deepnest a try? They’re giving Ponoko makers 10 free credits per account. 1 credit = 1 nest. Here’s your special link to sign up with your email/google account: http://deepnest.io/supersecretponokopromo/
Blank Slate – Paid Nesting Software
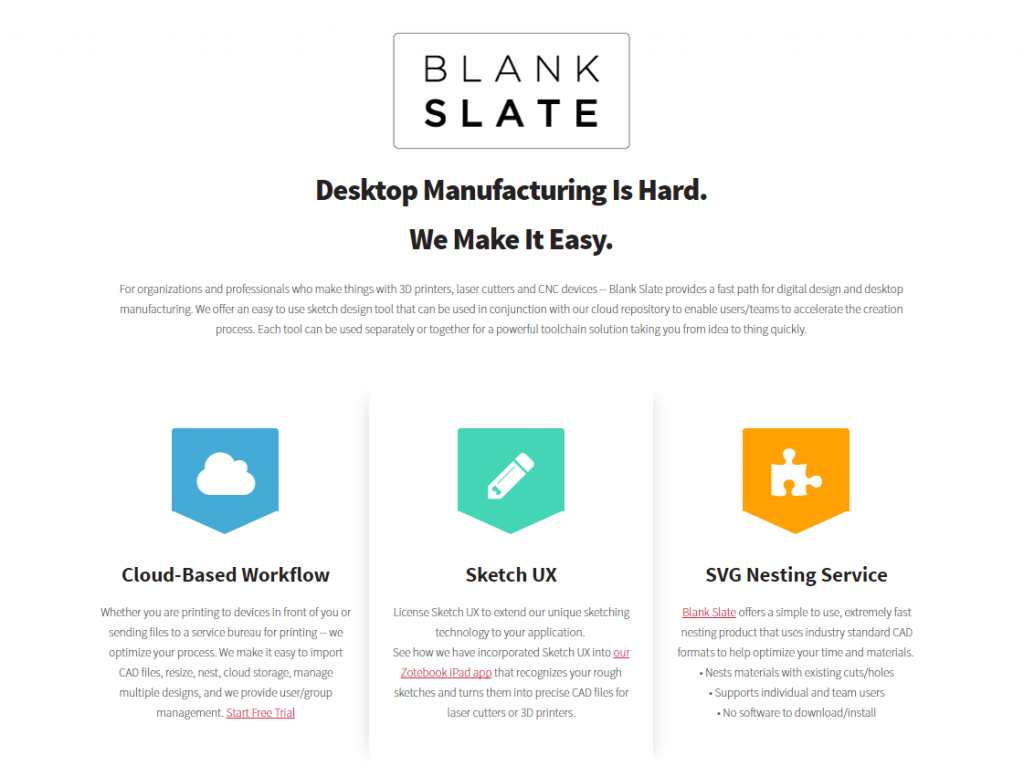
Blank Slate is a web-based nesting service for organizations and professionals who make custom products with 3D printers, CNC devices and laser cutters. The online nesting tool uses industry standard CAD formats to help optimize time and materials without the need to download/install software. A sketch design tool and cloud-based design storage tool are also offered. Each tool can be used separately or together.
As a web-based collaboration service, Blank Slate offers users (individuals or teams) the ability to create and manage design files, collaborate, share revisions and address common toolchain issues. You can keep designs in the cloud for next time, share them with others and type in the number of duplicates you would like, making this service ideal for people who want to produce multiple designs moving forward.
It is subscription based, with a $35 monthly fee that gives unlimited laser cutting and 3D printer file exports. The ongoing subscription allows you to nest as many files as you want and keep them in your design library. You can then mix and match files to get the final nesting layout desired.
Once you create an account, upload files (SVG, PDF or DXF) under the “My Designs” tab. The tool will try to clean up files for laser cutting, but there are limits to what it can do.
Next, prep materials and designs for nesting by clicking on the “Fabricate” tab. Enter in the size of material to be used and the quantity of each file to be made (yes, you can use multiple files!).
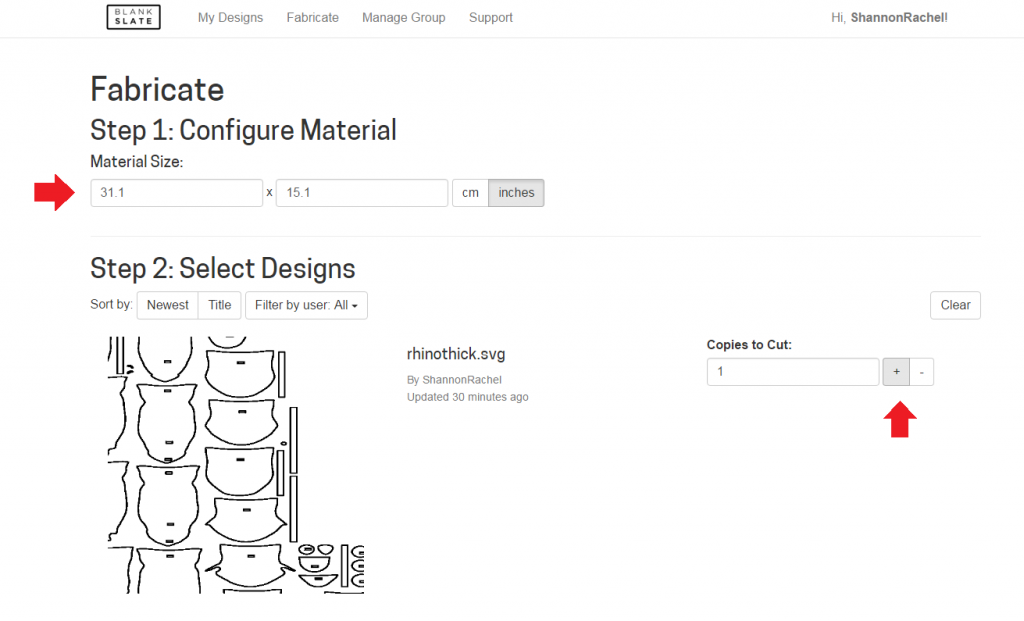
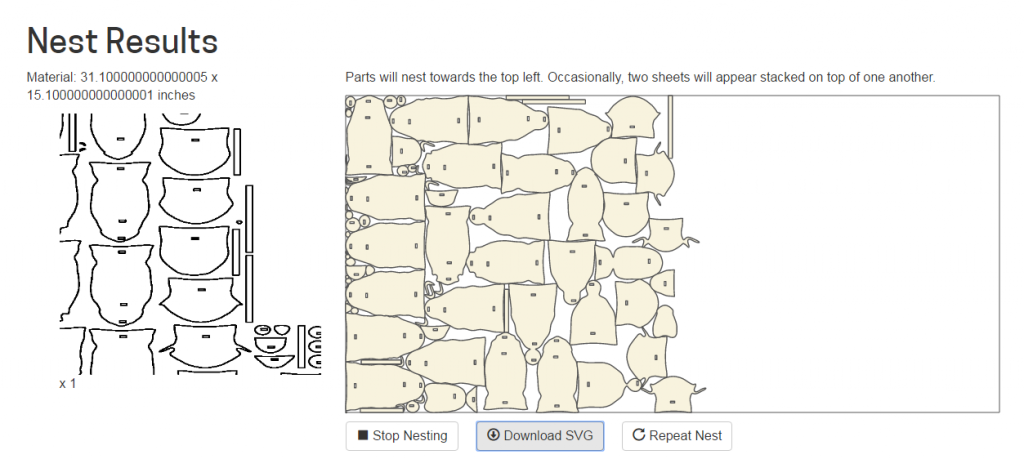
Press the “Click to Make Nested Cutfile” at the bottom, which will automatically optimize your collection of designs. The process will incrementally improve the layout, eventually timing out after 20 seconds. To see a different orientation, use the “Repeat Nest” button. This will reset the nesting algorithm to try a new approach.
Once the process is complete (you can stop at any point when you’re satisfied with the results), click the download button. How do you think this layout of our rhino design looks?
Blank Slate has the more robust set of tools of the nesting software systems we tested. The ability to add parts from multiple files/users is a real plus. But as with the other automated tools we tested, there can be double lines that aren’t deleted, which adds additional time in post processing.
Blank Slate Pros
* Input files are analyzed and are automatically corrected for structural problems that would prevent it from nesting and cutting properly
* Multiple file formats supported (Upload SVG, PDF or DXF files; Output – SVG)
* Centralized repository for designs with drag and drop interface
* Nests a collection of designs from different files and/or different users
* Nests materials with existing cuts/holes
* Easily configures number of copies of each design to be nested (rather than duplicating by hand in an endless copy-and-paste flurry)
* Includes feature to add spacing between parts, eliminating any burns where parts come too close together and the heat of the laser compounds
Blank Slate Cons
* Online-based system can have slow page loads
* Results are not always the optimal layout
* Not all double lines deleted
* Requires more post processing to get the file Ponoko ready
Blank Slate Special Offer
Want to give Blank Slate a try? Until April 30, 2017, the first 100 Ponoko makers to subscribe will receive one month free. Just go here and use the special code “PONOKO17” when signing up.
The Results: Manual Vs. Automated Nesting
While the final configuration for each of the automated nesting tools is slightly different, each one took the original manual nesting layout and reduced it to fit in half a materials sheet. Cool!
Since these take up half a materials sheet, now you have enough space to make two and start a little rhino family. Or if your home only has room for one rhino, see if the design fits on a smaller sheet size. Smaller sheets will reduce your material costs and possibly shipping costs, too.
After you have finalized the new SVG “cut file,” just pop it on a Ponoko template in your chosen software to bring your creation to life.
While all of our nesting files look great, the true test is how well they price out…
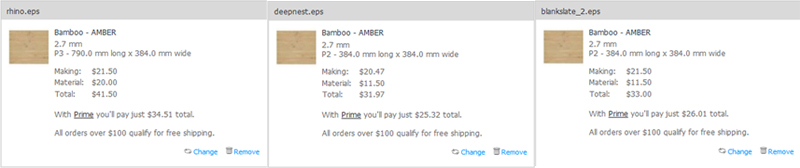
Since the SVGnest file had overlapping parts, it wasn’t possible to quote it. With this one out of the running, here’s how our manual nesting compared with the Deepnest and Blank Slate files.
To calculate costs, we quoted this project using amber bamboo. Making costs were the same between the manually nested file and Blank Slate. Deepnest came in $1.03 lower. But the real saving is found in the material cost. Materials for the manual nesting topped out at $20, where both automated nesting files only required $11.50 for materials.
Overall, Deepnest was the least expensive at $31.97, with Blank Slate coming in a close second at $33 and manual nesting was $41.50.
The best automated nesting solution generated a 23% cost saving over manual nesting 🙂
What did we learn from this nesting software experiment? As expected, the automated tools created a more efficient arrangement of parts that resulted in a significant cost savings when compared to manual nesting. On the other hand, we didn’t expect the additional post processing that would be necessary to get the files Ponoko ready.
So while the automated nesting tools were helpful in configuring the most efficient layout, they do have limitations. But they’re definitely tools worth having in your toolbox.
What’s the best nesting software? Which one should you use? Depends on your needs and personal preferences. Do you want simple or robust? What kind of interface do you prefer? Try out several services to get a feel for how they work. Upload the files for quoting to see if there are pricing differences in the layouts generated. Once you experiment with several designs in multiple tools, you’ll determine which nesting tool is the right fit for you.
Improve Your Nesting Process Even Further With These Tips
Want to become even more proficient with nesting your laser cut designs? Follow these tips:
* When choosing between manual and automatic nesting, consider overall time and monetary investment. If you are paying for a designer’s time, determine if savings in laser cutting and materials will offset the design fees.
* If you plan to make repeat orders of the same design, then it’s a good idea to prep the file as well as possible at the beginning to take advantage of the savings from nesting each time the product is made.
* Make sure the scale is correct. When taking files between nesting tools, be careful that the scale doesn’t get confused. SVGs are particularly susceptible because the units are dependent on the number of pixels/inch, which differs between nesting software programs. Including an object with a known size (such as the material sheet size) in your design is helpful for checking this before products are made.
* Eliminate any double lines. While automated nesting software tries to delete any doubled up lines, some are inevitably missed. Review the file carefully and remove any double lines manually.
* Eliminate overlapping parts. The automated nesting tools tend to have options for space allowance between parts so they don’t cut into one another. Using a minimum value a value of 1mm is recommended.
* Adjust colors. Some online nesting tools export line colors and thicknesses that need adjusting to match Ponoko requirements. Therefore, some manual adjustments may be necessary.
* Remove unnecessary complexities. If there are superfluous elements that no one will miss, eliminate them. With laser cutting, less is more.
* Review curves. Lasers slow down dramatically on curves. Try to reduce any curved sections without compromising the overall design. If completely straight lines aren’t an option, explore reducing the radius size as a compromise. See how one maker made these adjustments in the post How To Use Nesting Parts In Laser Cutting.
* Read Top Ten Ways To Reduce Laser Cutting Costs. This 10-part series addresses issues throughout the entire laser-cutting process such as digital prototyping, starting small, grouping parts, choosing material thicknesses and much more.
How Has Nesting Worked For You?
Fire away! We’d love to hear how you have minimized material waste, saved money and overall improved your design files by incorporating nesting parts into your process. Share your experience in the comments below.
Got screen shots of your files before and after nesting? We’d love to see them via @Ponoko on Twitter or give us a shout on Facebook.
And if you’re ready to make, log in and get to work!
5 Comments
I requested SVGnest support Ponoko files better by maintaining line and etch colors. Please consider dropping by (https://github.com/Jack000/SVGnest/issues/42) and giving it a thumbs up so the research group prioritizes it.
Or maybe try to pressure Ponoko into contributing to the repo. The blog post was helpful, but contributing to this open source project would be fantastic.
Hi Joseph,
It would be awesome if the colors were preserved. Fingers crossed this happens soon.
Author of SVGnest/Deepnest here
I just added this feature to SVGnest. The output should maintain the line colors and weights now.
PS. if you find parts are overlapping in SVGnest, try increasing the “space between parts” parameter and/or the “curve tolerance” parameter.
That’s great!
Thanks for letting us know Jack.
Hi,
Author of Otimize Nesting here:
I would like to mention that our nesting software is also subscription based, good for any maker.
Hope that this brings more choice options for you.
Thank you,
Igor
(www.otimizenesting.com)
Comments are closed.