Your Guide To Designing, Making & Selling Laser Cut Products
So, you want to create a product to sell. Where do you start?
While articles like this one from Entrepreneur offer a short-and-sweet view of the basics, there’s so much more that must be considered when you create a product to sell.
First you gotta have a GREAT idea. Then you gotta figure out how to make it. And sell it! Sure, it is possible to go from idea to prototype in one day. (See how one maker did it in this Fast Company article.) But that’s not realistic for most makers.
To do it right and have the most chance for success, it takes time to find the right idea and identify your target audience then determine how to manufacture a product and market it. And this guide has you covered.
Preparing For Sales: Your Four-Part Plan
Whether you’re new to selling your laser-cut products or an established maker who wants to increase your sales volume, this guide will walk you through the design and making process, help you set deadlines and be prepared for sales success.
Here’s how the plan is structured:
Part 1: Ideation, design and prototyping
Part 2: Making, packaging and pricing
Part 3: Promotion begins
Part 4: Promotion increases based on what’s working
How quickly you go through each part is up to you. Take your time and do one part per month in your spare time. Or if you’ve got a hot idea for a custom product that you need to start selling fast, blast through this process with one part per week!
However fast you go, we’ve established goals within each step to make the process easy—and fun! Let’s get started.
Part 1: Your Goals For Ideation, Design And Prototyping

Part 1 is all about determining what custom products to make that have the biggest chance of success. This is broken down into four goals:
Ideation
Decide what product will be a great seller for you. This includes brainstorming product ideas and doing market research.
Design
This is the fun part! You’ll also learn how to get the most out of your chosen materials and the making process.
Digital Prototyping
In this step, you get to turn your design into a profitable product, without spending a cent.
Physical Prototyping
Finish this part with a variety of low cost prototypes in your hands so you know exactly what the product will be before diving into larger production runs.
Let’s look at each of these goals in more detail.
Goal 1: Brainstorm Ideas
What products will be great sellers? Here’s how to find out.
To start, you must build a plan. This includes a clear idea of what the product is, who would love the product enough to buy it and how much you need to make and sell it for in order to turn a profit.
But before diving into the fun part of actually designing and making the product, you gotta do some basic research to understand what products are already on the market, who is buying them and how you can create something different and better that appeals to your target audience. So don’t skip this step. It’s vitally important to your sales success!
Identifying Your Ideal Buyer
Before we can talk product, it’s essential to identify your ideal buyer. What does this person need and how can you make something to fulfill this need. Consider demographics such as age, gender, where they live, religious and cultural preferences. Also think about psychographics such as interests and lifestyle.
Determining Your Laser Cut Products To Make And Sell
Now that you know who your ideal buyer is, it’s time to brainstorm and figure out the best-selling ideas for this target audience. Look at what’s hot at retail. Search online for the most popular ideas. See what other sellers are offering (so you can make something different). Read blogs in maker and small business spaces. Check out this post of laser cutting ideas as well as these how-to-make tutorials and guides.
Picasso said, “An idea is a point of departure and no more. As soon as you elaborate it, it becomes transformed by thought.” So once you’ve narrowed down the possibilities, the first step from the intangible to the tangible is to just get the idea out of your head in whatever form you can.
Grab a pencil and paper or get into your fave digital design program to rough out the idea. Work out the shape, dimensions and details. Record any describing words that accompany your sketch, such as color, texture, transparency, etc.
It’s also important to work out any other components required to complete your product. If you making an electronics panels/enclosures, for example, understanding the physical properties and size of these components is important because they’re likely to influence the overall design. The size of a bolt, for instance, will determine the size of the hole you need to design so the case can be permanently assembled.
With all this in mind, don’t feel like you must settle for the first design that you sketch out. When designing a product to sell, the more alternatives you examine, the stronger the idea you finally use will be.
Selecting Product Materials Your Buyers Will Love
This is where you get to unleash your creativity and think about bringing your product ever-closer to reality. The materials you choose for the laser-cut products you want to sell should not only make sense for the kind of product you’re making, but they should also align with your ideal buyer’s personality and expectations.
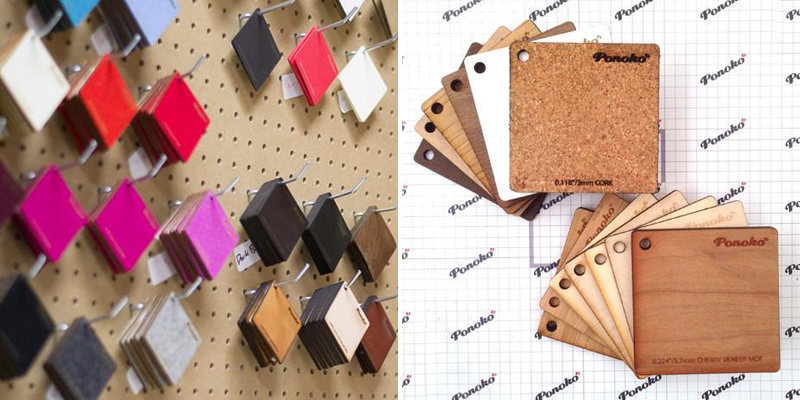
Before making your product, though, be sure to check out the thickness options and get a few $2 material samples so you can decide the materials your targeted buyer will like best.
Calculating Your Target Price, Cost & Profit
Figuring out what to charge for your product can be one of the more challenging aspects for any maker/seller. What’s the price point for comparable products? How do your products differ from these? Is there anything particularly special that could command a higher price?
How do you want to market your product? Do you want to sell a high volume of lower-cost products with a smaller profit margin? Or are you more interested in a lower sales volume of high-cost products with larger profit margins?
If you want to be able to sell wholesale, you need to make your product for ¼ of the retail price. This means a $6 retail product must cost $1.50 or less in total for making, materials and shipping of each item.
Goal 2: Design Your Product (The Fun Part)
Now that you have brainstormed what you want to make and have an understanding of who will buy it (and why), it’s time to prepare your first design for laser cutting.
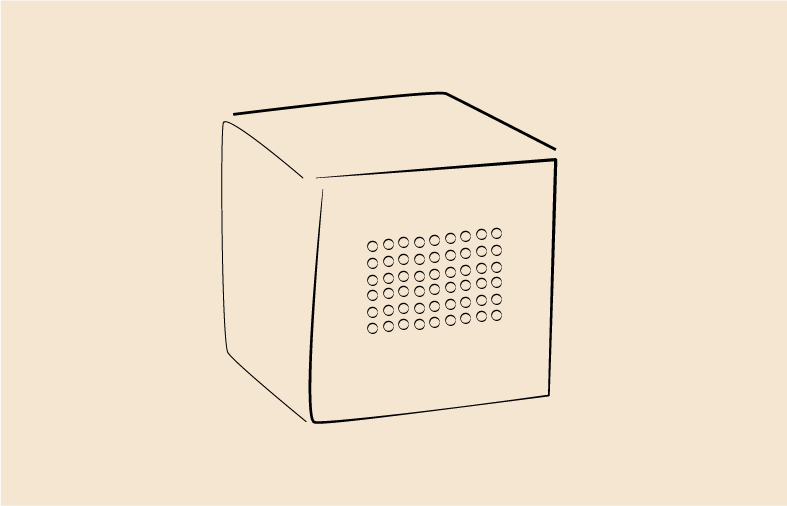
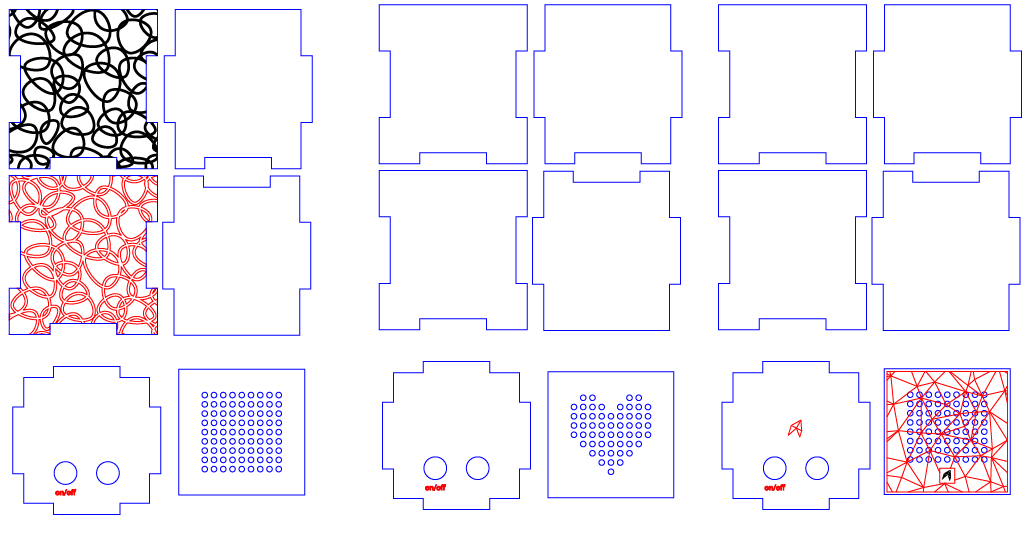
While you may typically create using 3D design software, laser cutters require vector artwork. Thus, you must export a file that is a simple, top-down drawing. It could look something like this:
 Read The Material Information
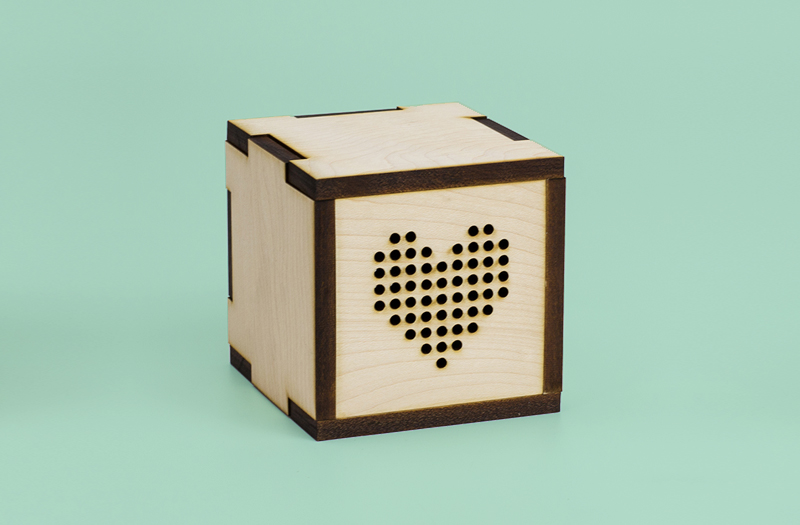
Check the available material sheet sizes and read the material information carefully so that you understand all the characteristics of the material and if any special accommodations must be made in your design. For instance, acrylic tends to have a thickness tolerance, so you want to allow for this in the overall design.
Keep It Simple
Good design is all about balance. Specifically to laser cutting and laser engraving, the balance is about detail. You need a certain amount of detail to create an aesthetically pleasing design. But too much detail makes the design overly busy—and expensive.
By keeping designs simple, the products are faster to cut and engrave, which means you get a better making price.
Goal 3: Digital Prototyping
Now that your conceptual idea has a digital design, can it actually turn into a profitable product? Let’s find out.
What’s amazing about digital prototyping is that you can upload designs for instant quotes—with no commitment to buying. When determining how to make products, this step is super important because you can upload numerous variations of your product designs and easily and immediately see what design choices will decrease costs.
The objective is to find a happy compromise between design aesthetics (look/feel) and efficient engineering (cost). For example, a retail price of $6 means the target production cost is $1.50 or less per unit in order to both sell wholesale and retail.
The First Quote
Upload your design to get a quote. The first quote is likely to be high, but don’t panic! Design adjustments can often drastically reduce the costs of making a part, as can volume.
Cost Saving Tip 1: Simplify The Design
Making cost is tied to the time the laser spends cutting and/or engraving the design. As such, complex and intricate shapes take longer to make. How can your design be simplified so that the laser isn’t slowed down by the detail? Having fewer lines, a smaller size and shared lines all help to reduce the cost.
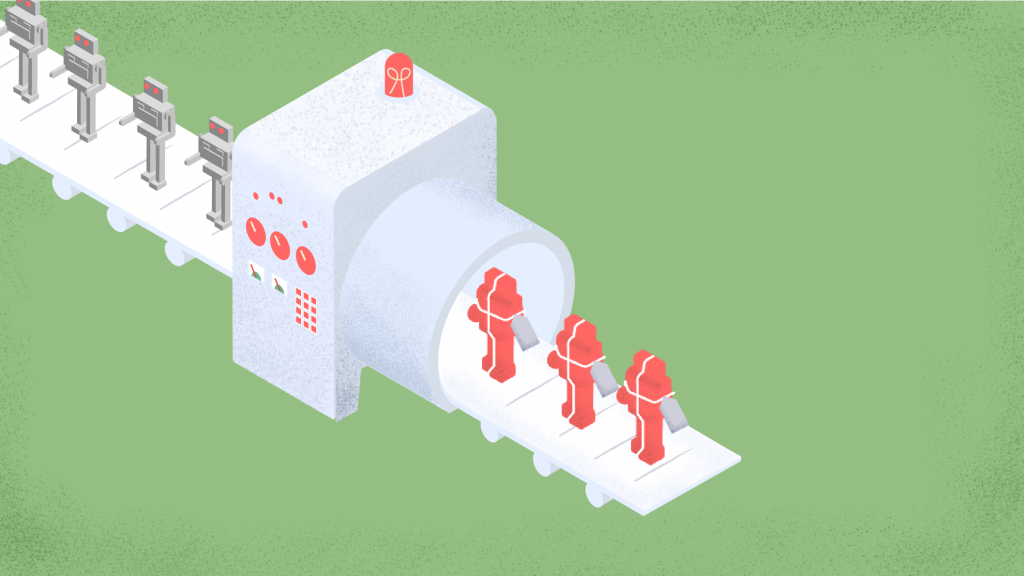
Cost Saving Tip 2: Nest Designs
From a manufacturing perspective, nesting is about laying out cutting patterns to minimize raw material waste. Nesting for laser cutting builds on the concept so that the parts to be cut are not only positioned close together but also configured where there can be shared cutting lines on parts that have parallel lines. No matter what kind of maker you are, you can use nesting as a tool to be able to make more things, save more money and generate more profit. (Learn more about how to nest your laser cut parts here.)
Cost Saving Tip 3: Better Volume Prices
It’s all about economies of scale: Make more = spend less per part. To see what you can save with your specific project, increase the quantity in your quote to see the difference.
Zero Cost Prototyping: Target Production Cost Surpassed
Digital prototyping with your Personal Factory can deliver the production cost you need to earn profit at competitive retail and wholesale pricing.
After spending $0 to prototype the design digitally, you can get the cost down to the level you need to make a profit.
Goal 4: Physical Prototyping
Once you have proven your idea can be profitable, can you turn it into a quality product that can compete for sales? Follow these steps to find out.
Print It Out On Paper
The first way to get a sense of what your product will be like is to print it out at 100% scale on paper. It’s easy—and it’s free. You’d be surprised how easy it is to misjudge scale on screen.
Laser Cut A Cardboard Proof
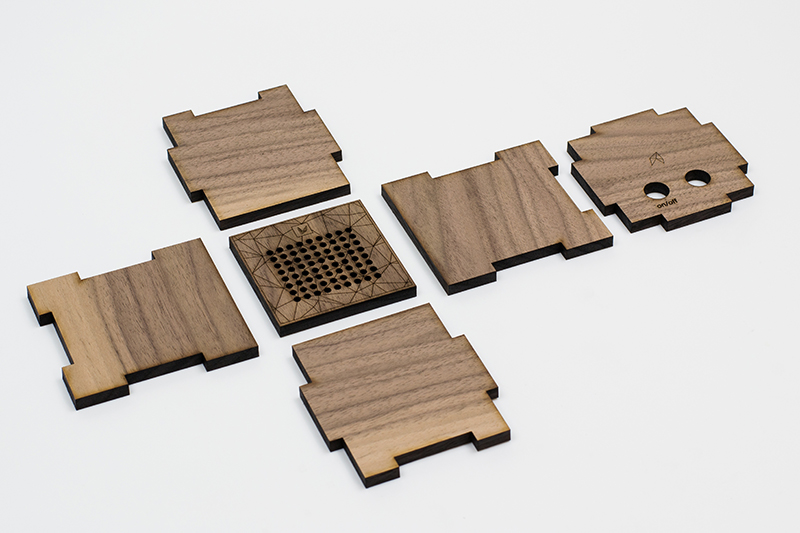
Once you confirm size and scale with a paper proof, next it’s time to get an actual product in hand. It’s time to place your first order…in cardboard, as a prototype.
When the cardboard parts arrive, take a really good look at the initial design. Is it what you envisioned? Are the parts’ size and proportions correct? Do any slotted parts fit together perfectly? If not, now is the time to adjust it so it better aligns with what you had intended. The result of this revised design will naturally be a new prototype, followed by another round of assessment. Continue revising the design until you’re confident in the quality of your product.
The First Delivery From Your Personal Factory
After mastering the cardboard prototyping, now you can place an order with the actual material of choice. Start with a smaller sample first before submitting a full order. This is extremely important. Doing a trial run lets you confirm all aspects of the product are how you envisioned them in your mind, and make any necessary corrections, before committing funds for a larger order.
Part 2: Your Goals For Making, Packaging And Pricing

If Part 1 is all about determining what product(s) to make that have the biggest chance of success, then Part 2 is all about getting these products ready to sell. This is broken down into the next three goals:
Making
Turn your most successful prototype from Part 1 into your final product using your fave material. Then get market feedback.
Packaging
Design and make packaging that not only protects your product but also appeals to buyers while showcasing your brand.
Pricing
Determine your final pricing model so you can make the most profit while selling at expected market prices.
Let’s look at each of these goals in more detail.
Goal 5: Making The Final Design And Material Choice
In Part 1, you brainstormed ideas on what kind of product you could make and sell. And with a little Google research, you decided on the ideal one.
After sketching out some initial designs and then digitizing them using your fave digital design program, you determined a specific style that was both aesthetically pleasing and cost effective.
Once you quoted a number of different options, simplified your design and then prototyped it in cardboard, you were able to finalize the design. And with the $2 material samples, you were able to confirm your material of choice.
Make Initial Product Samples
Before committing to a large order, it’s important to get some sample product in hand so users can test it out and provide feedback—and you can make any necessary changes. In this step, you can evaluate if the material you chose will work as expected and be strong enough for its intended use.
Getting the first real samples is exciting! And maybe even a bit nervous. After prototyping in cardboard, you have a good idea of what the final product will look like. But you never know until it’s in hand.
Will the products look as great as you hope? This is also how your customer will feel—so this is the time to ensure you have everything right for sales so they’ll be delighted when receiving their order.
Initiate User Testing
Now it’s time to let potential customers try out your designs for one final confirmation that you’re on the right track.
Getting feedback from family, friends and potential customers is essential to determine if the product meets a need, is aesthetically pleasing and priced right. Hopefully all of the research in Part 1 is paying off with the feedback confirming you’ve got a winner. Time to start selling.
Getting pre-orders are gold! Not only do these orders confirm that your design is great and you have buyers that are ready now, but they also give you confidence moving forward. Because you have a good indication that you’re on the right track, you reduce the chance of wasting any time or money on a product that doesn’t appeal to buyers.
So now that the product design is 100% finalized, it’s time to think about how to package it.
Goal 6: Packaging Your Product
Packaging is almost as important as the product itself. It must not only protect the product but also appeal to buyers while showcasing your brand. Finding a cost effective option should also be an important consideration here, as you don’t want the price of packaging to eat away at the overall profits.
Goal 7: Setting A Profitable Price
Before you can kick off a sales process, you must finalize the retail and wholesale pricing strategy. To start, you can use a simple “cost-plus margin” pricing model to ensure profitability.
Step 1: Calculate Total Production Cost At Various Order Volumes
In this step, collect all costs to determine how much you’ll need to invest at the various order quantities.
Total Production Cost = Making + Materials + Shipping + Packaging Costs
What are the costs at different quantities? Spreadsheet this.
Step 2: Calculate Profitable Pricing
Now that you know all of the costs, what’s it going to take to be profitable?
A standard pricing ratio acceptable to retailers is 1:2:4.
$1 of cost means a $2 wholesale price, means a $4 retail price.
In other words:
Profitable Retail Price = 2 x Wholesale Price = 2 x Total Unit Cost
Step 3: Set A Retail Price That Feels About Right
Using the information above coupled with knowing the competitive market price, you can set a retail price.
1. Minimum Order Size
What is the smallest order size you can place for a reasonable profit margin? This is a good place to start the business.
2. Most Profitable Order Size
What is the next best quantity that will result in a better profit margin? This is a good next step once there’s a reliable stream of retail and/or wholesale orders.
3. Minimum Wholesale Order Size
What quantity will result in a profit margin for wholesales orders?
4. Tough Retailer Negotiation
If a retailer demands a certain price point, make sure that you set a minimum order quantity so it’s worth your while.
5. Taking A Tiny Step First
For those just getting started ,you can relax some of the 1:2:4 pricing “rules” to align with your specific situation and desired profit margins. But they’re a great place to benchmark what is actually going on with your cash flow until you get more sales and experience.
Profiting From On-Demand Inventory
Continuing on the path of keeping costs low, what would happen if you decided to keep stock digital until you had customer orders? This way there would be zero cost until a sale is made and cash is collected.
By looking at a variety of quantities and the associated costs for each, as well as the needs of your target market, you can determine if ordering on-demand is an option or if having stock on hand for fast delivery is the way to go.
Either way, you must be profitable for this endeavor to survive. Without profit, you can’t continue your passion of making things. But with profit, you can create all kinds of new possibilities.
With the product, the packaging and pricing finalized, it’s time to move on to promotion.
Part 3: Your Goals For Promotion
While each of the previous two parts have focused mainly on the actual item being made, it’s important to realize that having a great product is only one aspect of the process. A solid promotional plan is crucial to how successful you become at actually selling your wares.
In Part 3, we’re taking a closer look at promotion and breaking it down into three goals:
Understanding Target Market
Complete the picture of your ideal buyer by determining where they shop, the marketing messages that convert and what the competition is offering.
Determining Where To Sell
Choose the sales outlet that provides the greatest access to your target market.
Marketing Your Product
Craft product descriptions and other sales messages that resonate with your ideal buyers.
Let’s look at each of these goals in more detail.
Goal 8: Understand The Needs And Wants For Your Target Market
In Part 1, we talked about the importance of identifying your ideal buyer—a specific market that you can target with laser focus. Before making any product, it’s essential to determine what this buyer needs and how can you make something to fulfill this need. Additional considerations included demographics (such as age, gender, where they live, religious and cultural preferences) as well as psychographics such as interests and lifestyle.
But now it’s time to delve deeper into how to reach your market.
- Where do they shop?
- What messages resonate with them?
- What other products are offered that compete with yours?
- How can you differentiate yourself from the competition?
Once you fully understand your target market, then it’s time to choose selling location(s) that have the best chance of holiday sales success.
Goal 9: Determine Where To Sell Your Products
Deciding where to sell your products is one of the hardest decisions you’ll have to make. Without customers, you can’t sell your products. So where can you find customers that align with your definition of an ideal buyer?
There are three main ways to sell products: Online, Local Shops and Craft Fairs/Markets. While you can do all of them, it’s typically easier and less overwhelming to start with one and do it well before expanding. Let’s take a closer look.
Online
One of the main benefits of selling products online is the potential for reaching the greatest number of potential customers. You’re just one google search away from landing a sale!
And with sites such as Etsy, setting up your online shop has never been easier. (Check out this Ultimate Guide To Selling On Etsy to get started.)
If your product idea requires more startup capital than what’s in your bank account, then launching a Kickstarter could be your avenue to not only judge consumer interest but also raise the funds you need to make a set number of per-ordered products.
But Etsy and Kickstarter aren’t the only options. Check out these 16 great places to sell products online via Creative Blog.
Whatever path you take to sell online, you’ll need high-quality images of your products and well-written descriptions that attract buyers. You’ll also need to consider how orders will ship—not only in terms of pricing but also how products will physically be delivered to customers.
If you are selling around the holidays, keep in mind that shipping providers are busier and delivery may take longer the closer it gets to Christmas. Thus, if you’re selling in the last quarter of the year, it’s essential have items available early if selling online.
Local Shops
Having your products on display in local shops requires selling of a different kind: Directly to the store owner. So you must research potential stores just like you would when determining individual ideal buyers. Does this store attract your target market? Does it have product inventory similar to what you offer? How do your products complement existing inventory while being different from everything else?
The benefit of wholesale selling is that it frees you up from manning your own storefront and fulfilling individual orders. For this option to work, you must not only approach shops with samples so they can place orders and have inventory in hand, but you’ll also need to make sure the production cost is low enough to make selling at wholesale viable.
Conventions, Fairs And Markets
Conventions, fairs and markets are a great place to sell artisan goods because people specifically attend them to find unique products that aren’t available elsewhere.
In order to sell at these kinds of local markets, there is typically a booth fee that allows you to exhibit your goods. In addition to the time spent manning the booth, you’ll also need to allocate time for setup, teardown and travel.
Be sure to bring supplies such as tables, stands, etc. to display your products and signage to create brand awareness. You’ll need to have enough inventory on hand to offer customers a variety of items and be able to accept both cash and credit card payments. (Square is a popular credit card processing tool.)
So which is better: selling at markets vs online? It depends on how you defined your target audience, where they shop and how you want to spend your time. If you do decide to sell at craft fairs and markets, check out these tips for more insight and helpful tips.
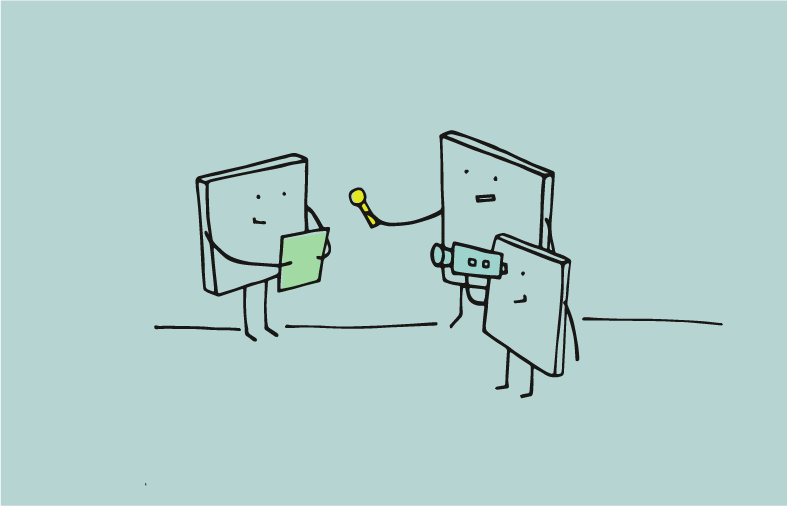
Goal 10: Marketing Your Product
So much goes into the subject of marketing that there are millions of blog posts and thousands of books and college courses on the subject. How do you know where to start? Let’s begin with the basics:
Describe And Photograph The Product
One of the first things you’ll want to do when marketing your product is write a description of it. This will be the foundation for much of your consumer communication.
Of course you’ll want to give the details about the product size, materials from which it’s made, weight (if applicable) and other features. But there’s much more to the story.
Rather than just describing the product, try to describe what problem are you solving for the customer. Does it help them do something? Does it bring them joy?
You may think that having a written description is only applicable if you’re selling online. Not the case. If you’re selling in person, you must be able to confidently and consistently talk about your product. By writing a product description, you can deliver the message just as easily verbally as in print.
Having great images are just as important (if not more so) as strong sales copy. Whether you’re selling online or promoting a physical presence via social media, photos are an essential part of your marketing arsenal. Remember: One amazing image is much better than 10 average photos. (Get even more info on the importance of visuals in marketing here.)
Communicate With Potential Buyers
The range of promotional options is HUGE! You can do anything from emails, postcards and digital ads to social media. Encourage engagement with discounts, gifts with purchase, competitions and prizes, samples, etc. But don’t get overwhelmed by all the paths you can take. You can’t do everything! (Unless you’re a superhero, and in that case, can we borrow your cape?) Instead, focus on one or two techniques and really nail them.
To really draw in your ideal buyers, bookmark these posts for reference:
- Get tips to capture high-quality product images here
- Learn how to create the perfect social media post here
- Sell on Instagram with these five tips
- Build an email list the right way with this tutorial
- Learn how to advertise on Facebook with this complete guide
- Understand four reasons to use direct mail here
Use Important Dates In Marketing Messages
One way to create a sense of urgency—and give customers a reason to buy NOW!—is by strategically using special dates in your marketing messages. Around Christmas, for example, it’s common to see special discounts for Cyber Monday. But you can build in specials or sales anytime during the year.
For even more insight into how to market your handmade business, check out these five smart strategies.
Whatever types of promotion you use, make sure to track your strategies so you can determine what’s working—and what’s not. You’ll need this info for the final part.
Part 4: Your Goals For Increased Promotion
It’s the home stretch in this journey to create a product to sell. For the final part, we’re taking a closer look at increasing promotion and breaking it down into three goals:
Reflecting On Sales
By understanding where and how sales are being made, you can stop doing what doesn’t work and double down on what does.
Placing Stock Orders In Accordance With Results
Products take time to make (and ship). Be prepared by assessing your stock needs and fulfillment offers so you don’t miss a sale.
Reaching Out To Customers (Big Time)
After identifying what marketing techniques are working, you can formulate a plan to reach your customers in one or two channels so that your message resonates with them while separating your from the competition.
Let’s look at each of these goals in more detail.
Goal 11: Reflecting On Sales
First, it’s critical to understand how sales are being made. Ask yourself:
Where did you sell the most items? If you sell more in one place than another, then it makes sense to focus on what is most successful and let the other areas go.
How much did you sell? This can help you forecast potential future sales and if you can order product on-demand or if keeping product in stock is the best route for you.
What did customers ask for? Understanding customers’ needs and wants can help you make any adjustments so that your product is more appealing—and more likely to sell.
What did customers like…and not like? Getting feedback on your efforts to date is really valuable. Positive comments let you know you’re on the right track. Any negative feedback, while often hard to hear, can actually help make your product better. So rather than be defensive when hearing any constructive criticism, thank customers for their input and let them know you’ll use their comments to make improvements.
What took lots of time that wasn’t necessary? There is a finite amount of time to spend making your endeavor successful. Are there any tasks you’re currently doing that don’t directly improve the bottom line? Can you eliminate anything that won’t compromise the quality of the product, the time you spend interacting with customers and/or your overall brand image? If so, redirect that energy to something that has more impact.
By answering these questions, you can assess where you are so you can stop doing what doesn’t work and double down on what does.
There is only a short window of time to capture your buyers. Continuing the process of trial and error on tasks that are still not working may be costly. Instead, it may be more beneficial to put all of your limited time behind the one or two key things that are really working for you.
Goal 12: Placing Stock Orders In Accordance With Results
You don’t want to miss out on sales by running out of product. So do you stock up or continue ordering on demand?
It depends.
If it seems you will have a strong and/or consistent order volume, consider stocking up to make sure you have inventory to fulfill projected demand.
But if you have a brand new product and soft demand, a safer strategy is to order from Ponoko on demand so you don’t risk paying for stock that does not sell. However, this option isn’t without risk.
Products take time to make, so depending on when you order, there may be rush charges to get product in-hand before any of your specific deadlines.
Additionally, shipping times must be considered. When promising to fulfill orders when you don’t have inventory on hand, you must keep delivery times—and any fees for faster shipping—in mind.
So while ordering on demand offers some protection from risk, you may experience higher making and shipping costs the closer you get to any holidays or specific deadlines. Depending on your pricing model, you’ll need to account for these fees in your sale price (or lost profit).
You’ll have to weigh this risk with stocking up and potentially having leftover inventory. On the plus side: Ordering early saves last-minute stress later, allowing you to focus on promoting your product like crazy.
Goal 13: Reaching Out To Customers (Big Time)
Hopefully you’ve been tracking your marketing activities from Part 3 and have a feel for what’s working (and what’s not). This information gives you direction to focus on the marketing techniques that are working best.
If you are selling around any holiday (Valentine’s Day, Mother’s Day, Father’s Day, Independence Day, Thanksgiving and especially Christmas), your customers are being bombarded with lots of marketing messages. So when making your marketing plan, remember that it’s not about all the different ways you could reach customers. It’s about reaching them in a way that is most meaningful to them while standing out from your competitors.
Sure you could try 10 different channels, but you’d be spread so thin that no one would hear you. #fail. Rather, spend that same effort on ONE channel and you’ll have 10x more impact. #sale!
Whether you’re doing emails, postcards, digital ads or social media, or you’re encouraging engagement with discounts, gifts with purchase, competitions or prizes, there is one rule: Make. It. Fun.
Ask yourself: If I were receiving this ____ (fill in the marketing idea you’re using here), would I like it? Would it capture my attention? Would I be happy to see it? Would it entice me to act (read: make a purchase)?
If the answer is “no” to any of the above questions, time to go back to the drawing board and make improvements. You can have a great idea, but if the execution is poor, it won’t resonate with customers.
Whatever marketing tactic you use, it should be clear. Attractive. Targeted to your specific audience. Easily shareable on Twitter, Facebook, Pinterest, Snapchat, Instagram, etc. Word of mouth is priceless!
Find ways to automate repetitive tasks. For social media, use a scheduling tool such as Hootsuite or Edgar. For an email series, check out Sendbloom or Infusionsoft. Manage contests with a service such as Rafflecopter.
And don’t go it alone. If you are unsure how to do something, find an expert and learn. For training on just about any marketing subject, LinkedIn’s Lynda has a class for you. Need to boost your SEO game? Want to market with Snapchat? Understand Google Analytics? Check! The site has these and a gazillion more to make you smarty smart.
If you’re stuck keeping your marketing efforts fresh, check out this post with 64 creative marketing ideas that will boost your business. It not only has marketing ideas for social media and contests, but it also has tips for content marketing and urban marketing as well.
And if you’re like us and want to create a product to sell around Christmas, these 27 ideas combined with these 50 tips will have you decking the halls—and shipping out orders—in no time.
It’s Up To You; Go Create A Product To Sell
WOW. We’ve covered A LOT of information. Hopefully you’re filled with excitement and can’t wait to get started. But make sure you bookmark this guide so you can read (and re-read it) again as you make your way through each goal.
Remember, not every product idea will be wildly successful. And that’s ok. There are many lessons to be learned from failure. (Just check out this post from Think Growth.)
If sales aren’t meeting expectations, do an honest evaluation of each step in the process. Identify any areas that didn’t work and determine why. Then make adjustments and try again. And again.
Henry Ford said, “Failure is the opportunity to begin again more intelligently.” The only real failure is if you stop trying. So what are you waiting for? Get started with Goal 1 today and you’ll be only your way to selling your first product in no time.