Create Your Own Ponoko Originals By Printing Your Designs On Our Materials
Trial period ends September 30, 2017.
In July, we introduced Ponoko Original materials with three colors of baroque printed MDF. Then in August, we debuted three more prints: Herringbone, Bespeckled and Botanic.
We had lots of great feedback, but we kept hearing one question: “Can we print our own designs?” We’re excited to finally say, “YES!”
So for the rest of the month, you can print your own unique designs on three of our most popular materials and then laser cut them to create one-of-a-kind products that you and your customers will love.
This trial is to get an actual sense of the demand for this new offering and what pricing might work for both you and us. So let us know you want custom-printed materials by placing an order (or leave us a comment). This service is available from both the USA and NZ making hubs.
Our materials + your artwork + our laser cutting = Awesome-r products!
Single- Or Double-Sided Printing On Three Materials
Full-color digital printing gives you full control over your products and is the best way to create truly unique designs. To give you the flexibility needed to build your own designs, we’re offering this new custom-printing service with three of our most popular materials:
0.118in / 3mm thick Clear Acrylic
0.118in / 3mm thick White Acrylic
0.118in / 3mm thick MDF
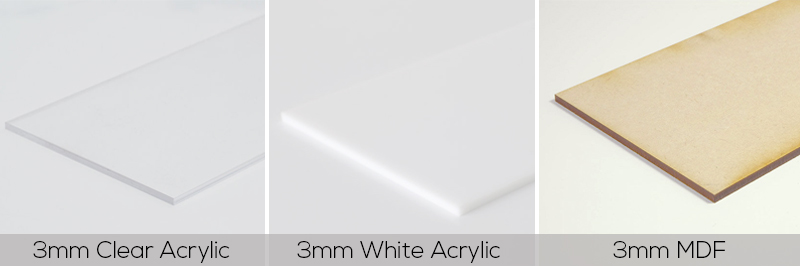
All three material choices can be printed on one or both sides with UV-cured, full-color ink that has a matte finish with a slight texture to it.
For products that need strength and stability, acrylic (PMMA) is as hard and stiff as plastics go. But as a thermoplastic, it is sensitive to stress concentrations that share a certain fragility with glass, so keep that in mind when designing. The clear option cuts to a clear edge, and the white version cuts to a white edge.
If your designs call for a more organic look, medium density fiberboard (MDF) is a particle board consisting of fine wood fibers that are pressed into a panel. Given it is more forgiving than plastic, it is also well suited to products with parts that slot together. It cuts to a warm brown edge.
What Can You Make?
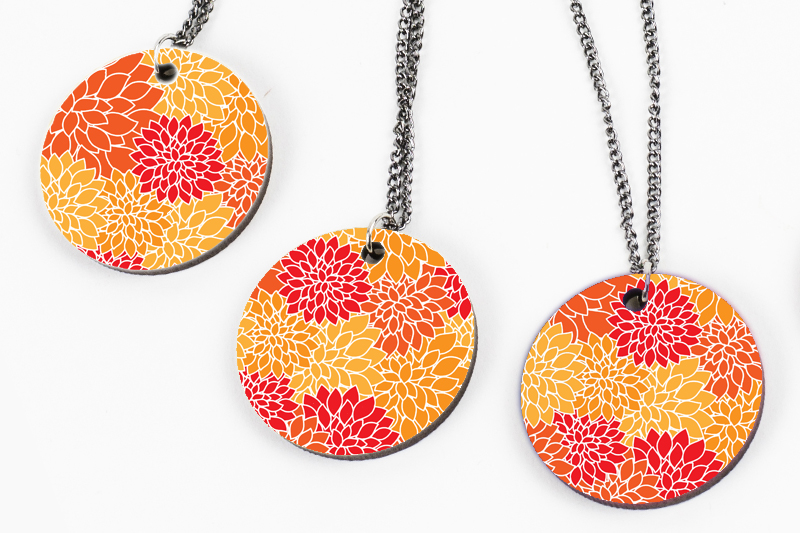
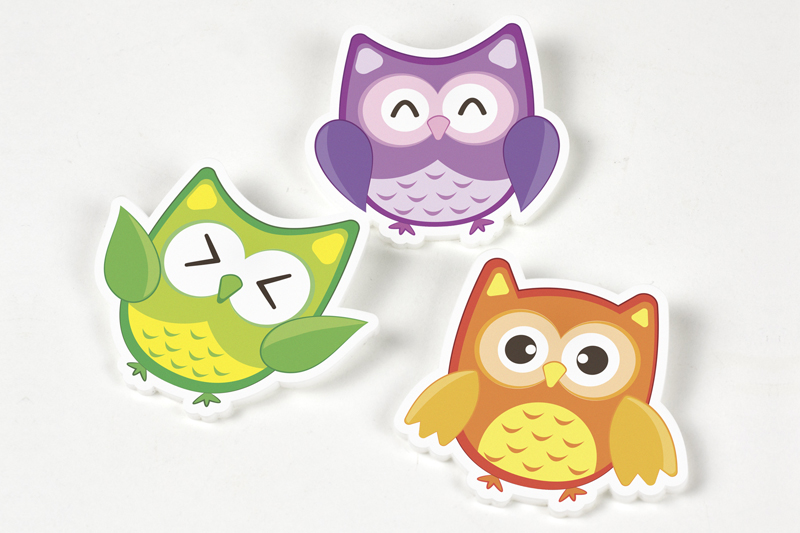
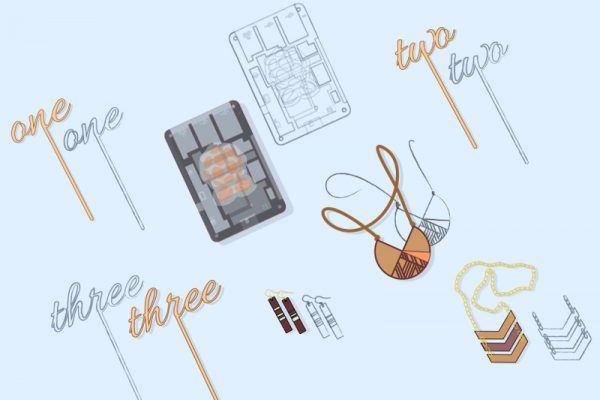
Anything you want! The possibilities are truly only limited by your imagination. To get the creativity flowing, check out these ideas we designed:
Add even more fashion flair to jewelry. Just look at how the colors pop! You could even create an entire collection based on patterns, colors and/or shapes.
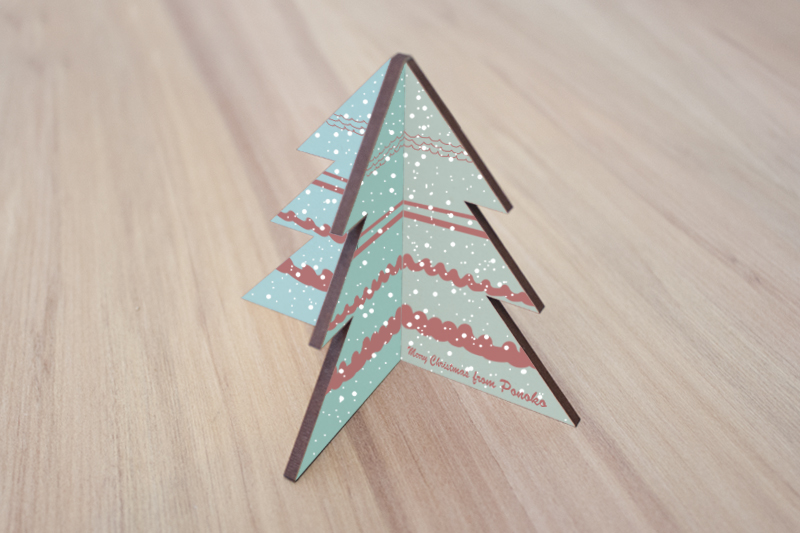
Forget off-the-shelf holiday decorations. Design your own that say Ho Ho Ho! From hanging ornaments to slotted Christmas tree designs like this one below, you could even turn them into holiday-themed promotional products!
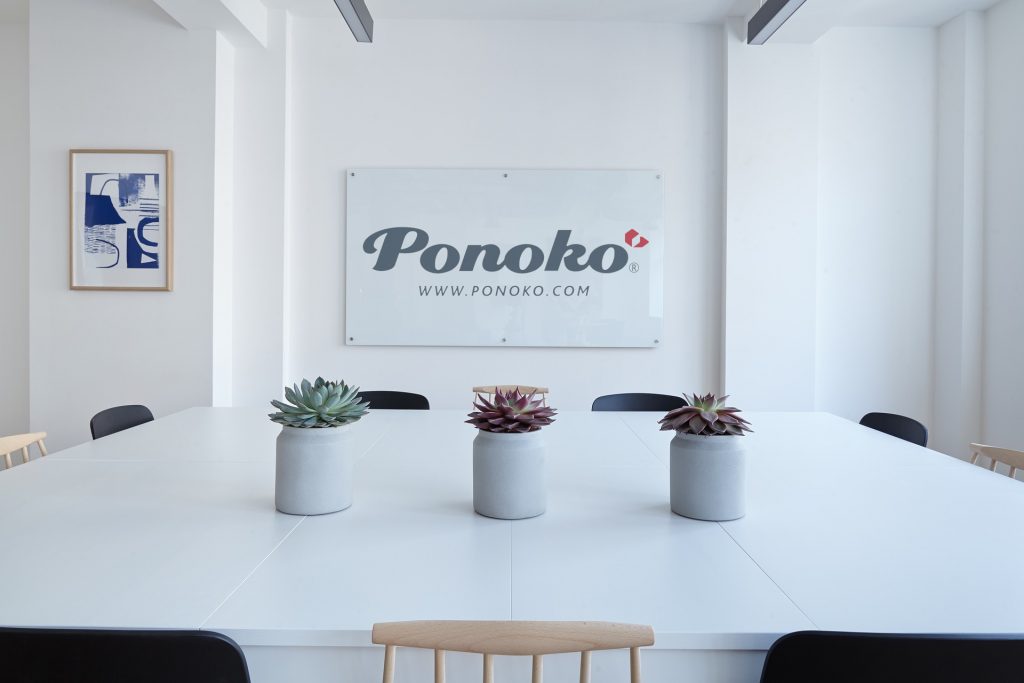
Whether you’re a business that needs to strategically add your logo around the office or you want to decorate the home with favorite quotes, you can custom print some slick signage to make your walls sing.
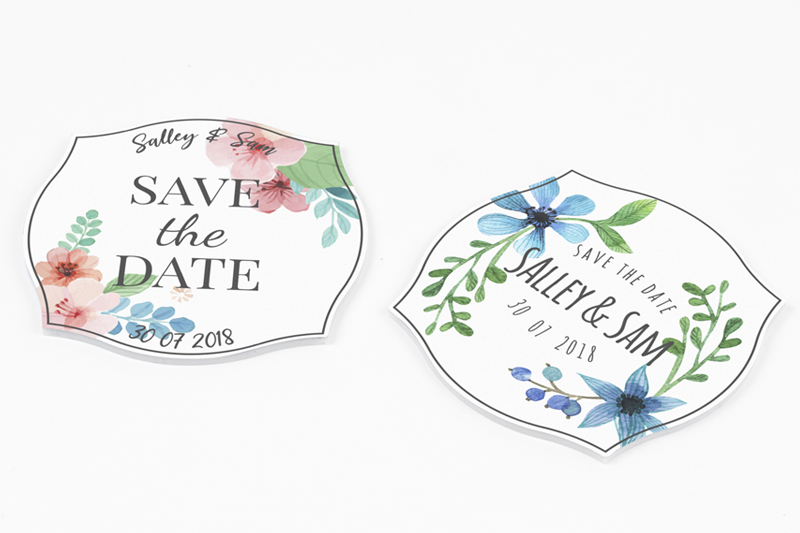
Celebrate a day of love by incorporating individual bridal themes to wedding decorations such as these Save The Date cards.
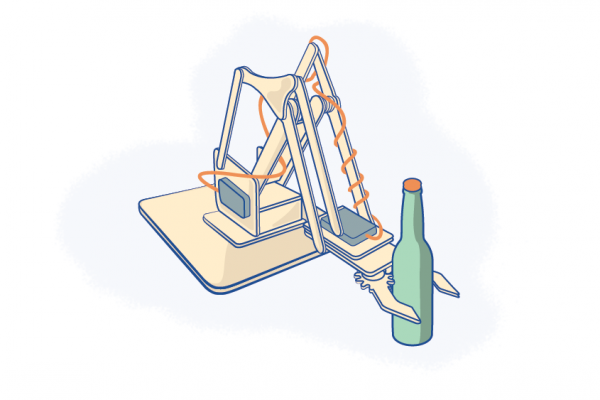
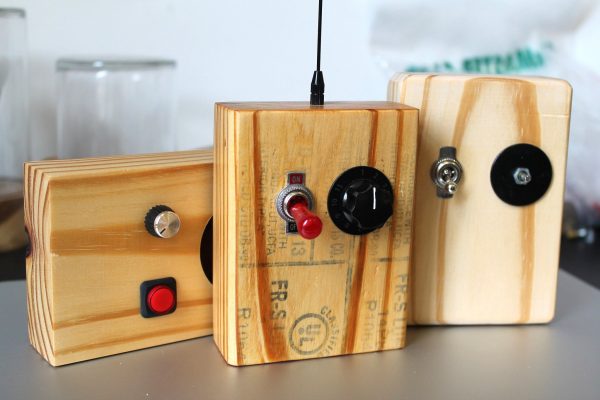
Want more ideas? Trick out your tech with custom electronics enclosures. Rock some robot designs. Give time-telling a twist with custom clocks. Make reading even more fun with some bodacious bookmarks. Coordinate employee name badges with your uniform program. You could even make boxes, coasters, lighting, housewares, desk and office products—now with your own custom art!
How To Get Your Artwork Printed & Laser Cut
While we’re testing out this new service, we’ll be processing orders manually. Just follow these instructions:
1. You email us at service[@]ponoko.com with the following info:
– Your .AI file/s containing cutting lines and artwork (using these NEW digital printing templates)
– The material you want to use per file
– Your name, shipping address and phone number
2. We’ll check your design, give it the thumbs up, then send you a fixed price quote and Paypal link.
3. You submit payment and we’ll get your order started.
4. We’ll make and ship within our normal timeframes plus the extra week needed for this new custom-printing process. This means about two weeks for most orders.
What Material Sheet Sizes Are Available?
There are three. Choose the NEW digital printing template size that best suits your product proportions. Add as many products as you like to maximize material usage, but make sure designs do not extend into the orange border area.
P1: 7.126in x 7.126in / 181mm x 181mm
P2: 15.118in x 15.118in / 384mm x 384mm
P3: 31.102in x 15.118in / 790mm x 384mm
What Will It Cost?
Total Price = Laser Cutting Price + Printed Material Price
Laser Cutting Price
The amount you normally pay for our laser cutting service.
Printed Material Price
The amount you pay for our acrylic & MDF sheets with your custom art printed on them:
Single Side Printed Material
P1: $3.50
P2: $12.00
P3: $24.00
Double Side Printed Material
P1: $5.50
P2: $21.00
P3: $39.50
How To Get A Fixed Price Quote
Follow the four-step process in the “How To Get Your Artwork Printed & Laser Cut” section above to submit your order to us, and we’ll let you know.
But if you want to DIY a price, just upload your laser cutting design as normal, select one of the three materials we’re offering for digital printing, then add together the “Making” price on screen to the relevant “Materials” price above, and voila!
How To Design For Digital Printing & Laser Cutting
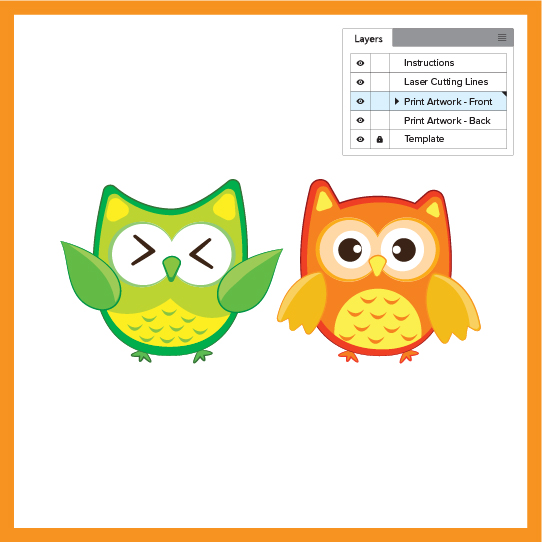
Since there are multiple custom layers for the artwork (two custom layers for single-sided printing and three custom layers for double-sided printing), you’ll need to set up your designs like this:

1. Download these NEW digital printing templates (Illustrator only at this time) to add your print and laser designs to a single file with multiple layers.
2. Follow these design formatting rules:
a) Print artwork needs to be in CMYK color mode for the most accurate results.

b) Use vector art only; no images or pixel based artwork.
![]()
![]()
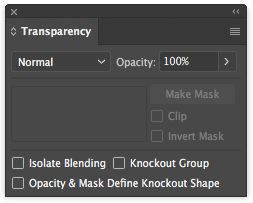
c) Use solid colors only. Set blending modes to normal and opacity to 100%.
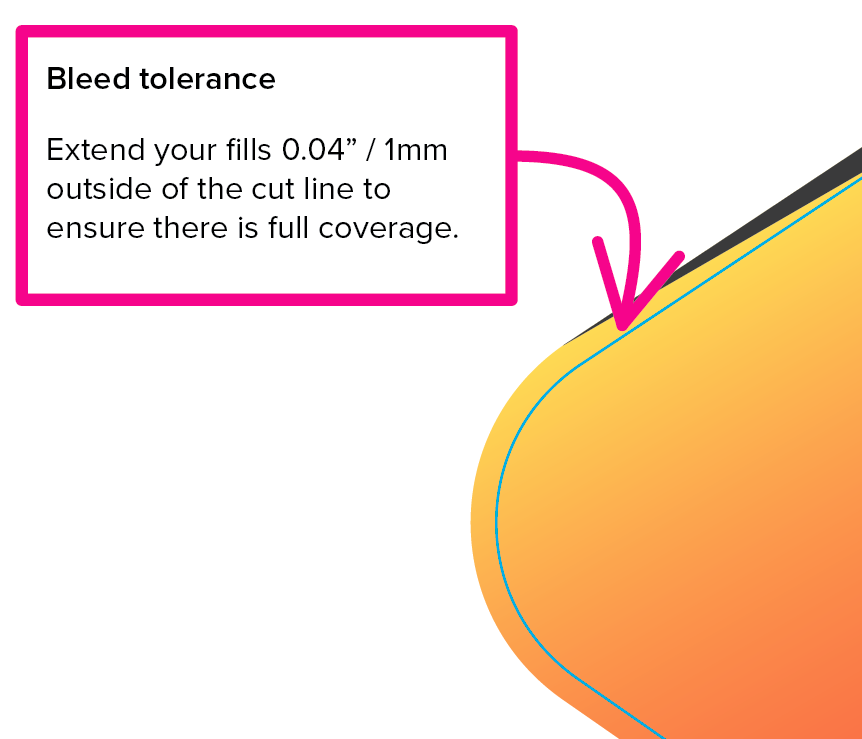
d) Allow 0.04” / 1.0 mm of bleed tolerance.
3. Place frontside artwork for printing on “Print Artwork – Front” layer.
4. Place backside artwork for printing on “Print Artwork – Back” layer.
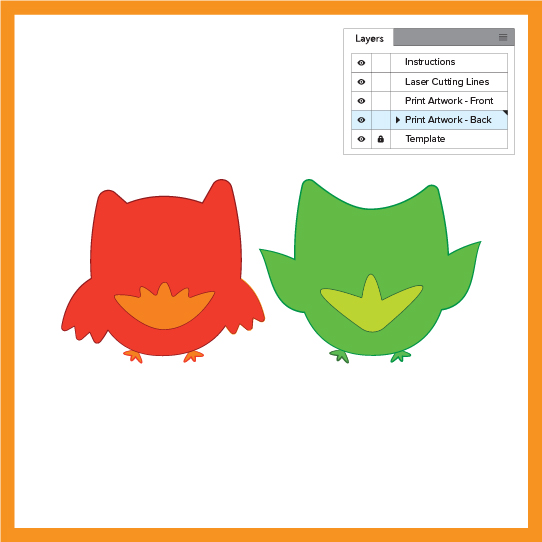
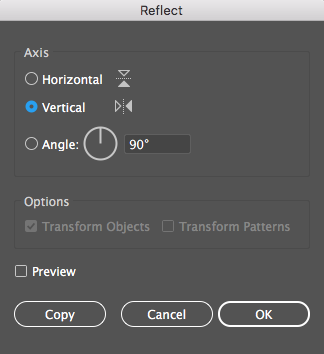
You’ll need to flip artwork for the back side to ensure that it aligns correctly with the artwork for the front side (if this is important to your design).
5. Place your lines for laser cutting on “Laser Cutting Lines” layer.
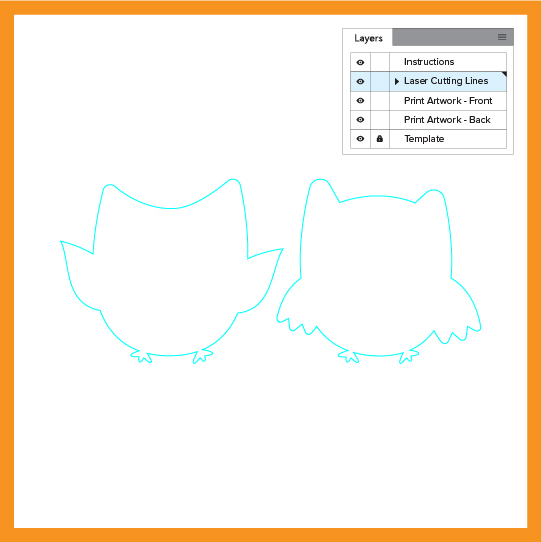
These will be the outlines that are cut out by the laser. The position and orientation should match the front side.
– Set the stroke style to a width of 0.01 mm.
– Set the stroke color to blue with CMYK values of 100, 0, 0, 0.
– Allow a gap of 0.080” / 2.0 mm between the cutting lines.
– Eliminate any shared cutting lines.
6. Save your design as a single .AI file with multiple custom layers: Two custom layers for a single-sided print or three custom layers for a double-sided print. (Note: There are two locked template layers: keep these.)
What Is The Smallest Overall Part Size That Can Be Cut Out?
Designs should be bigger than 1.0″ / 25mm.
What Is The Smallest Feature That Can Be Cut Out?
Designs should not have features (such as ascenders or descenders on text) smaller than 0.08” / 2.0mm. A small amount of material is lost as the laser cuts out designs, approximately 0.2 – 0.4mm total or 0.1 – 0.2mm on either side of the cutting line. Make sure the design is drawn slightly larger than your desired result to account for this.
For durable designs, we recommend that any positive features are not smaller than 0.08” / 2.0mm so they don’t bend or break in use or get damaged in handling.
Will The Printed Colors Match Those On Screen?
Generally speaking, printing will produce a more muted version of colors (computer screens are backlit, making colors appear bright and more saturated). Additionally, printing color on MDF will look more muted than the same color printed on white or clear acrylic.
If exact colors are super important to your design, do a test print first that includes several variations of your colors to help determine which shade will work best for your desired result.
Maker Tips: No Engraving; Special Fixing Notes
While we love laser engraving, we’re testing this new offering by using laser cutting and digital printing only. By using your custom-printed pattern as the design rather than adding engraving, you can keep making costs down. But please leave us a comment if you feel laser engraving is a must-have feature here.
Additionally, if you need to glue anything to the printed surface we recommend using a two-part epoxy. And if you need any screw joints, it’s best to laser cut these pilot holes to avoid material splitting.
Get Custom-Printed Products Now
Just email us your .AI design on our NEW digital printing template before the end of September and we’ll take it from there.
Got feedback or questions? Leave a comment or drop us an email: service-at-ponoko-dot-com.
Since we’re testing whether this is a service to offer long term, please chime in now to let us know!
19 Comments
Hi, is this available from NZ hub as well?
Hi Cai, it certainly is available in NZ! You’ll need to email us with the design to place an order. Download the new digitally printed templates above to get started!
Would this printing process work for screen / display facias, i.e. on clear acrylic, leaving an unprinted area in front of a display, in the middle of the printed area?
If you are recommending 1mm bleed tolerance then this is not idea for individual lettering / text for labels etc? Again thinking about facias.
Hi David, we’ll do our best to get everything aligned, but we can’t guarantee it will always be perfect. Things will likely be closer than the 1mm bleed tolerance (that’s the end of the spectrum).
From hearing our desires, to delivering… You guys rock! Thank you. We will definitely be supporting the continuation of this initiative and creating a custom print order this month 🙂
Hi Yvonne, so glad to hear the service is resonating with you. Looking forward to seeing your awesome designs!
Will we be able to use an Inkscape file or does it have to be AI? Thank you! So excited.
Hi Liz, Initially we are only accepting AI files. If you’d like, you should be able to download a free trial to make a design.
Thank you! I appreciate it!!
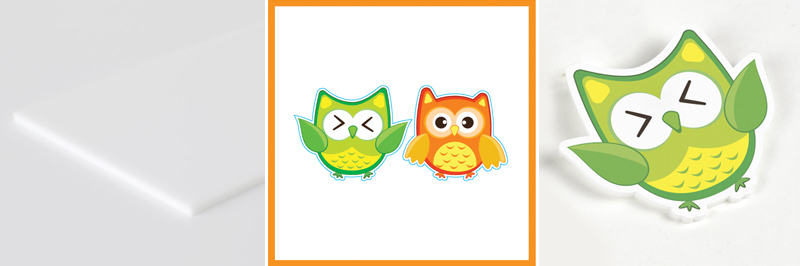
Hi. I was thinking about… so if I want to do for example something printed – there will be still not full coverage on the detail, correct? it will be an outline with just acrylic correct? Like on the owls image shows that there is a white acrylic displayed between printed area and laser cut lines
Hi Anna.
Correct. The colors you have in your design file will be printed on the acrylic. Areas with no color receive no ink and will remain the color of the underlying material.
You could print white ink on white acrylic to provide a matte/gloss contrast which could be interesting.
Hello, how do I speak to someone to get a price on some laser cutting?
Thanks Steven – we’ve reached out to your email 🙂
Oh man this is super exciting!!! I would totally use this!!! When will it be available and what is costing on it? white and clear acrylic and MDF are the only materials that we can print on?
Hi Nosheen, we think it’s super exciting too! We ran a trial of this in September with the printing cost included in the materials price and the laser cutting at our normal rates. Watch this space for releases moving forward!
Oh brilliant!! Hope to hear the about the permanent release soon!!!
Yes I am super interested in this service!!
Any updates on this guys? Would love to run some trials (missed the test run last month)
Hi Philip, great to hear you are interested! We are still ironing out the process at the moment, updates will likely be after the busy Christmas season.
Comments are closed.