How An Electrical Engineer Uses Laser Cutting And Engraving When Constructing Custom Audio Equipment
When listening to your favorite song, do you turn it up to 11? Or do you even consider how the volume is adjusted? In today’s digital age, most of us give little thought to volume control. Just hit a button on your preferred electronic device to lower or raise the sound through the app’s software.
Audiophiles, however, are all about high-fidelity sound reproduction. They not only think about how to control the quality and volume of sound but also how to improve it.
“There’s a resurgence in the vinyl record instead of streaming and vacuum-tube electronics instead of solid state,” says Terry Gerritsen, owner of Dynamic Audio Engineering (DAE). “A new generation of hipsters thinks this stuff is cool.”
And when you have the cool factor combined with custom-built exclusivity, there’s a market for products to serve this niche.
Building Stepped Attenuators
Terry didn’t just wake up one day and decide to build stepped attenuators, the electronic devices that reduce the power of a signal without appreciably distorting its waveform. In fact, his interest in high-end audio equipment goes back to his teenage years when he found some speakers in an abandoned warehouse. (Read all about that experience here.)
You might not think that finding some dust-covered 10” woofers would be a pivotal moment, but for Terry, it sent him down a path of studying electrical engineering at university and a 26-year (and counting) career in engineering.
While he has always been interested in how things work as well as designing and building things, the idea for stepped attenuators came from where all good ideas originate—in a bar, over a pint with friends.
“For people who appreciate an actual volume control knob to turn there is a pecking order of quality,” Terry explains. “The pinnacle would be a ‘relay-switch attenuator,’ which is used in only very high-end (expensive) equipment. But even a relay-switch attenuator is not perfect, and some audiophiles complain about the clicking noise the relays make when the volume is changed (think ticker tape machine).”
But what if you could put the relays in a small vacuum chamber to make the relay clicking inaudible?
Terry got to work prototyping his stepped attenuator to find out. Not only did he have to figure out the mechanics to make it work, but he also had to design a complete electronics enclosure for the hardware. “What I thought would take a few months to build has taken me deeper into the realm of audio electronics for the past three years and counting,” he says.
As with most electronics projects, as you continue to iterate prototypes, you find things that worked and didn’t work, things you missed along the way and things you didn’t even know to consider in the beginning. But as you systematically work the problem, it is possible to have a successfully functioning product in the end.
“After many months of struggling to make a prototype on my v2.2 attenuator, I have finally successfully assembled one,” Terry says. “It is like the Thomas A. Edison quote, ‘I have not failed. I’ve just found 10,000 ways that won’t work.’ It is more like 20 ways in the case of the v2.2 attenuator, but it feels like 10,000.”
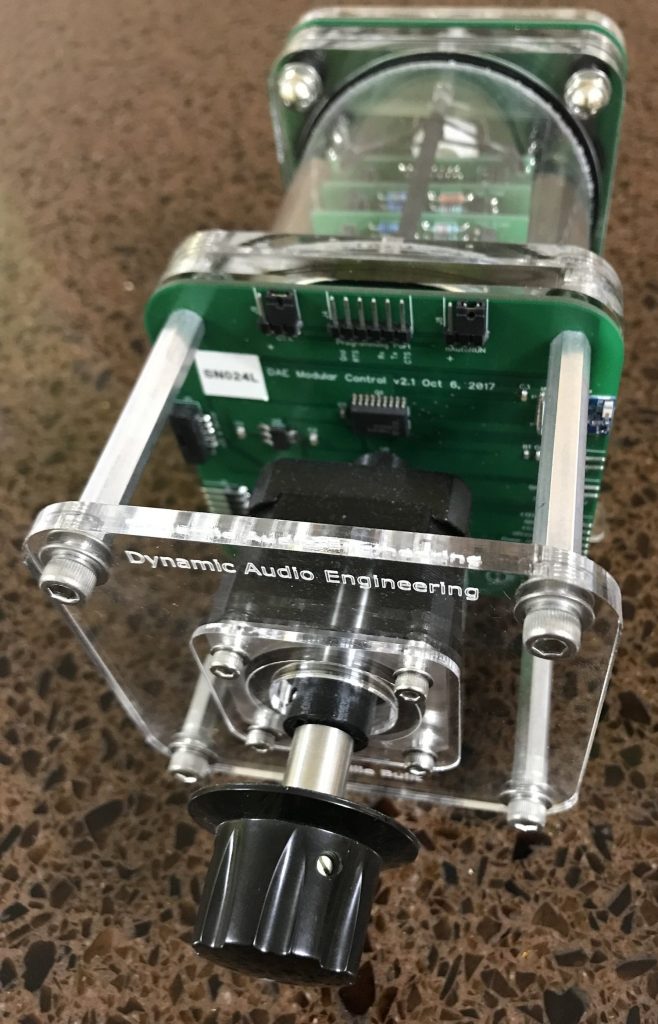
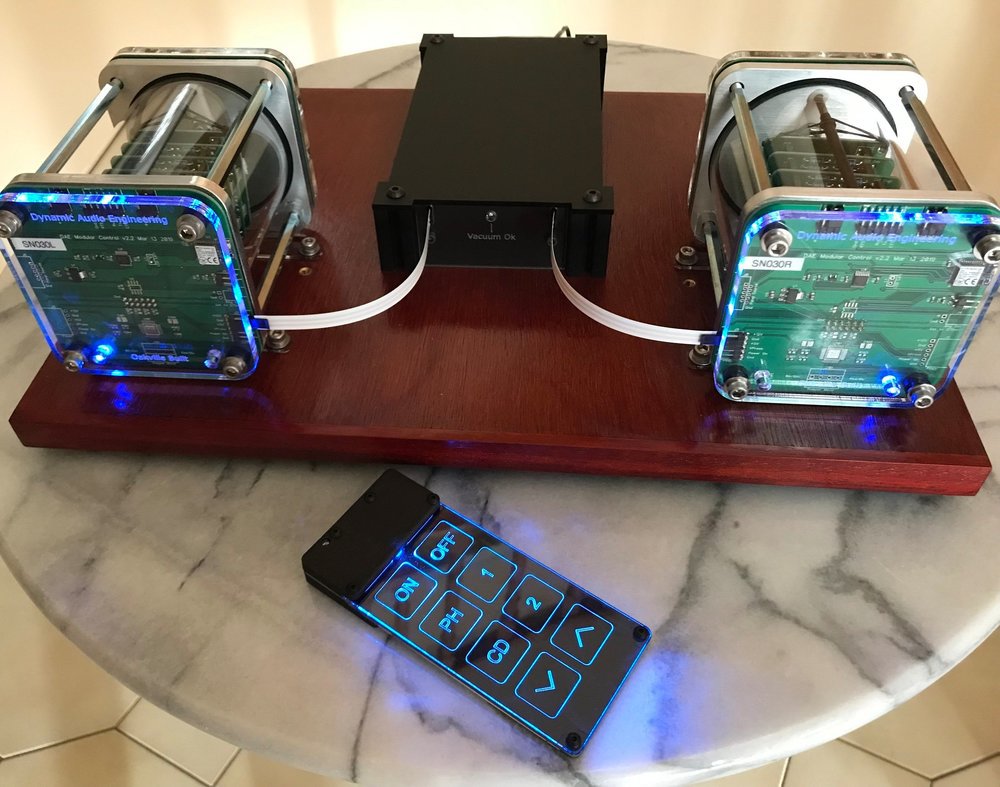
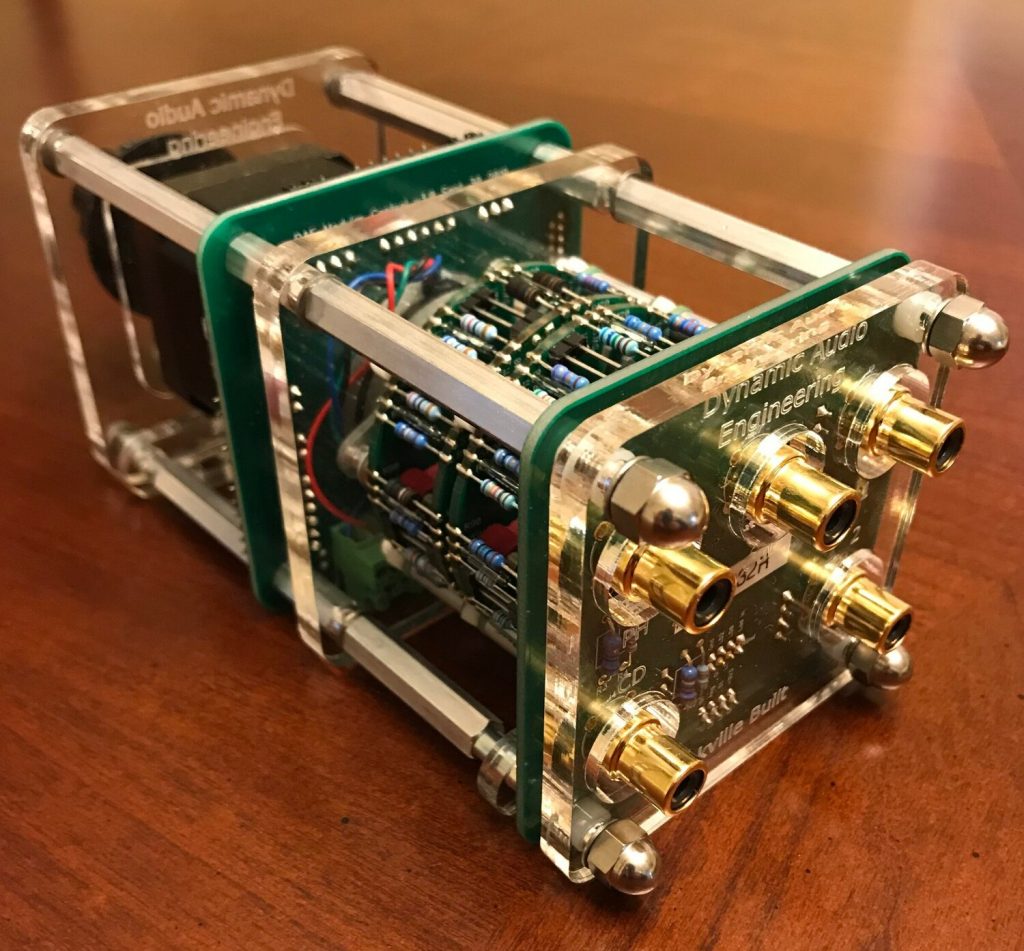
What makes his modular stepped attenuator unique is that the relays are vibration isolated and housed in an acrylic vacuum chamber so that the mechanism is quiet. But therein lies the challenge: Keeping the vacuum sealed.
While Terry has been able to make the v2.2 attenuator work, he wasn’t 100% satisfied. So he began considering other design methods that wouldn’t have the complexity of a vacuum seal but would achieve the same silent operation.
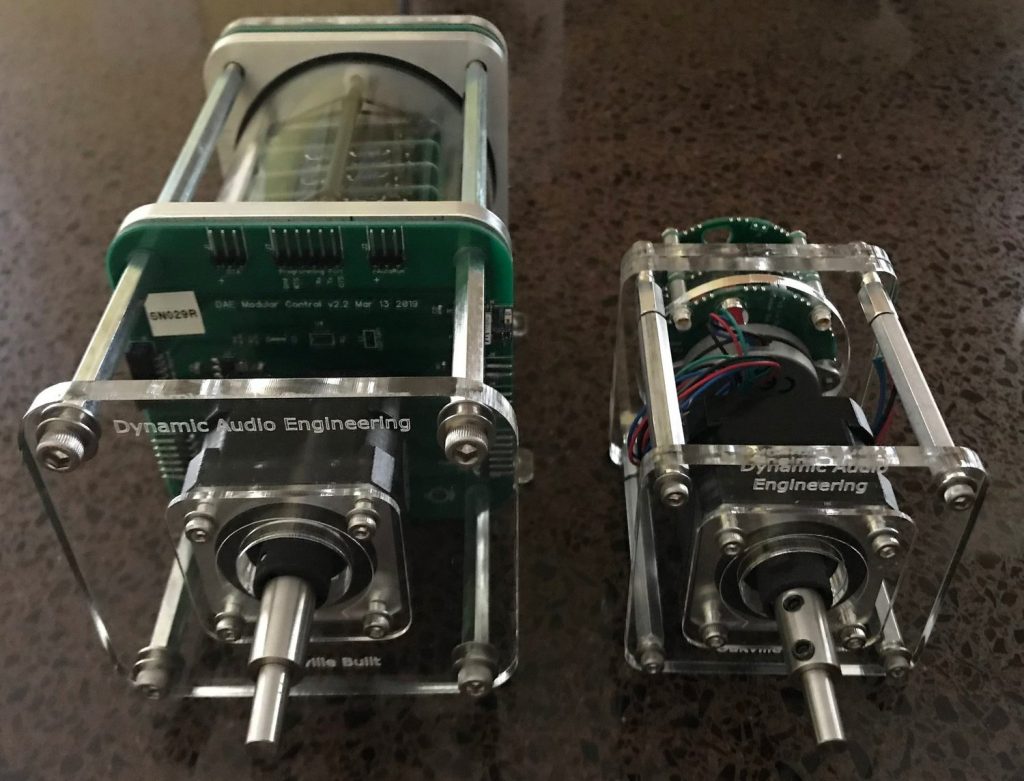
“The v3.0 attenuator is a radical departure from the v2.0 series attenuators that used a vacuum chamber to reduce relay switching noise,” he explains. “Instead of a vacuum chamber, the v3.0 attenuators use tiny reed switches and a few reed relays to perform the switching duties. The use of reed switches and relays allows the v3.0 to be significantly smaller and less costly than the v2.0 series attenuators.”
Notice the size difference between the v2.2 attenuator on the left and the v3.O attenuator on the right. The smaller size not only saves costs in terms of material used and laser cutting but also shipping of the parts.
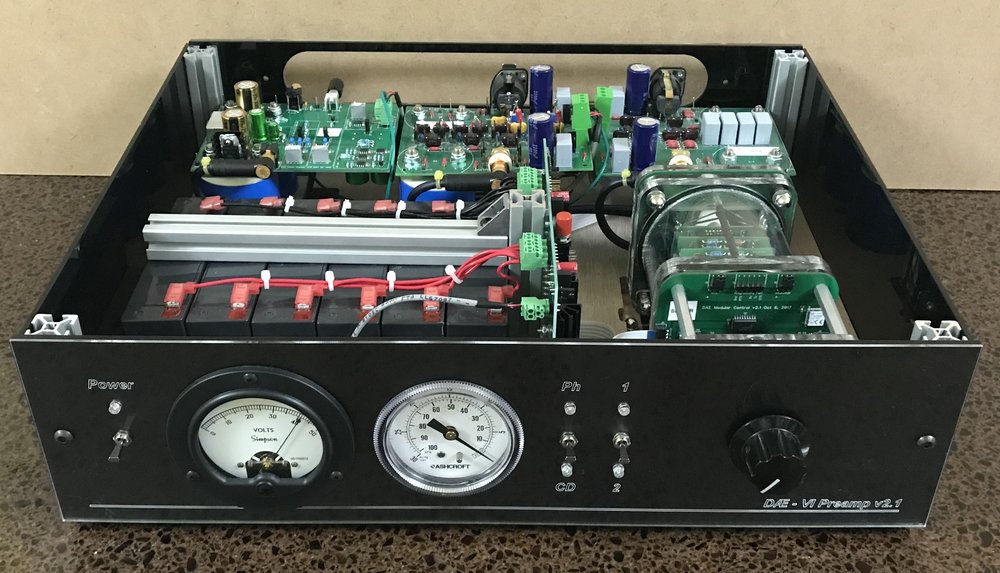
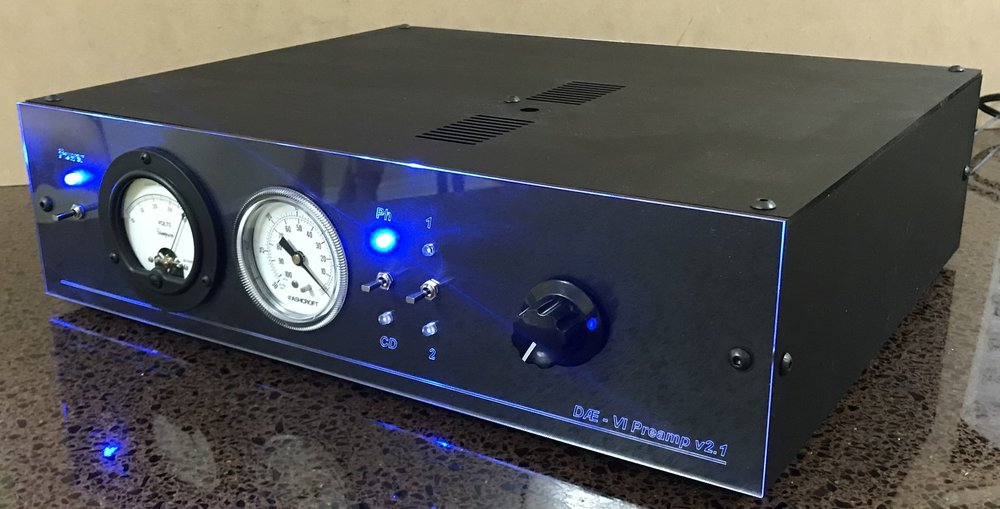
Terry notes that this very fancy volume control is radio controlled and motor operated, and the latest version of the attenuator uses 10 laser cut acrylic and Delrin pieces. “Clear acrylic is the most common material I use,” he says. “I started using this because it is a material that can be used to make a vacuum chamber, which I needed for one iteration of my attenuator design. I continue to use clear acrylic because the laser cut and engraved parts look great!”
You can see where he not only brands the faceplate by laser engraving the company name and location, but he also labels the ports for added convenience.
But acrylic isn’t the only material Terry is using these days. He has recently built a birch plywood shipping enclosure for the v3.0 attenuator that uses seven pieces with interlocking box joint corners.
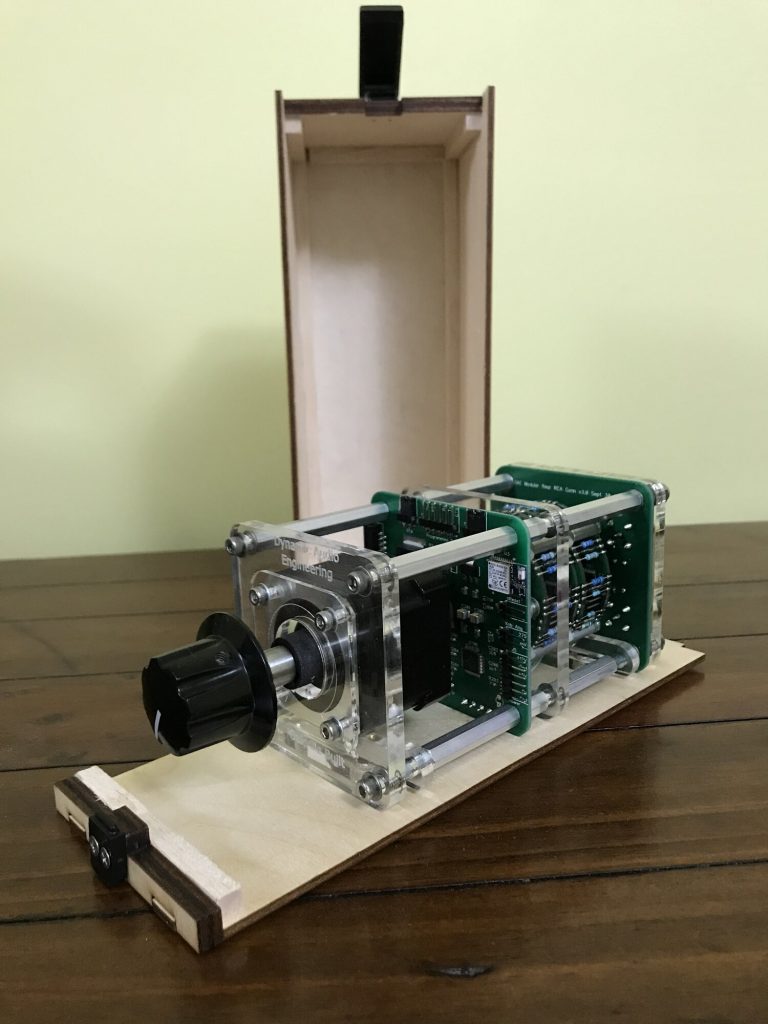
“I have wanted to experiment with laser cut plywood boxes, as there are software tools available to design the box joints at the corners that I wanted to try,” Terry says. “A 1/8” thick plywood shipping crate for the v3.0 attenuator provided the perfect excuse.”
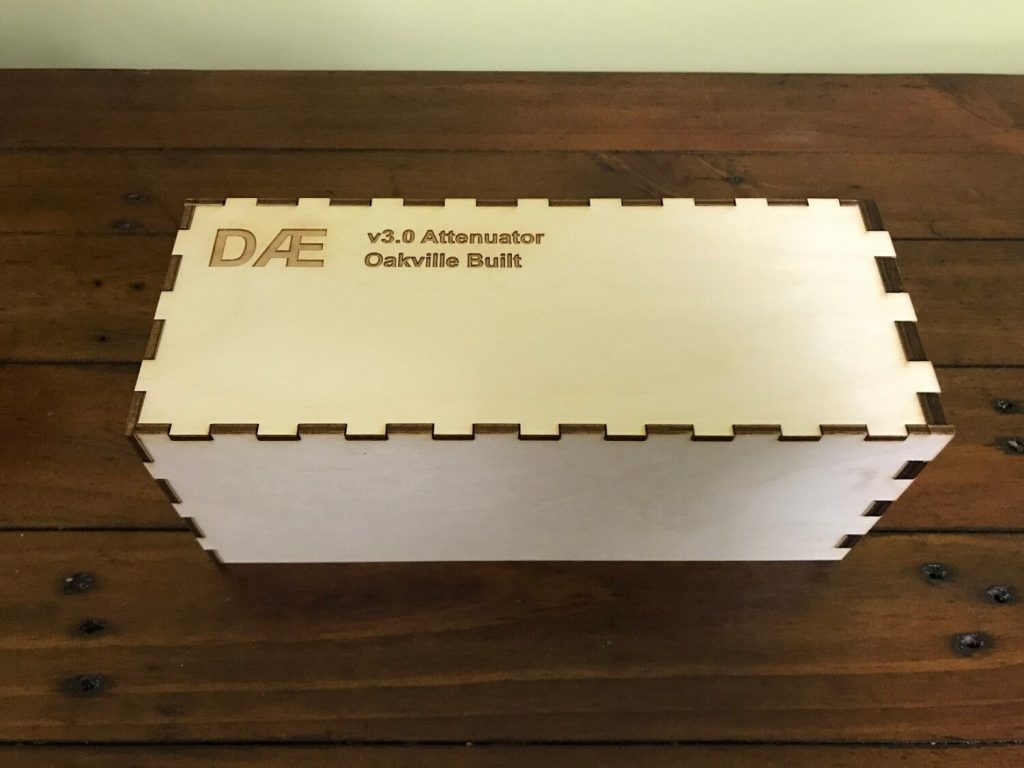
Not only does the crate protect the attenuator during transit, but it also serves as another branding point for the company.
Working With Ponoko
When Terry first began using laser cutting, he tried the machinery at a local maker space so he could be hands-on with the process. “Initially I wanted to do the laser cutting myself to get a better feel for what was possible,” he says. “However, the maker space laser cutter was a community-based machine used by amateurs like myself, so you could never be sure of the availability/condition of the machine. Also, a lot of experimentation was required to get good results when trying a material for the first time, even if only the material thickness was changed.”
That’s when he began looking for options and started working with Ponoko. “Once I got some experience, I was much happier using Ponoko because it saved time and allowed me to focus on the design. Also, the quality of the parts from Ponoko was much higher and more consistent than I could expect from laser cutting at the local maker space.”
Keep in mind that Terry doesn’t use laser cutting exclusively for his engineering projects, as some parts are better made with 3D printing or CNC machining. He uses whatever manufacturing technique is best to achieve the desired results.
“But when it comes to flat parts and laser cutting, I use Ponoko and have been very happy with all aspects of the service,” he says. “Laser cutting with Ponoko allows me to make the acrylic parts I need for the numerous iterations of my product and make them quickly, accurately and at reasonable cost—even in a quantity of one.
“What first enticed me to place an order was the easy-to-use online quoting/ordering system, but what keeps me coming back is the high quality,” he continues. “Working with Ponoko gives me the ability to build a prototype in small quantities that would be near impossible to build by hand with the same ease and accuracy.”
For a deeper dive into Terry’s prototyping process, check out the DAE blog where he details the challenges he faced and solutions he found when building the attenuator and other electronic projects.