With Laser Cut Templates, Drafting And Wireframing Become Faster And More Accurate
We may live in a digital world, but when it comes to brainstorming ideas and retaining what we’ve learned, there are no better tools than taking pen to paper. There’s something magical about how thoughts manifested in the brain seemingly travel down the arm to the hand and out the end of a pen, pencil or crayon (we won’t judge; just let us use the periwinkle one).
Clearly, drawing digitally is appealing because images can be very precise. So how can you have precision while hand drawing without spending a ton of time measuring everything with a ruler—and often losing the idea flow because you’re too focused on the details? Laser cut stencils to the rescue.
You may think that stencils are only for arts and crafts projects. Sure, they’re great for crafty applications, but they have a right-and-proper place within the business world, too. To see why, check out how two companies—BlastPoint and Tiny House Design—incorporate stencils into their workflow to build a better customer experience.
BlastPoint: Wireframing Interaction Screens
As a third-generation maker, Alison Alvarez has followed in her mother’s and grandmother’s footsteps by making things as long as she can remember. Currently, as the co-founder and CEO of BlastPoint, she and her team build software that makes big data accessible and affordable for everyone through interactive maps. Her days may be spent surrounded by tech, but that doesn’t mean that her maker’s eye won’t spot a making opportunity when one presents itself.
Even though BlastPoint is a software company, they put a lot of stock into customer interviews and paper prototyping. As such, the company’s CTO can often be found using Post-it Notes for creating paper prototypes in his notebook. Prototyping with sticky notes is popular and can be quite effective, but this method wasn’t working 100% because the notes were slightly too small for his liking.
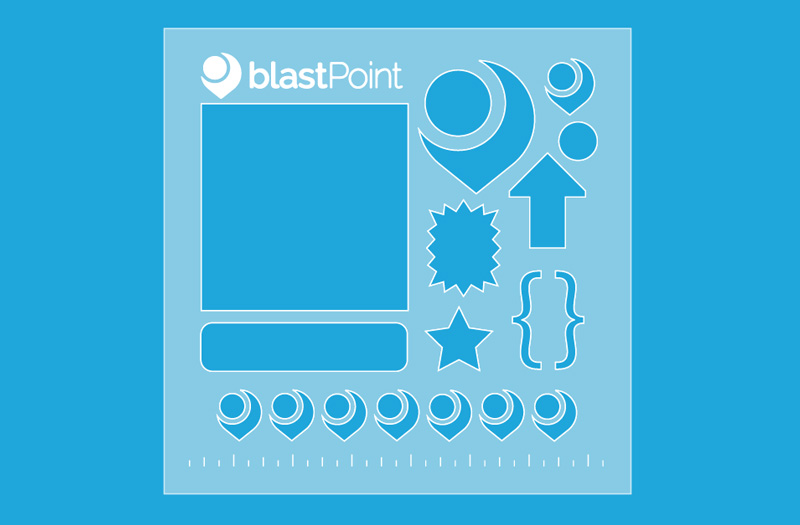
“My CTO is especially keen on drawing out interaction screens in his research notebook,” Alison says. “I designed the stencil so that he would have a rectangle to use to fill up a page quickly. I also added other elements for drawing, such as our company logo, to help with designs.”

When looking at ways to fabricate the stencil she envisioned, Alison says she learned about Ponoko from the online makers’ community. “I looked into 3D printing and metal fabrication, but laser cutting made the most sense for a one-piece stencil. Ponoko was much cheaper and better suited to what I wanted to make.”
Alison chose acrylic because it’s lightweight and flexible. “The clear has a slim thickness (1.5mm) so that it fits into the back of his notebook without wrecking the binding,” she says.
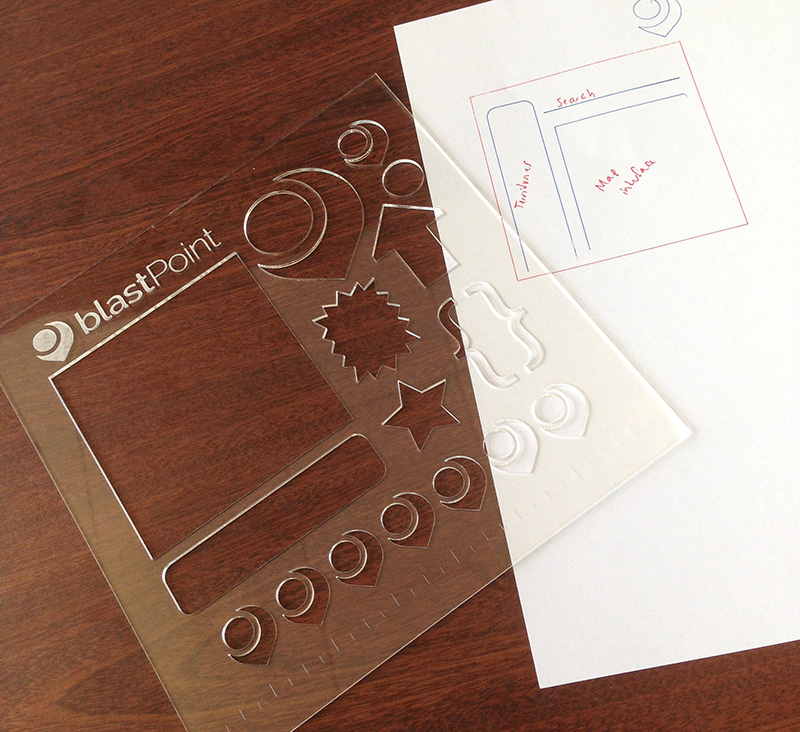
Evidently, these custom stencils have worked out great. “We are planning on issuing these stencils to everyone who works on the design side at BlastPoint,” Alison says, “which includes everyone, really.”
To learn more about all that BlastPoint has to offer, check out the website.
Tiny House Design
With the average size of the American home growing from 1,760 square feet in 1978 to 2,662 currently, the cost of home ownership is out of reach for many. There’s also a segment of the population who are rejecting excessive materialism and want a home that’s not only affordable but also ecologically friendly. Enter the tiny house movement.
Sized anywhere from 80 square feet up to 1,000, tiny homes have garnered tremendous media coverage with Tiny House Magazine and TV shows Tiny House Nation and Tiny House Hunters.
Since 2008, Michael Janzen has been designing tiny houses and blogging about the tiny house movement at tinyhousedesign.com and tinyhouseliving.com. “My main focus has been to show folks that they can design and build their own tiny homes, he says. “I even drew a book called Tiny House Floor Plans as an idea book to help people imagine how to lay out their own tiny home.”
If you’ve ever looked into what makes a tiny home special, you know it’s all about excellent space planning and having multi-functional areas that do double-duty. Proper configuration is essential. Picking up a pen and paper to test layouts is a natural next step for the soon-to-be tiny home owner, but not everyone can draw.
“When I was a kid, I loved drawing houses and found a lot of enjoyment using stencils because it gave me a good looking design that was to scale,” Michael says. “Since nobody makes tiny-house-specific stencils, I figured I’d make some and see if folks like them.”
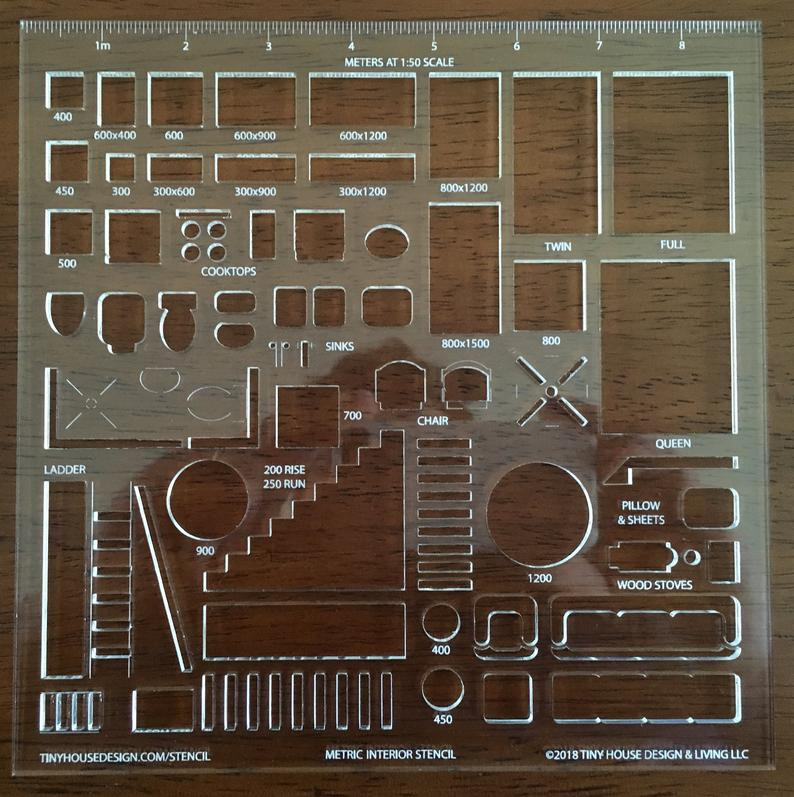
Like Alison with BlastPoint, he chose clear acrylic. “For a stencil to be useful, it must be clear so you can see what you’re doing,” he explains. But unlike Alison, he went with the 3mm thickness for a more substantial and durable piece.
Prior to making these stencils, Michael had experimented with 3D printing for another project but had never made anything via laser cutting. “I didn’t try any other making process for the stencils,” he says. “Laser cutting seemed like a perfect fit.”
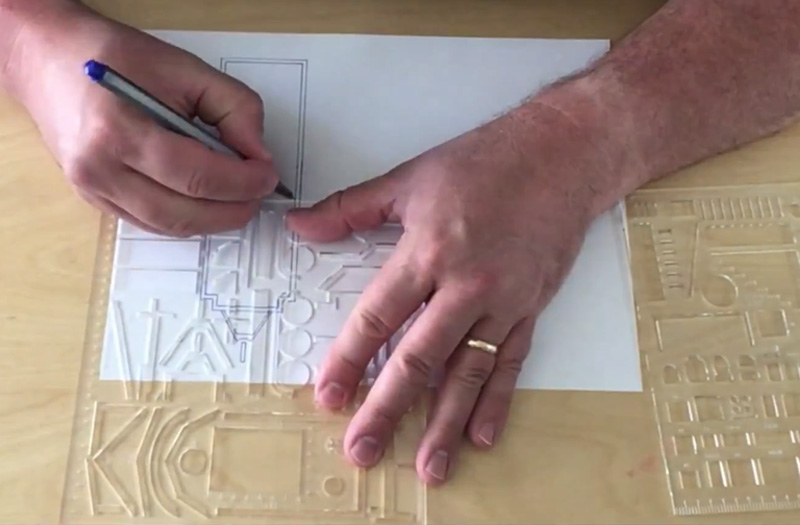
A perfect fit, indeed. Here’s the stencil in action.
While stencils may have been Michael’s first foray into laser cutting, he’s no stranger to making. A self-described jack-of-all-trades, he draws, codes and builds lots of things. But at the heart of it all is that maker spirit.
“Before the internet was invented, I was a potter,” he says. “But I’ve always been a maker, even as a kid. Luckily as I grew up, I didn’t stop making.” Lucky for us, and all those in the tiny house nation, he didn’t stop making either.
To see all the stencils Michael offers, visit his Etsy shop.
Putting Stencils To Work For You
What else can you do with stencils? Jeremy Medow uses an acrylic stencil as a template for making handcrafted Nixie clocks. “When first figuring out how to hollow out the bodies for my clocks, I realized that I could have templates cut from thick transparent acrylic,” he says. “I had these made years ago, and I still use the original ones on every production run. This has saved countless dollars and hours.” Get the full story here.
When Scott Bezek began selling his fresh take on the classic split-flap board, shipping these ultra-cool display boards in plain brown boxes just didn’t seem right. But spending money to buy custom packaging wasn’t an option because he didn’t want to pass along those costs to the customer nor did he want to absorb the costs himself and decrease his profits.
The answer? Stencil the packaging himself. To keep it on brand, he even designed a special font to perfectly match the split flap look. Talk about a smart branding extension. See how it all turned out here.
And since no stencil post is complete without an art project, check out Sara Dittrich’s Instagram, where she posted about how she created a rhythmic art installation using laser cut stencils here, here and here.

