Laser Cut Educational Toys
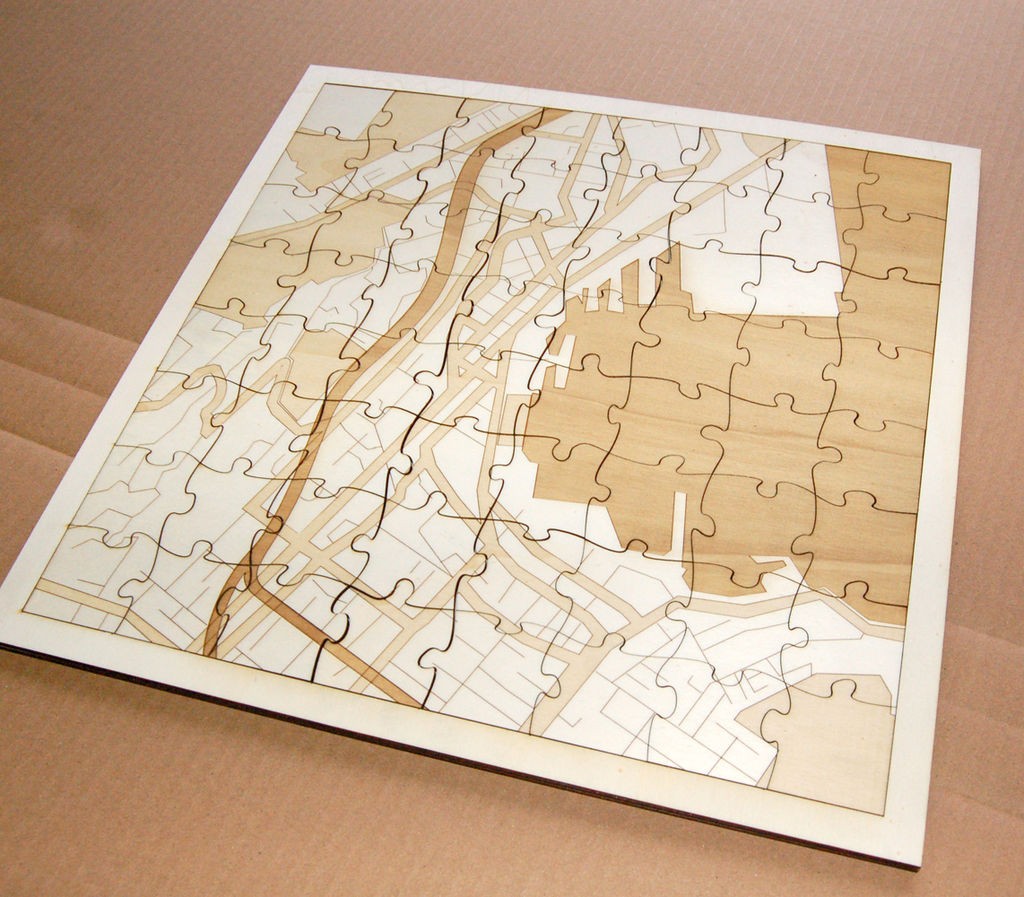
Personalised toys can make a great gift, adding something unique and memorable to show how much you care. It’s one of those things that many people think about doing, but never take the first steps to actually make it happen. Let’s take a look at how easy it can be to put together a personalised laser cut educational toy.
As you can see in this guide on Instructables, it is possible to achieve a highly resolved, professional-looking outcome even for those who are new to laser cutting. The guide, written by Ponoko’s own Dan Emery, walks through a process of creating the cutting pattern for the jigsaw pieces using Inkscape, and then building a custom map section that will become the laser etched details.
What follows is a condensed version of the original guide. For more detail on each step, it would be a good idea to read the full version on Instructables.
Software and templates
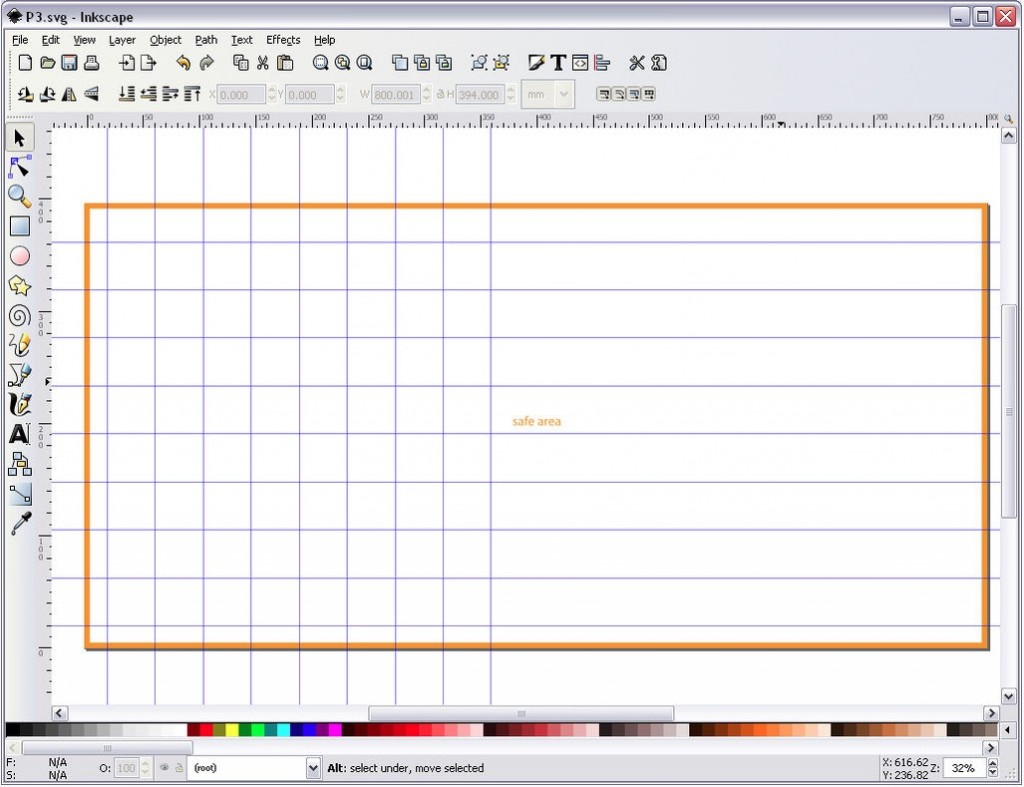
Inkscape is a very capable vector drawing program that makes creating laser cutter-friendly files accessible to beginners. Best of all, it is available for free! So to kick things off, install the version that suits your computer hardware and then head to this Ponoko page. The Ponoko p3 Template is available as a part of the Ponoko Starter Kit for Inkscape. This file is already set up to suit the Ponoko laser cutters, so open up p3.svg in Inkscape and you’re ready to begin.
Construct a Grid
Set up some guidelines as a grid to help space out the cut lines for the jigsaw pieces. These can be created by clicking in the ruler area on the left and top of the window, and holding and dragging out a guide. To edit the positioning, double click on the guide and a window will open up allowing you to edit the values.
Drawing the puzzle pieces
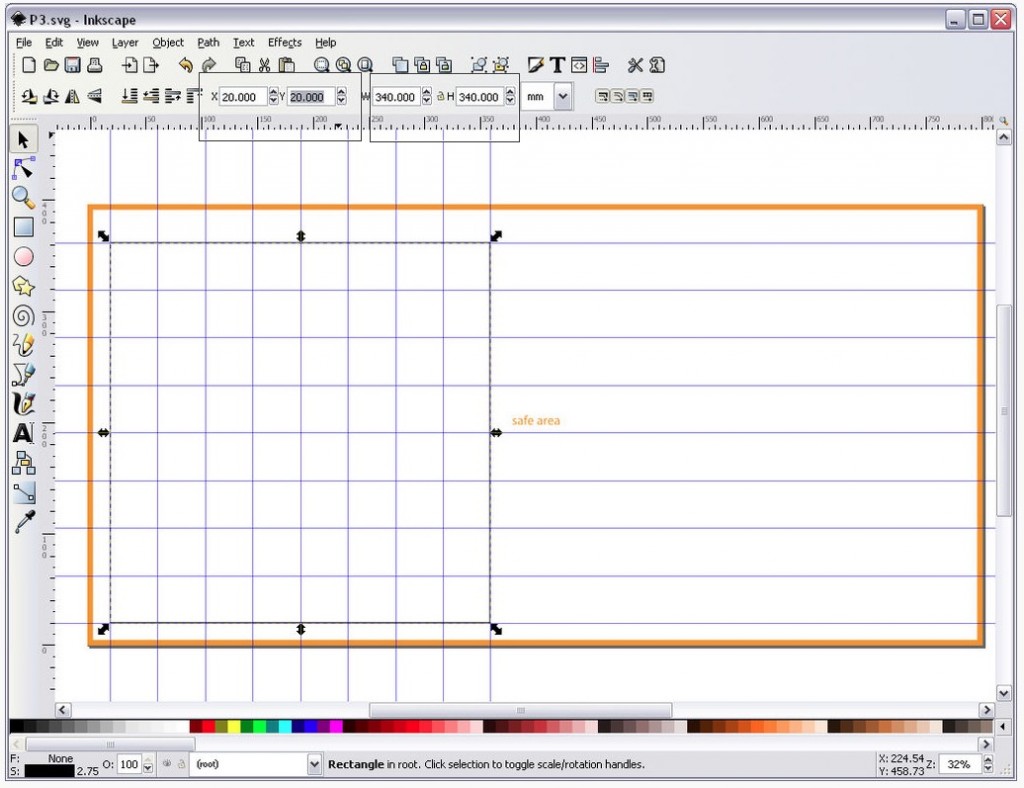
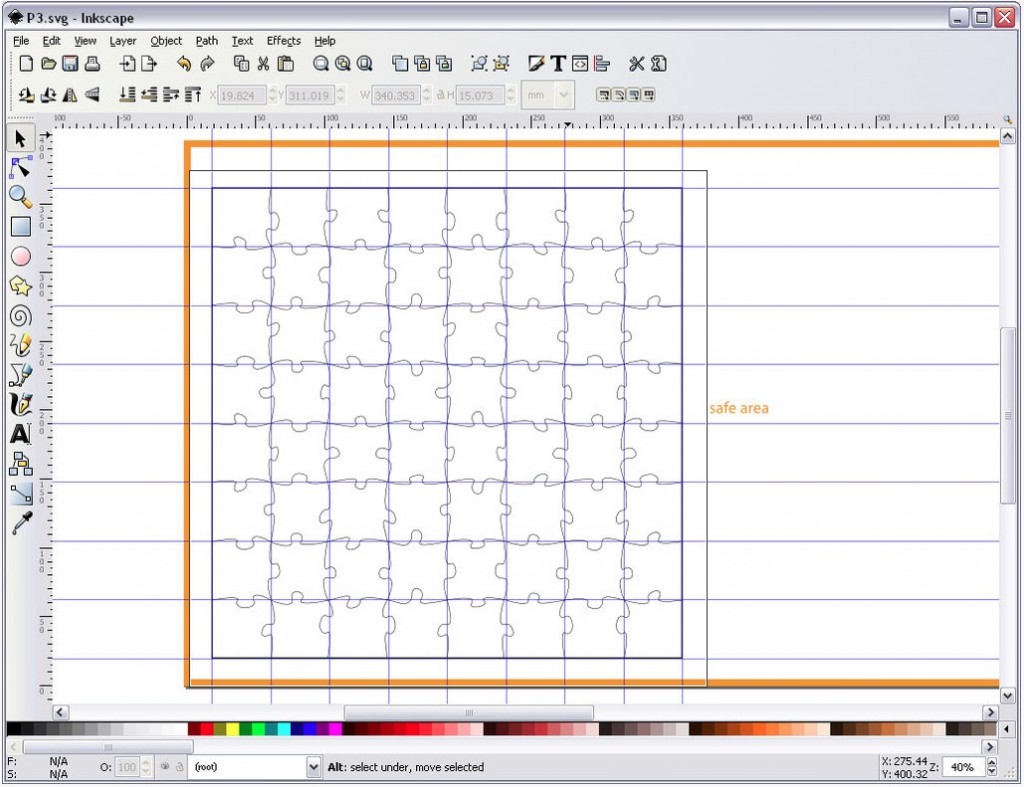
To make it easier to see where the pieces will be contained, create a bounding box that fits comfortably within the P3 template Safe Area. In this example, the bounding box is this 340mm x 340mm so that it would fit nicely on a P3 template. This will also leave enough space to cut a second version, if you’d like to make more than one… or a nice presentation border/frame to place the puzzle pieces in.
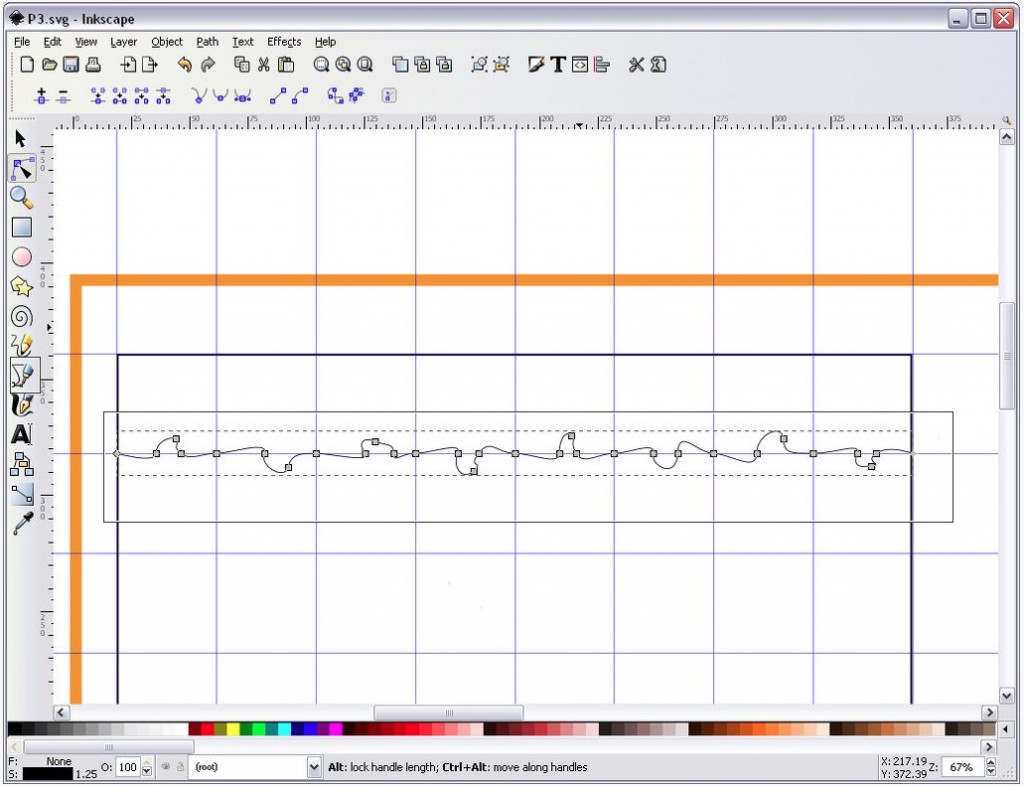
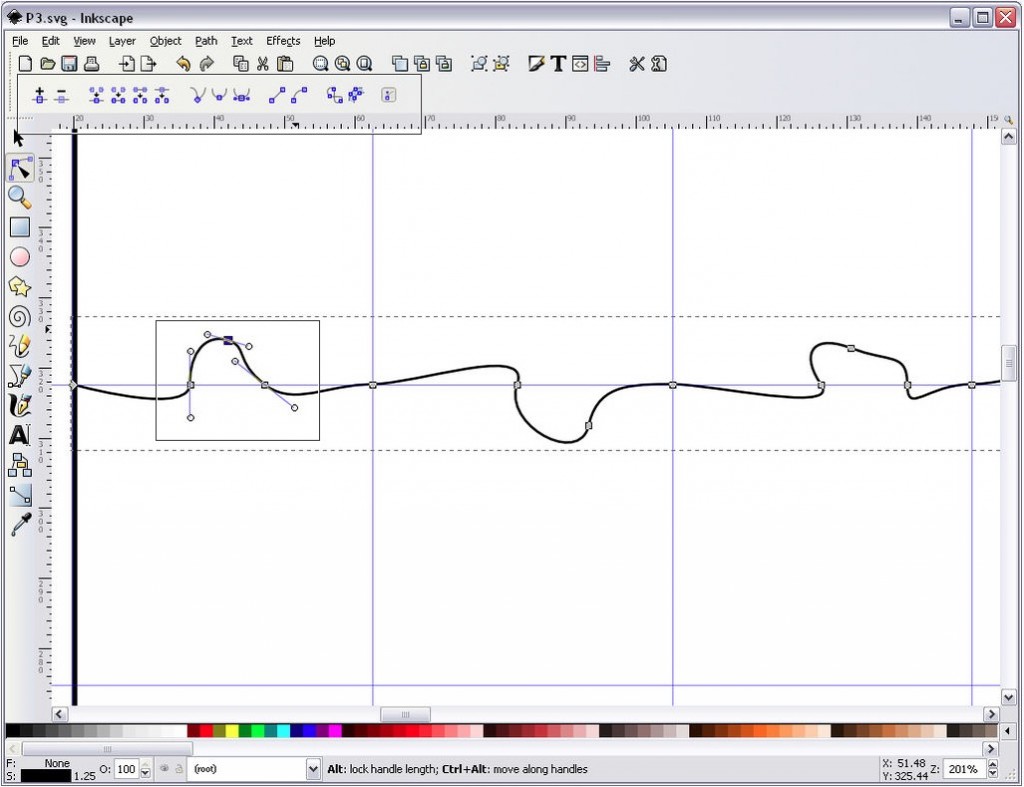
Next we create the cutting lines for the jigsaw pieces. Using the pen tool, click a point and hold down the mouse button to activate the bezier handles, and create a curve. Note: if you don’t hold down the mouse button you will not create curves but corners. Start off rough, and then go back to edit the curves using the handles later. It may help add complexity to your puzzle to vary the curves in size and shape a bit.
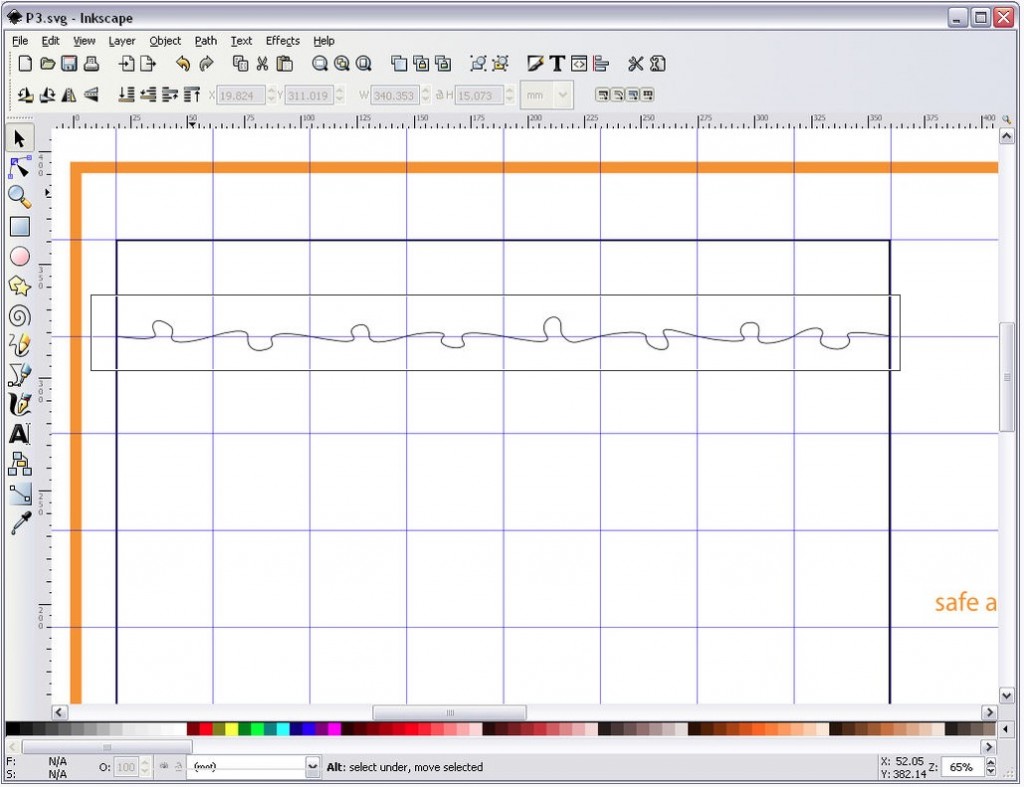
Copy and paste to each line of your grid, then repeat with a 90-degree rotation to complete the puzzle piece layout:
Now is a good time to tell the laser cutter that these are the lines you want it to cut. With all the lines needing to be cut selected, assign the following values:
Color – Blue (R:0 G:0 B:255 A:255)
Line weight – 0.003mm.
Adding an image
Next, we want to add in an image that will be laser etched onto the puzzle pieces. The image is, of course, up to you. In this example we are using a local street map. The Instructables tutorial goes through a more complex way to create a street map from scratch – but if you’d like to cut a few corners, you can head to OpenStreetMap where all the data you need for a specific area can be saved out and converted to an Inkscape-friendly SVG format.
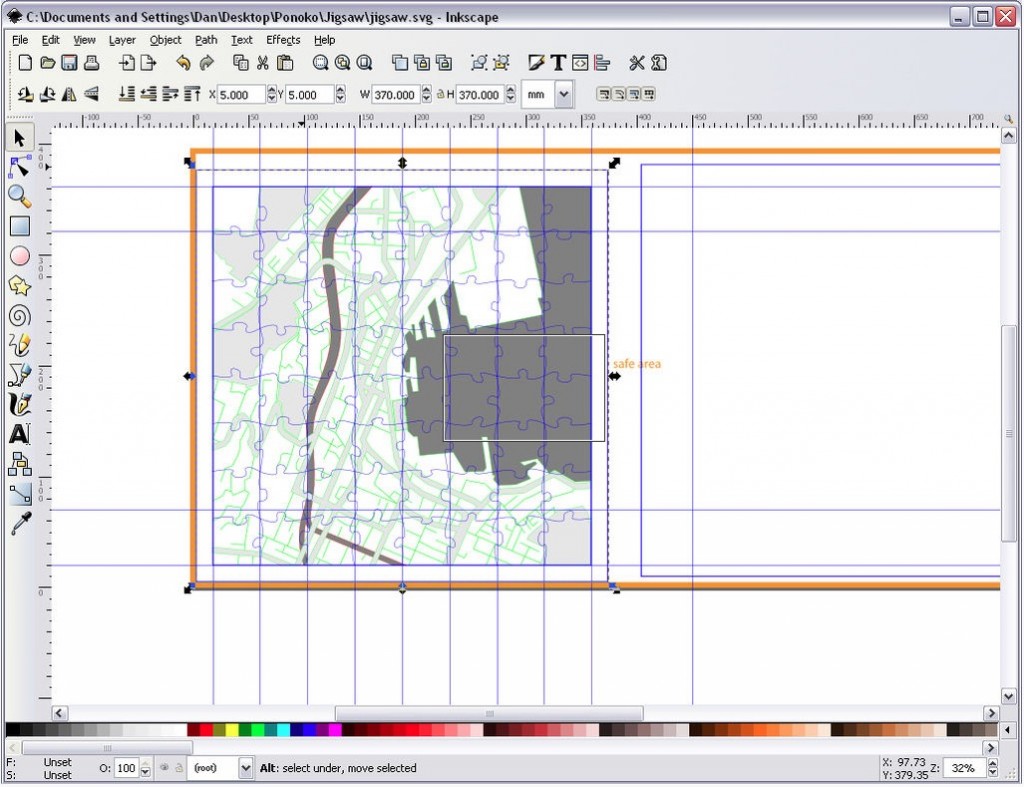
Import your SVG map, and assign the correct values to the different linework (follow the guidelines in the Starter Kit for different etch depth settings). Then align the map onto the puzzle grid, and just for clarity purposes and to check if anything needs altering, select the blue jigsaw pieces and use the Raise to Top command from the Object menu. This will give a better indication of how the finished puzzle will look, as you can now see the cutting lines as well as the etched details.
You should now have a file that is ready to save in the SVG format and upload to your Ponoko Personal Factory.
For those new to Ponoko, the Instructables guide also walks you through the Ponoko upload and order process. See the full entry on Instructables.
