Useful tips to ensure optimum cut quality from this versatile material

Cardstock is such a handy material for laser cutting. The versatile combination of lightweight tensile strength, fast cutting/etching and low unit cost means cardstock is a wonderful choice for greeting cards, business cards, model making and packaging. A number of popular cardstock options are available from both NZ and US Ponoko making hubs.
Cardstock cuts slightly differently from other materials in the Ponoko catalogues, so there are a few useful things to know to get the optimum cut quality for your project. Some of these tips are mentioned in the Ponoko material pages, such as designing around small light pieces that can shift during cutting. We always strongly advise that you carefully read material information to get a clearer idea of what results to expect. Material samples are another handy reference, although we stress that every project is different, and prototyping is the only way to ensure the best outcome.
Something to keep in mind is that many of the mass-produced, intricately cut card products on the market are not laser cut but stamped out with a die – kind of like a cookie cutter. A laser cuts by burning material away, so some discoloration can be expected around cut marks. This is an inherent part of the laser cutting process and can be seen in the catalogue material photos.
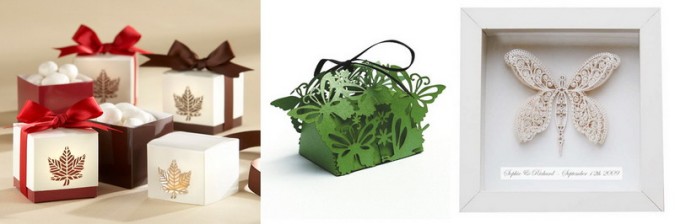
Because cardstock is thin and not particularly durable, it can not be masked with protective tape, unlike other materials. Protective tape shields the material from heat flare, and no tape means that the underside of the card will have discoloration marks. These are more obvious on light colored card. The example below shows the underside marking at its worst, although there is no discernable discoloration on the “design” side – it looks great despite the intricate detail.
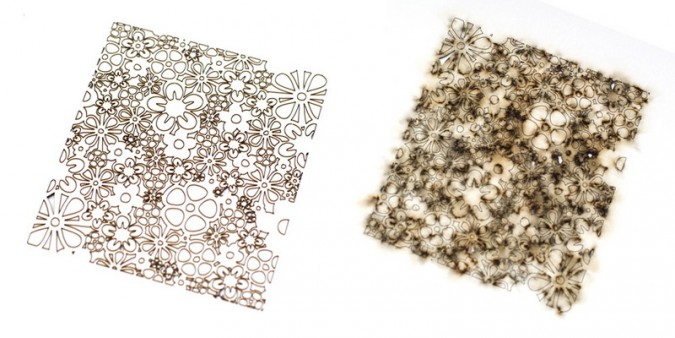
And the underside detail:

So with this in mind, here are a few tips to design for laser cutting card stock:
• Choose black cardstock for a double-sided design
• Mirror your design, cut right and left and then laminate (glue) the two sides with the undersides together to conceal them
• Line your cut card with a blank sheet of material as a design feature
• Incorporate raster and/or vector engraving into your design to add detail without cutting through the material
The black card is an example of lining with a mirror design, while the white card shows contrasting blank lining.

Cardstock is a popular material in gift packaging, such as wedding favors, etc. istockpack is a handy resource for free packaging templates. We will be adding some Ponoko-ready packaging files into the showroom in the future. When designing anything that requires folding, incorporate score lines into your design. If you’re using thinner cardstock, medium vector engraving will produce a clean fold. For thicker card, such as the NZ Box Board, heavy engraving will work better. Cardstock engraves beautifully – check out the material catalogue photos.
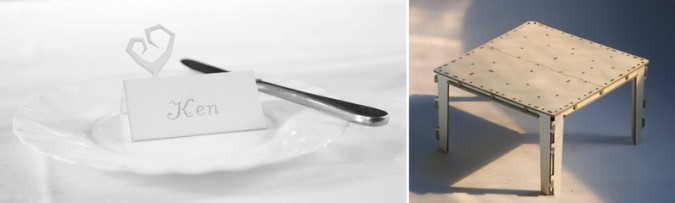
When folded or assembled into a 3D form, card will be much more rigid and stable. The placeholder below holds its shape perfectly with a clean score line, and it can be cut from any cardstock. The table that looks like a Madebydan coffee table is, in fact, a miniature version measuring only 66mm square. The level of detail is impressive, and this will work well with the Box Board.
One of the great features of cardstock is that you don’t need any specialised adhesives for assembly. The most useful, readily available options include: double-sided tape, glue sticks, spray adhesive and PVA glue. You probably have at least a few of these in amongst your stationery supplies already. Experimentation with different options is encouraged, just remember that you don’t need anything fancy; pretty much any water-based adhesive such as wood glue or craft glue will work well. Be sure to practice your adhesive technique first as it can get messy if you’re not careful.
In this article we have taken a look at some of the key considerations when designing for laser cutting in cardstock. Incorporate these into your own workflow, and you’ll soon see how rewarding this most versatile of materials can be.
Photo sources: butterfly favor box, fall favour boxes, butterfly. Rest – Ponoko.
This content originally appeared in the Ponoko Support Forums.