How to get your design right for attachments to laser cut jewellery

from the Ponoko Showroom – left: madebydan, right: SuperVery
One of the most popular applications of the Ponoko Personal Factory is to make custom jewellery. This post covers advice on how to optimise your design for attachments that enable laser cut jewellery to actually be worn by someone.
Making jewellery is an excellent way to get a feel for laser cutting and try out a range of materials. Popular rigid materials include plywood, acrylic, veneer mdf, bamboo, metals; while leather and felt are commonly used soft materials.
Much of the jewellery is based on 2D shapes, so minimal prototyping is required to get the optimum result in final product. However, there are still a few problems that jewellery makers run into. Many of those are the result of not considering how other components or findings, such as jump rings, clasps, pins, etc will be attached. The other contributing factor is material durability. You have to use enough material to avoid breakage.

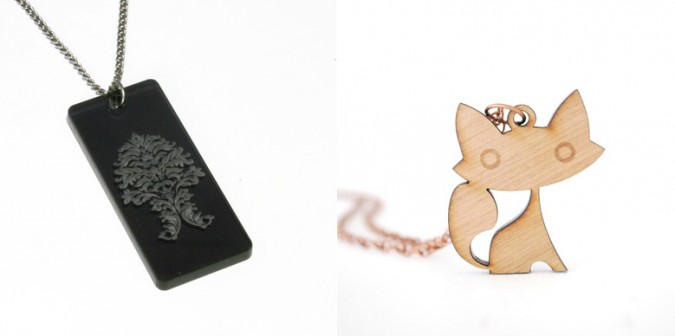
left: chromatophobic, right: taprobane
If you are wanting to attach a chain to your jewellery, you need to cut a hole somewhere in the shape for the jump ring that will hold the chain. But where should the hole be placed, and how big does it need to be? These details are determined by the combination of material thickness and overall design. Your design and material choice dictate the size of hole and size of jump ring to be used.


You need to leave enough material around the hole for it not to break, so it’s worthwhile checking Test Cuts photos in each of the Ponoko materials to get an idea of how finely you can cut the material. However, if the hole is too far inside the design it will not only compromise the aesthetic, but get in the way of the jump ring.
| Material thickness | Recommended hole diameter | Recommended jump ring size |
| 3.0mm / 0.118in | 2mm / 0.079in | 5mm / 0.197in |
| 4.0mm / 0.157in | 2.5mm / 0.098in | 7mm / 0.280in |
| 5.0mm / 0.197in | 2.5mm / 0.098in | 9mm / 0.354in |
| 7.0mm / 0.280in | 3mm / 0.118in | 11mm / 0.433in |

If you’re unsure whether your hole placement is functional, you can quickly draw a 1:1 cross-section of your material with different size holes and position your jump ring over the image to check the fit. The diagram below is an example.

Note how in this example, you can see that this figure illustrates how a 2mm hole in a 7mm thick material is too narrow for a jump ring to fit through.
Sometimes a circular hole just doesn’t work with the design, but don’t let it stop you. Instead, you can make the hole follow the contours of the design, which is more considered, or better yet, make it an integral design feature.

chromatophobic, Anna Corpron
This content originally appeared in a post on the Ponoko blog by Yana Skaler.