An Introduction To Illustrator Tools So You Can Create Designs With Confidence
So you’re bursting with wonderful creative ideas and you want to turn them into real life products that you can sell for a profit, use as branding tools or gift to friends and family. With a little help from Adobe Illustrator tools, these dream products can be a reality.
Why use Adobe Illustrator? Because it’s a pretty clever and powerful software. (Maybe that’s why they named it AI!)What makes Illustrator better than other well-known programs, such as Photoshop, is that it creates true vector files—and this is key.
A vector file constructs artwork mathematically, using points with lines between them. The image can scale without losing definition and can also be understood by digital machines such as laser cutters to make actual objects. But if geometry isn’t your bag, don’t worry. No higher math is required. The AI interface is visual and easy peasy to learn.
You can download the latest version of Illustrator and use it on a subscription basis from here. But once you have access, where do you start? How do you transform scribbles and visions into workable digital designs?

This post will guide you through some of the tools that can bring your creative genius to life. We know designers and engineers like you are visual creatures. So rather than a boring text-based user manual, this post is filled with GIFs to briefly illustrate what each tool does. An animated picture does say a thousand words, ya know.
As you work through the post, you’ll notice letters next to some of the tools. These are keyboard shortcuts you can use instead of moving the mouse to the click on the required tool. Not only can these shortcuts save a bit of time when you are making lots of changes but, more importantly, they can also make you feel like a pro. Let’s get started.
Selection Tools
First, check out the Adobe Tool Gallery and familiarize yourself with what tools are available. Then, open up the tools panel as demonstrated below.
Of all the Adobe Illustrator tools, the Selection tools will be the ones used most frequently. Conveniently located right at the top of the toolbar, the Selection tools are used to perform actions such as moving, adjusting or apply settings to parts.
The Selection Tool (V)
Let’s start with the basics. As the name suggests, the Selection tool selects objects in the design. This should be the active default tool when opening the program. To use, simply click and drag parts around to move them.
As you can see, using the Selection tool moves the entire object. But what if you need to select only a portion of a design? That’s where the Direct Selection Tool becomes your BFF.
The Direct Selection Tool (A)
This tool selects specific parts of objects, whether they be points or path segments. When clicking and dragging a point, you can see it moves around without the other points moving. You can also click and drag whole segments or delete selected segments when using the Direct Selection tool.
This is the ideal tool to use when making adjustments to forms or deleting unnecessary bits. For example, the Direct Selection tool comes in handy when optimizing laser cutting files. Pesky doubled up lines that cause excess burning can be easily selected with this tool and then removed by clicking “delete.”
Magic Wand Tool (Y)
The Magic Wand tool may not turn frogs into princes or grant wishes…unless you wish to be able to quickly and easily make simultaneous changes to select objects with similar attributes. Often these characteristics are the same stroke, color and fill settings. By selecting similar elements within the design that need adjusting or deleting, you can save a TON of time by making the changes en masse rather than individually. That sounds like magic to us.
Bulk corrections also help eliminate missing an individual edit or fixing a mistake that is prevalent throughout a design. This is especially helpful when laser cutting a large number of the same product and/or you need consistency between all objects because you’re selling them or using them as a branding tool and the design must be perfect.
Lasso Tool (Q)
The Illustrator Lasso tool allows you to select points or path segments within objects. In the GIF below, you can see the corner point being selected when the lasso is dragged around it.
For laser cutting, this can be helpful if you need to make a section of your object wider. When materials are laser cut, some of the substrate is burnt away, so it’s recommend to keep all design features 1mm wide or larger in order for all parts to be strong and maintain design integrity once made.
Slicing & Cutting Tools
The Adobe Illustrator Slicing and Cutting AI tools help divide and cut objects. These tools are important because sometimes features need to be removed that are part of a bigger whole. Plus, they make it faster and easier to adjust designs while retaining the overall form that you have worked so hard to create.
Scissors Tool (C)
Just like physical scissors, the Scissors tool cuts digital paths at specified points. You can click on path to cut it at several points, creating separate pieces that can be moved around.
This can be especially handy when laser cutting designs with small parts. For example, anything smaller than 7mm x 7mm can be lost during making. To work around this issue, remove a small section of a cut line and turn that space into a tab that’s connecting the part to the surrounding material.
Knife Tool
Knives are handy for slicing bread, tomatoes and the occasional digital data. Using the Illustrator Knife tool, just click, drag and Ninja up the parts to create multiple pieces. Yep, it’s that easy.
The knife tool is also especially helpful if you need to make a complicated form smaller quickly. Chop, chop!
Drawing Tools
Are you ready to have some fun? Then it’s time for Adobe Illustrator Drawing tools, which allow you to choose from a library of set shapes or draw your own freehand forms. Once you have chosen the basic form (a.k.a. the foundation of your design), then you can manipulate it using the selection tools shown above.
Ellipse Tool
Circles are one of the most basic forms, and the Ellipse tool makes it easy to draw perfect round shapes. Pro Tip: Hold down shift to get a perfect circle.

Polygon Tool
The Polygon tool draws geometric, multi-sided shapes—anything from simple squares, rectangles and triangles to more complex hexagons and octagons. Simply click and drag to make parts and adjust the size, or click once to set the radius and amount of sides.
Polygons are great for laser cutting and engraving products such as coasters, clocks and jewelry because having symmetrical shapes means you can strategically align parts (known as nesting) to save on material and making costs.
Star Tool
Working in a similar fashion to the polygon tool, the Star tool draws exactly what its name suggests. What’s great is that the tool not only creates traditional five-pointed stars but also starbursts and other symmetrical celestial shapes. If you want to laser cut star eyes for your next robot, then this tool does all the hard work for you. Far out!

Spiral Tool
You guessed it, the Spiral tool lets you draw spirals. While these may seem like simple shapes, spirals are actually mathematically quite complex. Luckily Adobe Illustrator is good at making complicated things easier. Just set the radius, decay and the amount of segments in the spiral, and voila!

Pen Tool (P)
The Pen tool creates anchor points with adjustable handles to make paths and closed objects. Using it is a good way to create curved lines that are nice and smooth.
The Pen tool can take a little getting used to, but once you get the hang of it, you can quickly make some really polished looking shapes—and it just might become your favorite. To use it, click to make each point and hold down and drag the handles around to change the angle between them.

Live Trace/Image Trace Function
Okay, so this isn’t technically part of the toolbar. However, the Image Trace function can be a super-duper helpful tool if you don’t have the time or inclination to draw a bunch of parts from scratch.
Image Trace also allows for conversion of a drawing or pixel-based image into a vector image. Cleaning up any pixelated (fuzzy) edges ensures a smooth shape that is essential for laser cutting. Check out the process below.

If you are making files to be laser cut, remember to tick the “Ignore White” box in the Image Trace Panel, as it’s important for preventing double lines—and who wants to pay twice when cutting once will suffice!
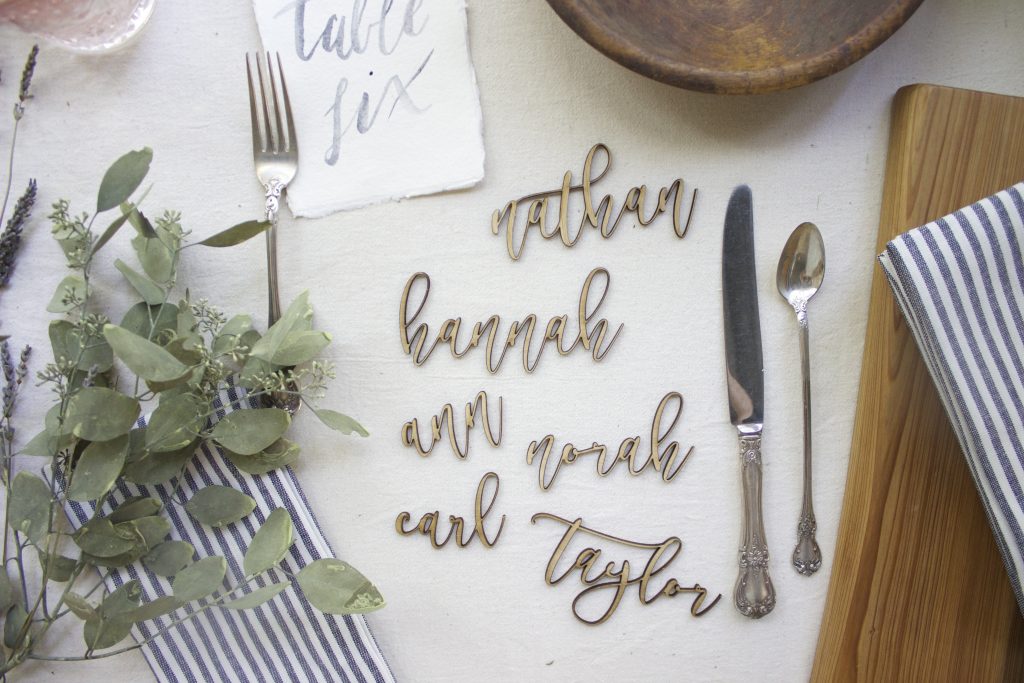
Type Tools
Type Illustrator tools are great for adding both standard and stylized text to designs. Not only can text be a really great element within a design, but it can also be THE design. We often see text laser cut for signs and wedding decorations, such as these pretty table numbers from Little Blue Chair.
The Type Tool (T)
The Type tool is the most basic of the text tools but, depending on the product (such as laser cut signs), it may be all you need. Simply select the Type tool, click on the artboard and start typing. There are many options for fonts and styles, which can be found under “Window > Type,” so have some fun!
Area Type Tool
Ever wanted to make a shape filled with text? Sure you can nudge letters around trying to get them to fit. But that takes work. Nah. Instead, simply click in an object using the Area Type tool and then write your text. No extra fiddling around required. This is a great tool to use when laser cutting unique wedding invitations into a special shape.
Don’t Forget To Convert Fonts To Paths For Laser Cutting
You can use any font on your computer in Illustrator. If you are laser cutting the final design, make sure to convert any text to paths. This step is essential in order for the laser cutter to follow the design correctly, regardless of whether or not the laser cutter has your specific font installed. (There are billions of fonts out there, so it’s almost impossible to have them all.)
Converting text to paths is as simple as selecting the text and then choosing “Type > Create Outlines” from the top menu. Keep in mind that you won’t be able to edit the text once you’ve done this, so do it last after your spell check!
Offset Tool
Did you know fonts are kinda like people? Yup. Some are tall, while others are short. And some are thin and others thick. We’ll leave skinny to the runway models because when it comes to laser cutting, there’s gotta be a little thickness.
If you’re working with a font that doesn’t have much volume, make sure all features are thick enough for laser cutting. As a general rule, features for laser engraving should be more than 0.3mm wide. And for laser cutting, keep features greater than 1mm wide. If the font falls under these thicknesses, fatten it up using Illustrator’s handy Offset tool.
Painting Tools
These Illustrator tools relate to the look of your vector paths. Painting tools are unique in that they are used for both selecting and creating paths.
Paintbrush Tool (B)
The Paintbrush tool creates a smooth path by clicking and dragging to draw completely freehand shapes. It’s a nice tool to create shapes with a really organic feel to them.
While this tool isn’t great for designing shapes to be laser cut, it can be useful for adding area engraving to an already established shape. In order for it to work for area/raster engraving, be sure to convert strokes to fills.
To turn a black stroke into a filled shape in Illustrator, select your line and use the “Object > Path > Outline Stroke” command. Make sure any lines to be converted are greater than 0.3 mm in stroke weight so the laser can create the shape.
Eyedropper Tool (I)
The Eyedropper tool samples and applies color, type and appearance attributes, including effects. For laser cutting designs, this is helpful for applying the same settings to all the parts you want cut or engraved.
Reshaping Tools
The Reshaping Illustrator tools change the shape and layout of objects. For laser cutting designs, these tools are helpful for aligning shapes (nesting) to make your design layout efficient to cut.
Rotate Tool (R)
The Rotate tool in Illustrator lets you twist parts around on the spot. When building laser cutting designs, keep in mind vertical and horizontal lines are simpler and faster for lasers to cut. So arrange parts in a way that keeps things straight if you can.
Reflect Tool (O)
This tool helps you perfectly reflect parts. For laser cutting, this is an important feature if you want to engrave clear/tint materials such as acrylic from the back and have it readable from the front. It’s also handy if you have two components such as earrings you want to be mirror images of one another.
Pathfinder Tools
The Pathfinder tools aren’t found on the standard tools panel, but they can be really helpful for combining shapes in Illustrator. Things such as appearances and clipping masks don’t play well with lasers, so Pathfinder tools should be used to adjust your forms instead.
You can bring up the pathfinder panel by clicking ‘windwow > pathfinder’.
Unite Tool
Here is the most useful pathfinder tool in action. You can combine any overlapping shapes into one. For laser cutting this is very helpful, as it means your design won’t end up getting cut up into a million different pieces where lines overlap. It’s great for making complicated shapes with ease.
Minus Back Tool
This is our second favorite pathfinder tool. It basically cuts one shape away from another. Sounds simple, but it saves a lot of fiddly drawing when you are working on complicated shapes.
Clean Up Tool
Here is another tool that isn’t in the main toolbar, but it helps get rid of pesky bits that aren’t great when laser cut. Things like stray anchor points might not be easily visible on screen, but they can cause ugly marks when cut or engraved if not removed. Don’t worry though, this post on how to run an Illustrator clean up explains how to avoid this.
Start Experimenting With Adobe Illustrator Tools
Now it’s your turn. Time to start playing around with Illustrator tools. While we think it’s fun to just open up new software and click around to see what happens, if you want more structure, there are lots of great tutorials listed at Creative Blog. You can also check out an image depicting the full breakdown of all the tools in the panel over at Adobe. And if you’re feeling really adventurous, you can even find some of Illustrator’s lesser known tools at Bittbox.
Everyone learns differently, so all of these avenues are a great start. We hope this guide helps you use Illustrator to make some awesome stuff. And if you’re ready to use your Adobe Illustrator creations to laser cut some products, these design guides will get you started. Happy designing—and making!
Additional thanks to Lisa Horn for supplementary writing and content editing.